• There were many reasons for the change of the site software, the biggest was security. The age of the old software also meant no server updates for certain programs. There are many benefits to the new software, one of the biggest is the mobile functionality. Ill fix up some stuff in the coming days, we'll also try to get some of the old addons back or the data imported back into the site like the garage. To create a thread or to reply with a post is basically the same as it was in the prior software. The default style of the site is light colored, but i temporarily added a darker colored style, to change you can find a link at the bottom of the site.

Review: Spyderpops RT base LED flashing brake light strip

Do you have a pic of the strip, installed?

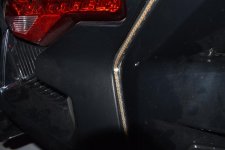
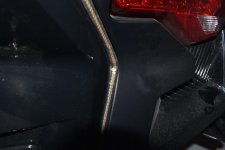
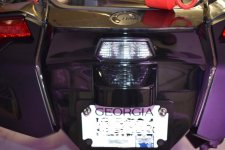
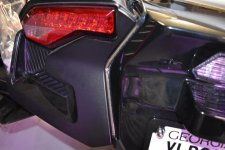
Here are a few pics. If you look at the first pic, you can see where I had to stick it sideways in the channel at the top compared to it fitting flat in the channel at the bottom.

Probably hard to tell from the photos but you can see how the led parts are angled differently at the top compared to the bottom (both sides). The right side was worse and I am guessing it is because the channel width was even narrower. I am sure that BRP didn't design those channels to any sort of tolerance.

It is not sticking at all anywhere in the curved section - hopefully there is enough adhesion at the top and bottom that will hold in place but I have my doubts.

It if had fit flat in top like it did at the bottom, the curved section would likely have stuck better too.

A little less wide led strip and it would have fit perfectly from top to bottom.
DSC_0001.jpg
DSC_0002.jpg
DSC_0003.jpg
1.jpg
 
VALKROCKET: We have strayed well off topic for MONK'S review here but I would be interested to see your DIY when you post it as your '21 bike might be slightly different than mine.

You obviously didn't completely follow the directions they provided with the kit. ;) The instructions say to remove 6 screws (actually there are 7) from the saddlebag area. My big hands and arms would never fit in that area without removing those saddlebag top panels and once all 7 screws are removed, you might as well take it off completely to get better access.

I am not sure how you got to those 2 torx screws that hold the tail light lens at the top without breaking off those 2 hidden cap screw tabs on the top saddlebag panels (like I did). You are clearly a better mechanic than I (I am not being sarcastic).

As they say, "desperation is the mother of invention". I was really getting frustrated with those black plastic push pins and decided to try something different. It worked. I have pretty large hands also, and had no problem getting to the factory harness once I wedged the sides open. Also, I didn't go anywhere near the tail lights or any part of the back end. Only pulled the side panels partway open for access, no need for anything else to be removed.
I see you're in the next state over. Soon as this Covid crap lifts we'll have to get together............... Road trip :thumbup:
 
VALKROCKET: We have strayed well off topic for MONK'S review here but I would be interested to see your DIY when you post it as your '21 bike might be slightly different than mine.

You obviously didn't completely follow the directions they provided with the kit. ;) The instructions say to remove 6 screws (actually there are 7) from the saddlebag area. My big hands and arms would never fit in that area without removing those saddlebag top panels and once all 7 screws are removed, you might as well take it off completely to get better access.

I am not sure how you got to those 2 torx screws that hold the tail light lens at the top without breaking off those 2 hidden cap screw tabs on the top saddlebag panels (like I did). You are clearly a better mechanic than I (I am not being sarcastic).

Will try to PM you with pics of my install.
 
Back
Top