stewartj239
New member
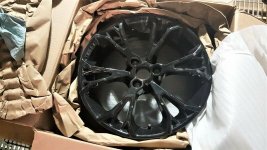
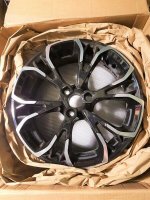
The RT "Special Series" rim that came out in 2015 caught my eye and I always thought that I would like to see those rims on my RT-S which came with the standard black rims. I had been on the lookout for a used set to show up and even thought about buying them new, but had a hard time determining what the actual part number was.
I recently came across this thread by Steve W. that showed how to do it using an angle grinder:
https://www.spyderlovers.com/forums...3-Changing-appearance-of-17-RT-S-front-wheels
Thanks to Steve for this thread as I knew that this was probably the way to get there. My only concern was with his use of an angle grinder as I didn't trust that I could handle it in such a tight area, especially with the part of the rim where the tire mounts. I did some research to see if I could accomplish the same thing using a Dremel. I was able to locate the comparable bits and decided to give it shot.
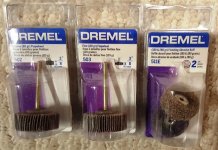
So here are the Dremel bits that I used. An 80 grit flapwheel, a 120 grit flapwheel and a 180 grit buffing wheel. For each rim, I used one 80 grit flapwheel and one 180 grit buffing wheel. I was able to use just one 120 grit flapwheel for both rims.
After I started the first rim, I came up with the following pattern which I think worked best. I started removing the paint at the base of each "V". I then worked my way out as seen in the 2nd and 3rd pictures.
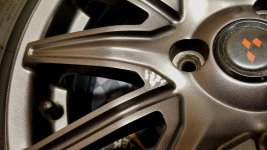
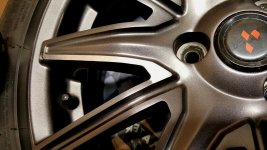
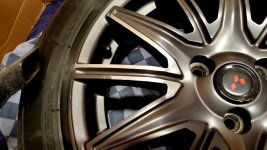
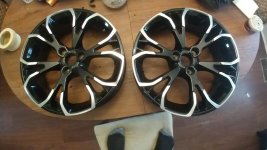
Once I was done with each of the "V" sections, I then hooped the outer ring of the rim that borders the tire. Here is the end result.
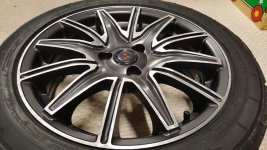
Here is how the finished rim compared to the OEM rim. It is purely an optical illusion, but the just created "Special Series" rim looks bigger.
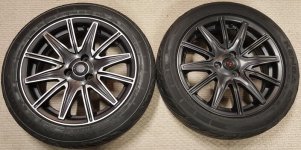
So for the order of events here, I started with the 80 grit flapwheel. To remove all of the paint, it took about 35-40 minutes per rim. I then used the 120 grit flapwheel to smooth out and clean things up. That took about 10-15 minutes per rim. I then used the buffing wheel to shine it up a little bit. That took about 5-10 minutes per rim. So if you do the math and taking your time, which I did, it took me a little under 1.5 hours per rim.
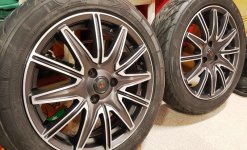
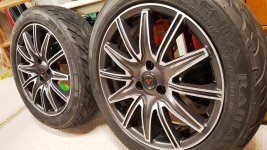
Overall, I am extremely happy with how this came out. $35 in Dremel bits and 2.5 to 3 hours of my time and it was done. This was a much easier solution than finding the "Special Series" rims and having tires mounted. Here is a shot of the final product.
I recently came across this thread by Steve W. that showed how to do it using an angle grinder:
https://www.spyderlovers.com/forums...3-Changing-appearance-of-17-RT-S-front-wheels
Thanks to Steve for this thread as I knew that this was probably the way to get there. My only concern was with his use of an angle grinder as I didn't trust that I could handle it in such a tight area, especially with the part of the rim where the tire mounts. I did some research to see if I could accomplish the same thing using a Dremel. I was able to locate the comparable bits and decided to give it shot.
So here are the Dremel bits that I used. An 80 grit flapwheel, a 120 grit flapwheel and a 180 grit buffing wheel. For each rim, I used one 80 grit flapwheel and one 180 grit buffing wheel. I was able to use just one 120 grit flapwheel for both rims.

After I started the first rim, I came up with the following pattern which I think worked best. I started removing the paint at the base of each "V". I then worked my way out as seen in the 2nd and 3rd pictures.


Once I was done with each of the "V" sections, I then hooped the outer ring of the rim that borders the tire. Here is the end result.

Here is how the finished rim compared to the OEM rim. It is purely an optical illusion, but the just created "Special Series" rim looks bigger.

So for the order of events here, I started with the 80 grit flapwheel. To remove all of the paint, it took about 35-40 minutes per rim. I then used the 120 grit flapwheel to smooth out and clean things up. That took about 10-15 minutes per rim. I then used the buffing wheel to shine it up a little bit. That took about 5-10 minutes per rim. So if you do the math and taking your time, which I did, it took me a little under 1.5 hours per rim.
Overall, I am extremely happy with how this came out. $35 in Dremel bits and 2.5 to 3 hours of my time and it was done. This was a much easier solution than finding the "Special Series" rims and having tires mounted. Here is a shot of the final product.


