[FONT=.SF UI Text][FONT=.SFUIText-Italic]WHEEL REMOVAL -[/FONT][/FONT]
[FONT=.SF UI Text]
[/FONT][FONT=.SF UI Text][FONT=.SFUIText]6. Lift Spyder further until the rear wheel is barely off the ground and chock the rear wheel (just for stability while breaking the caliper nuts.....) This will expose the upper brake caliper nut.[/FONT][/FONT]
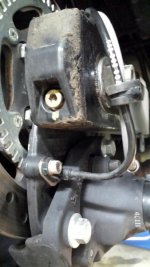
[FONT=.SF UI Text][FONT=.SFUIText]7. Break the brake caliper nuts (bloody tight). You will need a socket and extender to get at the upper the brake caliper nut.[/FONT][/FONT]
[FONT=.SF UI Text][FONT=.SFUIText]8. Unbolt and remove the sensor next to the caliper(remember where each shim goes - I had 4, all between the sensor and the caliper mount plate). [/FONT][FONT=.SFUIText-BoldItalic]Be very careful with this sensor. This is one of the 3 (one on each wheel), that control your ABS as well as being used, in conjunction with the other two wheel sensors, for traction control and brake distribution by Nanny. If you damage this sensor, or don't get all the shims back in, you WILL get a "Limp" mode from Nanny on startup and may have to replace the unit.[/FONT][/FONT]
[FONT=.SF UI Text][FONT=.SFUIText]13. Put a cloth or tape inside the wheel to avoid damaging it when the caliper comes off. (Just in case)[/FONT][/FONT]
[FONT=.SF UI Text][FONT=.SFUIText]14. Remove the brake caliper bolts and the slide the caliper off the disc (tight fit) and bungy to the frame or exhaust to keep the load off it. [/FONT][/FONT]
[FONT=.SF UI Text][FONT=.SFUIText]15. Avoid touching the brake pedal while the caliper is off as you could create nanny messages when you start the Spyder......which can be fairly easily rectified....... but.....)[/FONT][/FONT]
[FONT=.SF UI Text][FONT=.SFUIText-Italic]WHEEL REINSTALL - [/FONT][/FONT]
[FONT=.SF UI Text][FONT=.SFUIText]4. Lift the Spyder and manoeuver the wheel back in.[/FONT][/FONT]
[FONT=.SF UI Text][FONT=.SFUIText]5. Lower the Spyder until the axle hole aligns with the swing arm holes.[/FONT][/FONT]
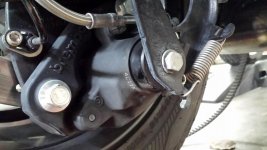
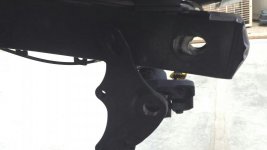
[FONT=.SF UI Text][FONT=.SFUIText]6. Ensure the disc caliper backing plate is in position for the axle to slide through (to save having to remove the wheel after you have installed it because you find a metal backing plate lying on the ground.....don't ask me how I know ). Hang the backing plate from the stud on the swing arm while you slide the axle through the wheel, then you can raise the plate to slip the axle through the plate hole.[/FONT][/FONT]
[FONT=.SF UI Text][FONT=.SFUIText]7. Slide the axle through the swing arm, the wheel caliper backing plate and opposing swing arm. (It should slide fairly easily if you have you bike lift at the correct height).[/FONT][/FONT]


