• There were many reasons for the change of the site software, the biggest was security. The age of the old software also meant no server updates for certain programs. There are many benefits to the new software, one of the biggest is the mobile functionality. Ill fix up some stuff in the coming days, we'll also try to get some of the old addons back or the data imported back into the site like the garage. To create a thread or to reply with a post is basically the same as it was in the prior software. The default style of the site is light colored, but i temporarily added a darker colored style, to change you can find a link at the bottom of the site.

Removal of the black housing

xpeschon

MOgang Member
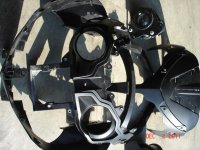
OK folks I need some instructions, or help.. I am trying to remove the black housing that the windshield is mounted on, lower portion anyway. I see where it appears that it separates into two pieces, we will call it a UPPER portion and a LOWER portion, (I THINK its called the COWL) but not sure, at any rate all I need to do is remove the BOTTOM portion in order to get to the wiring harness plugs. I have to replace the shift controller on the handle bars and the plug is under the lower piece. It looks as though the two pieces kind of SNAP apart but I didn't want to get to rough with it in fear that I could break something..
I tried to explain what I need some instructions and feel that it could be kind of hard to understand for everybody but I explained it the best way possible..
Thank you in advance for any assistance.

X Joe
 
Look along the line where they join. You will see small gaps where you push in small screwdriver. You PUSH in the screwdiver not pry. Push straight in and it pushes a tab back and release's it. There are four or five all around the seam if I remember right. just look for the little gaps and don't pry, push.:D
 
Look along the line where they join. You will see small gaps where you push in small screwdriver. You PUSH in the screwdiver not pry. Push straight in and it pushes a tab back and release's it. There are four or five all around the seam if I remember right. just look for the little gaps and don't pry, push.:D
He's right Joe, I had mine off a couple of years ago and skinned it up a bit just take it easy and if you can't get just yell and I can run over.
 
I see the gaps your referring to and have tried your method however I feel as though I'm gonna break something, I will give it a shot again tonight after work I suppose. The two pieces must really be snapped together because I got pretty violent with it.. Thank you for the information at least at this point I do know that it separates at the seam. I will keep you posted..

X Joe
 
Update, I'm good to go.. Thank you for the help.. It kicked my butt and hope that I NEVER have to take it apart again but if I do I know how because of you dabreitbach and of course my buddy Mo Lee.. Thanks ya all..

X-Joe
 
Back
Top