• There were many reasons for the change of the site software, the biggest was security. The age of the old software also meant no server updates for certain programs. There are many benefits to the new software, one of the biggest is the mobile functionality. Ill fix up some stuff in the coming days, we'll also try to get some of the old addons back or the data imported back into the site like the garage. To create a thread or to reply with a post is basically the same as it was in the prior software. The default style of the site is light colored, but i temporarily added a darker colored style, to change you can find a link at the bottom of the site.

Questions About Doc Humphrey's F3 Brake Pedal Height Adjustment Kit

newbert

New member
Today I had my dealer install Doc Humphrey's Brake Pedal Height Adjustment Kit on my 2016 F3-T. (I'm definitely NOT a DIYer, so I have to rely on others to service my Spyder - So be it. -- This is the first of these kits installed by my dealer, so I just want to make sure that things are correct and safe.) Now, I've only rode it home (about 10 miles), so maybe it's too early to discuss this. Nut nevertheless, my initial feel is that the brake pedal is now too low. Although I can now just slide my foot over onto the pedal (which is what I wanted), I feel that I really have to point my toe too far to initiate an emergency stop. So, it feels a bit un-safe to me right now. So, I have a few questions:


1. Is it possible to raise the height of the pedal (just a tad), now that the kit is installed?

2. If not, is there something to substitute for or thicken the rubber pad on the brake pedal (effective raising its height)?

3. The kit I bought was the lower-priced one and my peg was left in place. I notice that the bracket that Doc discusses starting at 0:38 in the video below was NOT installed and crimped near the front end of the rod near the brake pedal like Doc does. Am I correct in saying that this should have been done? (Again, I'm NOT a DIYer, but I try to understand installment videos before buying a product.)

4. At about 4:45 in the video, Doc talks about a safety spring that needs to be popped off before kit installation. The dealer returned a few small parts which I'll assume were replaced by the kit. But, I notice that he returned something that looks a lot like that safety spring to me. So, my question is - was that spring supposed to be replaced by something from the kit? Or should the original spring have been re-attached?


Please don't take this a negative post about either Doc's product or my dealer's competence because it's certainly not meant to be. (My dealer has installed a few other mods for me, and I've had no complaints about them.) I just want to make sure that it was done right and everything is safe (and whether I can still adjust the height - see questions 1 and 2). After all - this is the BRAKE PEDAL we're talking about!

Any info would be appreciated!

Thanks!
 
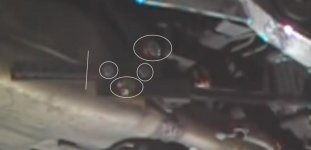
Adjusting the height after installation is very easy. If you feel if the pedal is too low, and you don't want to do it yourself, you should take it back to the dealer and have them adjust it for you. We have had a few that needed adjusted higher after the initial impression of when they sat on the byke. This picture that I am posting (not very clear has all of the bolts and nuts that you need to take loose. The white line is where they should have cut off excess material when complete.
position.jpg

The dealer also should have cut the excess of the arms off. Here is the Green Instructions where it is explained in detail where you can achieve an even finer adjustment in section #4. The pedal height can be adjusted in 1/8" increments.

https://roadsterrenovations.wordpress.com/f3-brake-pedal-modification/

It explains how to fine tune it. This is a great product and I had to stop so fast the other day that if I hadn't had it I couldn't have missed a truck that turned in front of me. AS LONG AS IT IS INSTALLED and ADJUSTED properly. The installer should have had you ryde around in the parking lot and check the height/position before kicking you out the door.
If you decide to try to change this yourself, send me an email here and I will talk to you further.
https://www.roadsterrenovations.info/contact

As far as the safety wire. They put them on because they do not use a quality securing nut and bolt. It cages around the nut and bolt in case it comes loose. You don't need to worry about that happening as long as it was installed by the instructions using our nut and bolt.
 
Just re-read your post and I am trying to understand why the tech did not put on the tether bracket? Much like the safety spring that bracket is designed to make a solid connection between the two points between where the weld in on the BRP bracket. I have not ever heard of one of their welds breaking, but since we are attaching the adapter to their rod I wanted to make sure that if it ever did happen that the tether would make sure and allow you to still use the brakes, even with the weld broken. It is designed to be on there and the tech should have installed it with the rest of the kit. If he had questions as to the installation, I would have been free to have talked to him on the phone. I think you need to contact me and start over. I will take the time to talk you through the entire procedure step by step. With him leaving that part off and not letting you try it first, I am now questioning the install.
Sadly, some "technicians" are just parts changers. They color well in a familiar picture. However, when given something new to do if they cannot follow instructions, they have no business doing it. If it were me I would not ryde the byke until all the parts were installed correctly. Contact me. Still waiting on that email.
 
Got your email, but when I went to reply it returned saying your email was not correct, so here is a copy of what I tried to send. Here is my phone number 812-372-4590

I fully understand this. Here is my direct dial number if they need help on how this is done. If you looked at the kit at all you will remember that there was a bunch of holes drilled 1/2" a part. There is also a square bracket that has one larger hole towards the middle and two smaller holes at the top. Those holes line up with the part that has all the holes. Depending on which way the square bracket is installed will offset the pedal up or down by a 1/4". It is all explained in section 4. Here is a link to the Green Instructions in case they threw away the paper instructions.https://roadsterrenovations.wordpress.com/f3-brake-pedal-height-bpm-2/


It is under "an even finer fine adjustment".


Also, it may take several adjustments initially so you find the sweet spot. If you are rocking your ankle too far forward, it is too low. The jam nuts are supposed to be used in this setup phase, then the locking nuts need to be installed. They actually should replace them since they have been put on and will now have to be removed. The size of the nuts are M8 1.25 and M6 1.0. It is not reccomended that you use nylock nuts, but torsional nuts on them. If you have time, lay out your remaining parts and take a picture and I will tell you what you need. And, after you get this resolved with them I would appreciate an update on SL.

Thanks for the quick response, Doc!

I have an appointment with the dealer on Tuesday, and won't ride the Spyder until then.

Meantime, I'll take a few pics of the installation and of the two parts that were returned to me, and e-mail them off to you later today.

Thanks!
.
 
Thanks for the quick response, Doc!

I have an appointment with the dealer on Tuesday, and won't ride the Spyder until then.

Meantime, I'll take a few pics of the installation and of the two parts that were returned to me, and e-mail them off to you later today.

Thanks!
.

PM sent, Doc.

Thanks!
 
Why didn't BRP just have threaded turnbuckles on each end of the brake rod so the brake perdal could be adjusted up or down according to owner preference. I know, that would be too easy.:banghead::banghead::banghead:
 
Just to put this thread to bed ---- My dealer tweaked the brake pedal height today (took all of 10 minutes), and now the pedal is at a nice comfy level for my foot. I can just slide the foot over the pedal when needed, and can still apply the brake quickly without to much of a "throw".

Definitely a worthwhile upgrade for me!

Glad they got it straightened out for you and thanks for posting the final fix.
 
General pedal height comment

This is unrelated to the previous discussion but it is pertinent to the height issue. When I rec’d my F3L the floorboards were set in position 3 (middle). I found the pedal too high and difficult to use. I am 6’4” so I moved floorboard to the far forward position with corresponding linkage. This totally solved my pedal issues. Think it is a combination of a lower angle of my leg and a slightly shorter linkage but it fits me fine now. Just my experience.
 
Back
Top