-
There were many reasons for the change of the site software, the biggest was security. The age of the old software also meant no server updates for certain programs. There are many benefits to the new software, one of the biggest is the mobile functionality. Ill fix up some stuff in the coming days, we'll also try to get some of the old addons back or the data imported back into the site like the garage. To create a thread or to reply with a post is basically the same as it was in the prior software. The default style of the site is light colored, but i temporarily added a darker colored style, to change you can find a link at the bottom of the site.
You are using an out of date browser. It may not display this or other websites correctly.
You should upgrade or use an alternative browser.
You should upgrade or use an alternative browser.
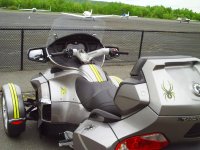
Playing around with Plasti-Dip
- Thread starter llyrad
- Start date


Bob Denman
New member
I believe that you've got to pretty much take apart the frunk to remove those two pieces... :shocked:
But it's looking pretty darn great! :2thumbs:
But it's looking pretty darn great! :2thumbs:
flamingobabe
...in the pink (Girls On Spyders)
Pete at Power Sports Wrap did my 2013 fenders...after 1500 miles they look great...no chips ...perfect 
Bob Denman
New member
I bought those 2 pieces in chrome for my A&C... :shocked:
I wish that I had better news for you...
Actually I do; it's not really all that tough to pull the nose off...:thumbup:
I wish that I had better news for you...
Actually I do; it's not really all that tough to pull the nose off...:thumbup:
CyncySpyder
Teddys favorite human
Teddy had me post a bunch of pics in our albums that just may help you
") Also did the bottom part of the Frunk and accent over the middle of the hood, tho not perfect, I don't think it looks bad at all, especially for our first attempt :thumbup:Have Fun
Also did the bottom part of the Frunk and accent over the middle of the hood, tho not perfect, I don't think it looks bad at all, especially for our first attempt :thumbup:Have Fun
http://www.spyderlovers.com/forums/album.php?albumid=2698


Here's the link to our album showing the FRUNK completely off the Sled which may help you see what you need to see. We've been having fun with Plasti-Dip as well. Just don't put it anywhere body-panels over-lap or have a potential to rub, cause it will eventually cause a tear and need redoing later down the road, but that's still easy to do. Its fun to play around and get different looks. We've blacked out our rims but I'm thinking of redoing them again, but this time in red. I think they will 'POP' with the black outline of our larger diameter tiresI was afraid I would have to take the frunk apart, but I see no way around it the more I look into it.
As for masking it off, I'm not sure that would work, as it won't give me the clearance for the proper spray, but might do a single coat first to see if that will work.
Also did the bottom part of the Frunk and accent over the middle of the hood, tho not perfect, I don't think it looks bad at all, especially for our first attempt :thumbup:Have Fun http://www.spyderlovers.com/forums/album.php?albumid=2698
StanProff
New member
I plastic coated the handlebars and the foot rest areas on my 2010 and I like the look. I'll follow this with pics in a few minutes. I think it will stay on the handlebars petty well but the foot rest area won't last with shoes down there. At least it lets me know if I want this look more permanate.
CyncySpyder
Teddys favorite human
Sorry, we don't mean to HiJack your thread, just trying to help & share ideas


We also did our handlebars in the black Plasti-Dip and I have to admit, I really like the look of them being blacked out SO MUCH BETTER than the OEM gray casting. But since my ryding jacket has armor in the elbow pads, & I have a tendency to lean my elbows on the top of the handlebars from time to time, they developed a tear and I ended up removing it from the bars all together for now. If someone were careful, I'm sure it would work fine for this application, but I know me, and I don't want to be worried about something like that, so we're just going to redo them the same as we did our Foot-Castings & support brackets and do them in black BEDLINER. That stuff is made to take the abuse and after about 8K miles on the foot pegs, we've had two minor little chips. Great thing about the Spray-On BedLiner from the rattle can is, if you do get a chip, no big deal, just spray over the chip with another lite coat of the BedLiner and your done, as it blends in perfectly without having to worry about it matching. After the 8 hrs cure time, your good to go again and can't tell there was ever a chip there. Another good thing, if I didn't tell you, you'd most likely never tell from just looking that the handlebars and the footcastings were actually two totally different products, as they look almost identical :thumbup:


The tires have held up well, tho I just ordered a couple of cans of the Red Plasti-Dip and plan on doing the rims in Red to see how I like that look:dontknow: I'm thinking with the black outline of our new larger car tires, it should make the Red of the rims 'POP' even more hyea:
hyea:
:clap:That's the great thing about the Plasti-Dip, if you don't like something you've done, it peels right off without any mess or residue left behind :2thumbs:
I plastic coated the handlebars and the foot rest areas on my 2010 and I like the look. I'll follow this with pics in a few minutes. I think it will stay on the handlebars petty well but the foot rest area won't last with shoes down there. At least it lets me know if I want this look more permanate.
We also did our handlebars in the black Plasti-Dip and I have to admit, I really like the look of them being blacked out SO MUCH BETTER than the OEM gray casting. But since my ryding jacket has armor in the elbow pads, & I have a tendency to lean my elbows on the top of the handlebars from time to time, they developed a tear and I ended up removing it from the bars all together for now. If someone were careful, I'm sure it would work fine for this application, but I know me, and I don't want to be worried about something like that, so we're just going to redo them the same as we did our Foot-Castings & support brackets and do them in black BEDLINER. That stuff is made to take the abuse and after about 8K miles on the foot pegs, we've had two minor little chips. Great thing about the Spray-On BedLiner from the rattle can is, if you do get a chip, no big deal, just spray over the chip with another lite coat of the BedLiner and your done, as it blends in perfectly without having to worry about it matching. After the 8 hrs cure time, your good to go again
and can't tell there was ever a chip there. Another good thing, if I didn't tell you, you'd most likely never tell from just looking that the handlebars and the footcastings were actually two totally different products, as they look almost identical :thumbup:Hey CyncySpyder, how's the dip holding up on the wheels?
The tires have held up well, tho I just ordered a couple of cans of the Red Plasti-Dip and plan on doing the rims in Red to see how I like that look:dontknow: I'm thinking with the black outline of our new larger car tires, it should make the Red of the rims 'POP' even more
hyea: :clap:That's the great thing about the Plasti-Dip, if you don't like something you've done, it peels right off without any mess or residue left behind :2thumbs:
Sarge707
Active member
I Love this Plasti Dip stuff-Been reading ALL the threads and think I,m going to do the Front Trunk, Lower Silver side panels, Instrument Panel and Rear panel above the rear lights just under the trunk Hatch Yellow Blaze?? Would it look good?:dontknow:
Attachments
lookerjdc
New member
I ordered a can of Balze Orange to do the rear fender (where the license plate is)
but I guess I like to make simple things difficult
I did slow light sprays, let it dry for 30-60 inutes, then do it again
but it didnt work.... I couldnt get a consistent covering, or I would get drip marks,etc, and I had to peel it off and try again
any tips to make my stupid brain grasp the concept of easy..... lol?
I want to do the center part of the frunk and the rims, but until I can get the rear fender done I dont want to start messing with the other parts
Sarge707
Active member
I ordered a can of Balze Orange to do the rear fender (where the license plate is)
but I guess I like to make simple things difficult
I did slow light sprays, let it dry for 30-60 inutes, then do it again
but it didnt work.... I couldnt get a consistent covering, or I would get drip marks,etc, and I had to peel it off and try again
any tips to make my stupid brain grasp the concept of easy..... lol?
I want to do the center part of the frunk and the rims, but until I can get the rear fender done I dont want to start messing with the other parts
I think that rear Black Plastic is a tough case- I tried to put My Spyder Decals on there and it just threw them off??? Even after a Lot a cleaning ???
lookerjdc
New member
You should know that the florescent blaze colors tend to fade pretty quickly. They are working on a fix but there have been cases where they faded in just a couple months.
thats good to know
thanks
Similar threads
- Replies
- 12
- Views
- 525
- Replies
- 1
- Views
- 836
- Replies
- 2
- Views
- 3K
- Replies
- 31
- Views
- 4K