cruisinTX
Member
While I had body panels out of the way doing an oil change this weekend, I decided to take a look at what some call an emergency frunk release. I do appreciate all the work that some of you have put into the videos on "how to" do those. My normal MO is to march to the beat of a different drummer, so I did some extensive probing and snooping under the hood to see if there might be something I could do with the frunk release that might make it better (in my mind anyway).
I gave it a lot of thought an decided I would rather not have to remove any panels to make it accessible as there have been many occasions where I realized I needed back in the frunk after starting up. At the same time, I did not want it so obvious that someone walking by might notice it and decide to help themselves to what-ever I had stored in the frunk. Especially if I did not take time to turn the handle bars to lock it.
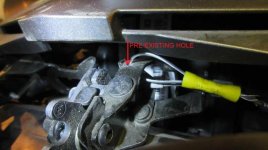
While poking around the release mechanism I noticed a small hole drilled in the portion that moves to release the frunk lid using the key. I also noted it did not take a great deal of force to actuate that. I then obtained a bicycle cable kit an shortened one of those with the largest lead terminator to use as my frunk release cable.
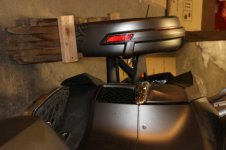
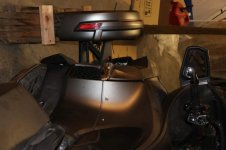
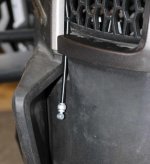
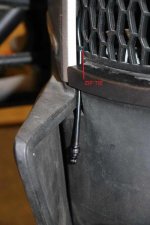
These pictures start with my finished version of what one might see as they walk by. Study the first one pretty good before moving on to the second, third and fourth ones where I show the unpainted version then close-ups of the first two.
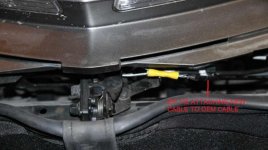
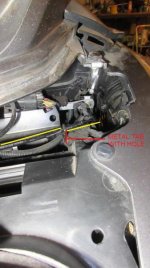
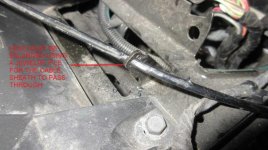
The next few pictures show how I made use of that pre-drilled hole in the internal release lever using an electrical connector to secure the cable and the routing of it all.
hope this helps someone else.
I gave it a lot of thought an decided I would rather not have to remove any panels to make it accessible as there have been many occasions where I realized I needed back in the frunk after starting up. At the same time, I did not want it so obvious that someone walking by might notice it and decide to help themselves to what-ever I had stored in the frunk. Especially if I did not take time to turn the handle bars to lock it.
While poking around the release mechanism I noticed a small hole drilled in the portion that moves to release the frunk lid using the key. I also noted it did not take a great deal of force to actuate that. I then obtained a bicycle cable kit an shortened one of those with the largest lead terminator to use as my frunk release cable.
These pictures start with my finished version of what one might see as they walk by. Study the first one pretty good before moving on to the second, third and fourth ones where I show the unpainted version then close-ups of the first two.
The next few pictures show how I made use of that pre-drilled hole in the internal release lever using an electrical connector to secure the cable and the routing of it all.
hope this helps someone else.
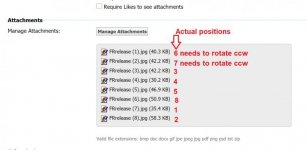
Attachments
-
 FRrelease (1).jpg40.3 KB · Views: 285
 -
 FRrelease (2).jpg42.2 KB · Views: 266
 -
 FRrelease (3).jpg42.2 KB · Views: 284
 -
 FRrelease (4).jpg30.2 KB · Views: 271
 -
 FRrelease (5).jpg46.9 KB · Views: 288
 -
 FRrelease (6).jpg50.9 KB · Views: 268
 -
 FRrelease (7).jpg35.4 KB · Views: 320
 -
 FRrelease (8).jpg58.3 KB · Views: 297
 that doesn't sound right! :sour: )
 ")
 hyea:
hyea: