Arr MiHardies
New member
Only had my bike about 3 weeks. putting some fender led reflector replacements on order soonish. But I do already have some gloryders with RT caps on my wheels and an appointment to get some leds installed to similarly illuminate the rear tire next week (i know I know just enough to cause problems if i try to do too much). The gloryders look fantastic though. Need to get someone to video them in motion.


Also, the first mod I did was a garage door opener mod I've heard mixed results from spyder owners with the opener that wires up to the headlights, and that seemed way more expensive than it needed it be, so I bought a keychain garage door opener at lowes for about $35. popped it open and soldered a wire to the one of the buttons. cut a litt notch out of the side to feed the wire out and closed it back up. Attached the remote under the seat with velcro so I can change the battery easily if needed. Ran the wire up to the console. I took a button blank off the console and drilled a hole in it. Got a momentary switch from Radio shack for about $3, connected it to the wire and mounted it in the drilled hole on the blank. reassembled the bike. This remote works fantastic. The pictures below is of the button on the console, and of the garage door opener under the seat (seen in top center of second picture above the fuel cap). Total cost ~$40.


-----------
Update 11/26/2011
Did most of a tricLED underlighting kit this weekend. Was more than I had ever done to a vehicle.
Had to run a separate line to the battery, which I ran to under the black panel on the left side of the frunk (opposite the computer connections) where I mounted the remote receiver box. From there a wire straight down then between the outer body panel and the inner air tube panel straight down to the front spoiler. Above the spoiler (inside the bike) I placed the 3m connectors and hooked up the spoiler leds and the center frame leds. testing things along the way,
I do not have wheel ramps. Instead I used a jack from my pickup to raise the left side of the bike as high as it would go (placed where the two lower front wheel bars meet). This worked pretty well and allowed me to get to everything I needed to... except the swingarm leds. by the time I got this far it was getting pretty late (about 2am), and I could not figure out how to best run the wires from the swingarms to the receiver or connectors at the spoilers. In addition, I had no way to really raise the rear end to access things more easily. so I called it a night and did one more test. wait. things aren't working. pull off the 3m connectors and do a direct connection. still nothing. pull off the connectors connecting the battery wire to the receiver and connected straight to a 9v battery. things worked. okay. problem with the battery run. everything looks good, so I check the inline fuse. blown. damn. I put everything back together. reattach all the panels. I know everything will work, I just need a new fuse. So, being the kind of guy that absolutely hates leaving a project like this incomplete, I made a quick 3 am run to wal-mart in the wake of the black friday devastation, I find a 5 pack of fuses for about $1.50 buy em and go out to my bike. the inline fuse was already installed on the battery wire provided by reggie, and was really close to the battery connectors, so I placed it right next to the positive battery terminal. So, I pop up the seat, install the fuse. turn on the lights, and bam! everything lit up, and I was driving home with my 60% installed underlights.
Does anyone have any suggestions on how to raise the rear end of the bike or route the swingarm LEDs?


Also.. thinking of labeling the garage door button as shown in my OP.... cant decide what though. "Eject Passenger"? "Self Destruct?" any other good ideas?
----------------
Dec 05, 2011
So I took another stab at the swing arm leds over the weekend and got them installed. I'll try and get pics updated tonight. But since I've installed the leds, I sometimes have trouble figuring out if they are on during the day or when lighting conditions are just right. I don't want to accidentally leave something on and come back to find my battery dead. So.. I popped that button blank with my garage door opener back off and wired in 4 led lights to this blank that connect to my remote controlled light unit. One light to each of the 4 outputs. Now I can now at a quick glace which of my lights are on.
The lights aren't as evenly spaced as I would like. But they'll do. Maybe at some point I'll buy a fresh blank and make them spaced all pretty like. In the picture below, the lights on channels 1 and 3 are on. The upside of wiring these lights directly into the control box like I did is that they will pulse, strobe or flash just like the rest of the leds so I can also tell at a glance which pattern they are on.

I also have some more LED strips coming that I am going to place inside the wheel wells, behind the lower honeycomb vents on both side and behind the upper honeycomb vents near the wind deflectors on both sides to light up the inside of them. Since my other lights currently I leave on solid, I plan on setting these other lights to "breathe" mode, so the breath actually comes from heart of the spyder. Reggy is also sending me some of the fender channel LEDs to check out since I can't decide if I like them or not. I'll let you know how these go when I get them.
Really need someone to get a video of me driving with my bike lit up. I'd love to see how it looks from a third person perspective.
-----------
12-07-2011
Got a couple shipments in today. Added 12" white leds in both wheel wells, as well as a 4" in the radiator and oil sections to illuminate the honeycomb grills. The breathing effect from the center of the bike isn't as pronounced as I was hoping though. Speaking of which, I also got the KewlMetal honeycomb grills for the radiator so my spyder is more symmetrical now. That missing grill always bugged me. Also installed the tric fender leds. Still kind of torn on them at the moment. I like them, but am inclined to say they are too bright. Also, installing them made the running lights really damn hard to get back on. I've taken them on and off a few times, So I'm familiar with doing it, but the top section really did not want to go back on on either fender. Really concerned about how difficult they might be to get back off now.........
But after installation I took my bike down to the frozen yogurt store 5 minutes away for some dessert and the instant I parked some other folks came out saying "Woah! Thats cool!"
still have a couple more 4" leds to install that needed more invasive surgery than I wanted to invest tonight to illuminate the upper honeycomb grills near the lower wind deflectors.

------------
Update 12-11-11
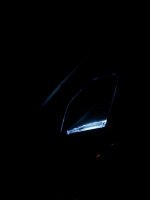
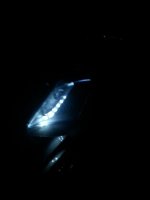
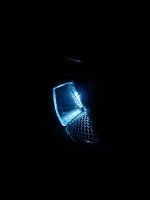
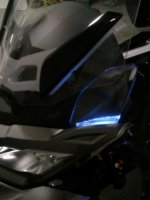
Just added these to the front end of my RT.
Still trying to convince Reggy @ TricLED to make me a custom knight rider (Nyght Ryder) bouncing light effect (like on KITT) for placement where these lights are, which would look REALLY slick. Regardless. these still look great as is..


-----------------
Update 01-21-12
Just did a bunch of stuff and I'm not done yet.
Added an FZ-1 switched fuze block cause I got sick of turning all my lights on automatically.
Added lights in BOTH the upper and lower wind deflectors. Looks real nice.
Added some prototype turn signals on the rear Reggy sent me.
But perhaps my absolute favorite additions so far is some project nite style lights hidden inside the lid of my saddlebags. Does an awesome job of balancing out the front and back of the bike, which always felt front heavy and looks terrific.
Still have to add my adaptive running lights, which will also be wired into my switched fuze block so they will also turn on automatically.


Also, the first mod I did was a garage door opener mod I've heard mixed results from spyder owners with the opener that wires up to the headlights, and that seemed way more expensive than it needed it be, so I bought a keychain garage door opener at lowes for about $35. popped it open and soldered a wire to the one of the buttons. cut a litt notch out of the side to feed the wire out and closed it back up. Attached the remote under the seat with velcro so I can change the battery easily if needed. Ran the wire up to the console. I took a button blank off the console and drilled a hole in it. Got a momentary switch from Radio shack for about $3, connected it to the wire and mounted it in the drilled hole on the blank. reassembled the bike. This remote works fantastic. The pictures below is of the button on the console, and of the garage door opener under the seat (seen in top center of second picture above the fuel cap). Total cost ~$40.
-----------
Update 11/26/2011
Did most of a tricLED underlighting kit this weekend. Was more than I had ever done to a vehicle.
Had to run a separate line to the battery, which I ran to under the black panel on the left side of the frunk (opposite the computer connections) where I mounted the remote receiver box. From there a wire straight down then between the outer body panel and the inner air tube panel straight down to the front spoiler. Above the spoiler (inside the bike) I placed the 3m connectors and hooked up the spoiler leds and the center frame leds. testing things along the way,
I do not have wheel ramps. Instead I used a jack from my pickup to raise the left side of the bike as high as it would go (placed where the two lower front wheel bars meet). This worked pretty well and allowed me to get to everything I needed to... except the swingarm leds. by the time I got this far it was getting pretty late (about 2am), and I could not figure out how to best run the wires from the swingarms to the receiver or connectors at the spoilers. In addition, I had no way to really raise the rear end to access things more easily. so I called it a night and did one more test. wait. things aren't working. pull off the 3m connectors and do a direct connection. still nothing. pull off the connectors connecting the battery wire to the receiver and connected straight to a 9v battery. things worked. okay. problem with the battery run. everything looks good, so I check the inline fuse. blown. damn. I put everything back together. reattach all the panels. I know everything will work, I just need a new fuse. So, being the kind of guy that absolutely hates leaving a project like this incomplete, I made a quick 3 am run to wal-mart in the wake of the black friday devastation, I find a 5 pack of fuses for about $1.50 buy em and go out to my bike. the inline fuse was already installed on the battery wire provided by reggie, and was really close to the battery connectors, so I placed it right next to the positive battery terminal. So, I pop up the seat, install the fuse. turn on the lights, and bam! everything lit up, and I was driving home with my 60% installed underlights.
Does anyone have any suggestions on how to raise the rear end of the bike or route the swingarm LEDs?
Also.. thinking of labeling the garage door button as shown in my OP.... cant decide what though. "Eject Passenger"? "Self Destruct?" any other good ideas?
----------------
Dec 05, 2011
So I took another stab at the swing arm leds over the weekend and got them installed. I'll try and get pics updated tonight. But since I've installed the leds, I sometimes have trouble figuring out if they are on during the day or when lighting conditions are just right. I don't want to accidentally leave something on and come back to find my battery dead. So.. I popped that button blank with my garage door opener back off and wired in 4 led lights to this blank that connect to my remote controlled light unit. One light to each of the 4 outputs. Now I can now at a quick glace which of my lights are on.
The lights aren't as evenly spaced as I would like. But they'll do. Maybe at some point I'll buy a fresh blank and make them spaced all pretty like. In the picture below, the lights on channels 1 and 3 are on. The upside of wiring these lights directly into the control box like I did is that they will pulse, strobe or flash just like the rest of the leds so I can also tell at a glance which pattern they are on.
I also have some more LED strips coming that I am going to place inside the wheel wells, behind the lower honeycomb vents on both side and behind the upper honeycomb vents near the wind deflectors on both sides to light up the inside of them. Since my other lights currently I leave on solid, I plan on setting these other lights to "breathe" mode, so the breath actually comes from heart of the spyder. Reggy is also sending me some of the fender channel LEDs to check out since I can't decide if I like them or not. I'll let you know how these go when I get them.
Really need someone to get a video of me driving with my bike lit up. I'd love to see how it looks from a third person perspective.
-----------
12-07-2011
Got a couple shipments in today. Added 12" white leds in both wheel wells, as well as a 4" in the radiator and oil sections to illuminate the honeycomb grills. The breathing effect from the center of the bike isn't as pronounced as I was hoping though.
Speaking of which, I also got the KewlMetal honeycomb grills for the radiator so my spyder is more symmetrical now. That missing grill always bugged me. Also installed the tric fender leds. Still kind of torn on them at the moment. I like them, but am inclined to say they are too bright. Also, installing them made the running lights really damn hard to get back on. I've taken them on and off a few times, So I'm familiar with doing it, but the top section really did not want to go back on on either fender. Really concerned about how difficult they might be to get back off now.........But after installation I took my bike down to the frozen yogurt store 5 minutes away for some dessert and the instant I parked some other folks came out saying "Woah! Thats cool!"
still have a couple more 4" leds to install that needed more invasive surgery than I wanted to invest tonight to illuminate the upper honeycomb grills near the lower wind deflectors.
------------
Update 12-11-11
Just added these to the front end of my RT.
Still trying to convince Reggy @ TricLED to make me a custom knight rider (Nyght Ryder) bouncing light effect (like on KITT) for placement where these lights are, which would look REALLY slick. Regardless. these still look great as is..
-----------------
Update 01-21-12
Just did a bunch of stuff and I'm not done yet.
Added an FZ-1 switched fuze block cause I got sick of turning all my lights on automatically.
Added lights in BOTH the upper and lower wind deflectors. Looks real nice.
Added some prototype turn signals on the rear Reggy sent me.
But perhaps my absolute favorite additions so far is some project nite style lights hidden inside the lid of my saddlebags. Does an awesome job of balancing out the front and back of the bike, which always felt front heavy and looks terrific.
Still have to add my adaptive running lights, which will also be wired into my switched fuze block so they will also turn on automatically.
Last edited: