• There were many reasons for the change of the site software, the biggest was security. The age of the old software also meant no server updates for certain programs. There are many benefits to the new software, one of the biggest is the mobile functionality. Ill fix up some stuff in the coming days, we'll also try to get some of the old addons back or the data imported back into the site like the garage. To create a thread or to reply with a post is basically the same as it was in the prior software. The default style of the site is light colored, but i temporarily added a darker colored style, to change you can find a link at the bottom of the site.

My Attempt at the Fixing the Horrid Fuel Smell

canister.gif

Found this on the web. The foam at the bottom is a "volume compensator". This drawing also shows a bit of a tube inside to prevent the new vapors just being sucked into the engine. I'm guessing the foam is supposed to keep the charcoal tight against the top so the fumes have to travel a little way through charcoal. I might add a buffer tube to the purge outlet.

Also the roll over valve on top of the fuel tank is supposed to prevent liquid fuel from entering the evap system. I know that I get liquid fuel in the evap system. Have the pictures to prove it.
 
The vent exit is the little hole behind the fill. No way can gas get pumped out it sits too high even if you filled to overflow IMHO.


attachment.php
 
Gypsy: Thanks for the pics. It is exactly what I needed.

Looks like there could be a valve of some sort on the port coming from the fuel tank.

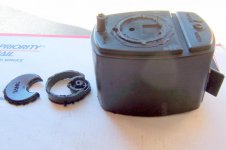
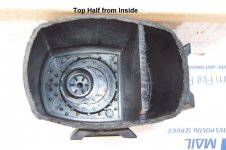
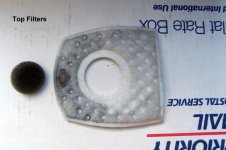
I was hoping for some high-tech valve or something but there is nothing there. Just a "dome" with the inlet port going thru it, then a flat area with a recessed square, and then an offset hole into the inside of the canister. The vapors come in thru the port, hit the flat square, go sideways to the hole into the canister. Why all the trouble, I have no idea. Possibly a liquid trap for a drop or two but that's about all it would hold.

Top Structure I.jpgTop Structure II.jpgtop half from inside a.jpgTop Filters b.jpg

Sorry photos aren't better but you get the idea.
 
Last edited:
canister.gif

Found this on the web. The foam at the bottom is a "volume compensator". This drawing also shows a bit of a tube inside to prevent the new vapors just being sucked into the engine. I'm guessing the foam is supposed to keep the charcoal tight against the top so the fumes have to travel a little way through charcoal. I might add a buffer tube to the purge outlet.

Also the roll over valve on top of the fuel tank is supposed to prevent liquid fuel from entering the evap system. I know that I get liquid fuel in the evap system. Have the pictures to prove it.

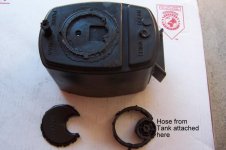
Excellent drawing and very similar to what I found. The foam rubber was tight against the divider but maybe with the charcoal sitting on it, it does compress a little and is as you say, a "volume compensator". The generic drawing shows the inlet tube going a little ways into the charcoal to force the vapors thru at least some charcoal. Mine had no such tube. There was a little circular ridge that held the small foam filter in place (see previous post) but once the vapors got below that ridge, they could go straight over thru just a little bit of charcoal and then thru the white filter to the vacuum port or purge port. As for the "liquid fuel trap" in the generic drawing, I thought that might be the function of the "dome" and offset holes (see previous post again). But it would only hold a drop or two in the recessed square before it would fill up and begin dripping thru the hole into the charcoal. That could well be what it is, but at that point I gave up over-thinking it.
 
Thank you for the pics.

I'm guessing it is the "liquid fuel trap" shown in the pic a few posts above.

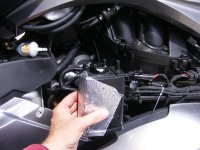
While waiting for my son to help on a yard project, I decided I had time to remove the canister. There was no room for air to circulate around the canister. Engine heat would boil the vapors in the canister and release them through the overflow hose.

I believe there is room to reinstall it where the '14's have their canister. I do think BRP changes the design a little. the new one appears smaller in diameter from the pics so it should fit easier.

When I got it out, I didn't smell as bad as I expected. I may try simply remounting it away from a heat source and see if that helps. Not sure there is room to lengthen the canister. then I realized all I really need is more volume of charcoal. If it keeps smelling I will add a second homemade canister in the overflow line. All it needs is two hoses, one in, one out. Since gas vapors are heavier than air the in (from the other canister) should be lower than the out.
 
Thank you for the pics.

I believe there is room to reinstall it where the '14's have their canister. I do think BRP changes the design a little. the new one appears smaller in diameter from the pics so it should fit easier.

then I realized all I really need is more volume of charcoal. If it keeps smelling I will add a second homemade canister in the overflow line. All it needs is two hoses, one in, one out. Since gas vapors are heavier than air the in (from the other canister) should be lower than the out.

According to the parts diagrams, the canisters are the same for all years including 2014 -- 709000090 for $66.99 (as Roger pointed out earlier). I, too, thought about increasing the volume of charcoal with a second container but then wondered how strong the vacuum is and would the vacuum be strong enough to pull the same volume of air back through more charcoal. Once again, I gave up overthinking it. For testing, you might have to bypass the purge valve to apply the vacuum to the canister(s) and compare the vacuum pull at the air inlet with one canister and with two. Just a thought.
 
I'd like to say something here....


Gypsy, you freaking rock for the pics!!! :yes:


Okay, carry on....

.
 
That would be awesome if BRP recalled 2013's to redo our canisters and install it where the 2014's are located. I have had terrible fumes and also drips on my driveway last summer.
Thanks Gypsy and Craniac I think I have a better understanding of how it works now. Messing with it on my own is definitely out of the question.
 
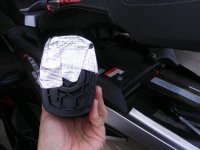
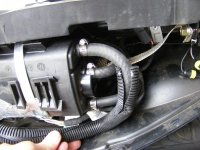
This is what the canister looked like when I finally got it out. It was just sitting loose, not in the mount.
evap move 003.jpgevap move 005.jpgevap move 004.jpgLOT

There is a LOT more room on the right side with it out. I went for a short ride and the right panel is quite a bit cooler than the left side. I think the added airflow will help cool the exhaust pipe and fuel tank.
evap move 001.jpg
You can see all the way to the bottom of the engine now.

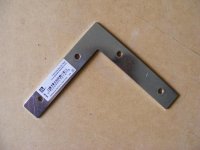
I went to the Home Despot and bought a small bracket.
evap move 006.jpg
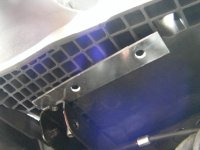
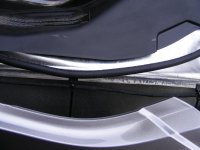
One of the holes closest to the bend had to be enlarged. I then sandwiched the bracket between the frame and the black plastic piece under the seat.
 
evap move 007.jpg

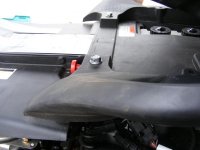
This is the bolt I used pictured from above, the one next to the red handle. Remove the bolt, wiggle the bracket in until the enlarged hole lines up and put the bolt back in.
evap move 008.jpg

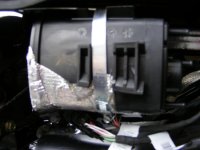
Then I used a large hose clamp that I already had from some old project and mounted the canister. The overflow is at the top. The purge vavle outlet is at the bottom. I figured the was best since the vapors are heavier than air.
evap move 009.jpg

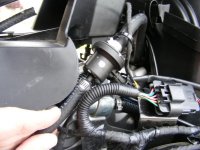
Next I ran the purge hose from the canister along the right side of the tank and to the purge valve. I was careful to avoid sharp objects. My wife and kids are always telling me to avoid sharp objects.
evap move 011.jpg
After the pic I tucked the hose up a little.
evap move 012.jpg
 
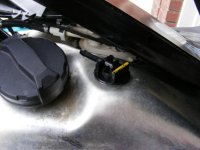
Next I removed enough plastic to get to the top of the tank. I replaced the factory hose with a new hose three feet long. I should have gone longer and wrapped the hose over the frame backbone. It attaches to the valve behind the filler. It is black with yellow stripe on mine.
evap move 014.jpg

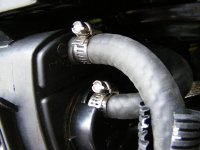
I ran the hose to the inlet on the canister. I removed the factory overflow hose and hooked it to the canister.
evap move 018.jpg

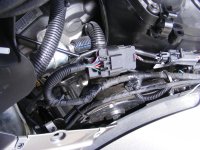
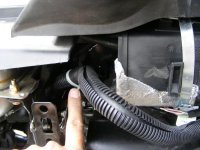
I routed the outlet through the frame support and above the drive belt. I wanted to find a better location but this was the best I could do.
evap move 016.jpg I left the protective cover on the hose since it goes near sharp things. I guess I need a protective cover too.
evap move 017.jpg

Put all the tupperware back on and went for a short ride. Right side panel is noticeably cooler than the left. Too cool today to tell for certain but...NO gas smell right now!
 
I'm too confused head to take all of this in at the moment, but it sounds good.

I''ll have to try this maybe tomorrow....really.

What size are all these hoses? 3/8" fuel line?


Have you wrapped yourself w/ a protective cover yet?????


.
 
Gas fumes from boiling gas tank and increase mpg

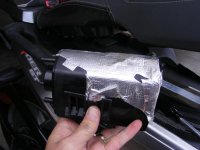
You can play with the canister all you want it will not stop the gas fumes. They are coming from your gas tank boiling from the 2 manifold pipes. I no longer have gas fumes now even when it gets to around 110-120 out here in the high desert.

I left the cat alone and yes it does put out heat but not to the gas tank. It was the 2 manifold pipes that was heating up the gas tank and creating all the gas fumes. When I wrapped the manifold pipes it cooled it down so much that I didn't have a boiling gas tank or hot glove box. then I took out the factory air box and replaced it with Air Filter Kit Performance Can-Am Spyder RS and RT,
http://www.kewlmetalstore.com/index....f71b20b3a27625 I get 25% more air and a deep throat sound plus more mpg as well as more power. What a world of a difference and I can now see the top of the engine as well as getting to the front spark plug easy. That in proved my power and mpg. You can replace your cat that looks like that cat but a strait flow instead. RT Cat-Bypass is now available at www.spyder1attitude.com. ;) RJ
 
AZCowboy: I believe you are right that wrapping the pipes will lower the temps under the tupperware. I am worried about what that will do to the longevity of the pipes.

Snoopy: The lines are 1/4 inch or 4.6mm running from the tank to the canister and then to the purge valve. The overflow is larger. I think it was 3/8 inch.

By the way I buy my hose clamps at the Home Despot in the plumbing section. I think they are better quality and less expensive than the clamps at the car parts stores.
 
Back
Top