• There were many reasons for the change of the site software, the biggest was security. The age of the old software also meant no server updates for certain programs. There are many benefits to the new software, one of the biggest is the mobile functionality. Ill fix up some stuff in the coming days, we'll also try to get some of the old addons back or the data imported back into the site like the garage. To create a thread or to reply with a post is basically the same as it was in the prior software. The default style of the site is light colored, but i temporarily added a darker colored style, to change you can find a link at the bottom of the site.
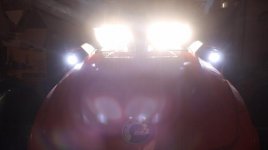
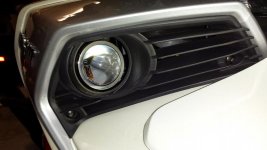
Install Lamonster's Fog Light Kit without panel gap (F3, F3-S, F3-T)

Very well done. Regardless of modifying the "panel gap" the video is an excellent install video for fog lights on an F3.
 
Thanks...

Install videos are a great help here so many come here looking for visual aids to installation of acc and mechanical work. :bowdown: great video and short cuts are always a plus....:thumbup:
 
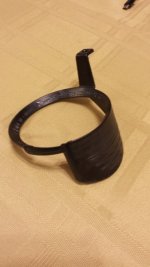
Nice job and great install video! I started to go down the same road shortly after BRP started selling the fog lights. I opted to make my own lights (didn't have the Lamont option back then). I didn't want the gap and was going to order a spare set just in case I didn't like the way it turned out. While I was looking up the part I found that BRP actually had the pieces to use with the fog lights. I ordered a set and sent them a note asking why they weren't included with the fog lights. Ended up being an oops on their part as they were supposed to be. Started providing them as part of the kit. Another option for those without the time/skill/patience.


CJ JAX
 

Attachments

  • 20150317_193544.jpg
    20150317_193544.jpg
    39.4 KB · Views: 55
  • 20150304_204053.jpg
    20150304_204053.jpg
    25 KB · Views: 51
Part number

Nice job and great install video! I started to go down the same road shortly after BRP started selling the fog lights. I opted to make my own lights (didn't have the Lamont option back then). I didn't want the gap and was going to order a spare set just in case I didn't like the way it turned out. While I was looking up the part I found that BRP actually had the pieces to use with the fog lights. I ordered a set and sent them a note asking why they weren't included with the fog lights. Ended up being an oops on their part as they were supposed to be. Started providing them as part of the kit. Another option for those without the time/skill/patience.


CJ JAX

Zuni, you wouldn't happen to have that part number by chance would you ?
 
Nice job and great install video! I started to go down the same road shortly after BRP started selling the fog lights. I opted to make my own lights (didn't have the Lamont option back then). I didn't want the gap and was going to order a spare set just in case I didn't like the way it turned out. While I was looking up the part I found that BRP actually had the pieces to use with the fog lights. I ordered a set and sent them a note asking why they weren't included with the fog lights. Ended up being an oops on their part as they were supposed to be. Started providing them as part of the kit. Another option for those without the time/skill/patience.


CJ JAX

Interested in part # as well
 
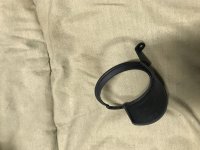
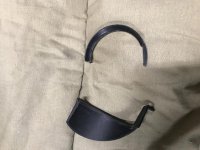
Fog Light Heat Shield

705008996 & 705008995

I do believe.

Christopher
 

Attachments

  • heat shield.jpg
    heat shield.jpg
    25.3 KB · Views: 52
Thanks, I was just wondering about that gap because I am in the process of installing the LED Foglights with the white and amber ring kit. I was wondering why you did not use a hole saw.
 
Last edited:
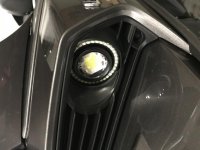
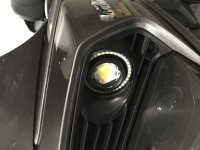
Ok I just got it figured out. Drill out the blank with 2 1/2 “ hole saw and you end up with thisC3F57D38-0BCF-4218-B074-2AFFAD5C189B.jpg
 
Next screw that part back on and either glue the rest to the back or use double sided tape. You end up with this>>9462CA22-0A52-4B82-9D58-4A79F364C218.jpg
 
Now all I need to do is figure out how to wire the ring kit and show chrome fender light kit. I watched the videos and they are very confusing. Is there a diagram anywhere on paper?:gaah:

I just found a more recent video Lamonster did on the light ring install on a red F3 and he did a much better job explaining it all.
 
Last edited:
Thanks, I was just wondering about that gap because I am in the process of installing the LED Foglights with the white and amber ring kit. I was wondering why you did not use a hole saw.

I didn't have hole saw big enough. Valid point.
 
I didn't have hole saw big enough. Valid point.
Thank you for starting this thread and getting me to think about how to make it work. You did not have the light ring so it was a different situation.
I just held it in my hand and did it slow and easy You can also make it easier by once the drill bit goes threw to put the drill in reverse. Thats how they cut vinyl siding on houses, they turn the blade around. Once the hole is cut out you just trim with a boxcutter and sand the edges to get rid of the burs. The only part that looked bad before, was that inside edge than had nothing over that plastic piece that was left after you removed the cover , but it makes for a great base for attaching this piece with the screw and adhesive. last night I had not done that yet because I had just fabbed those pieces and it was late.

Be extremely careful doing it this way to avoid injury. Once the drill bit punches threw the teeth on the hole saw will bite down and may spin in your hand. I just slowed it down and used very little down pressure to get it to start cutting the soft plastic. wear gloves.
 
Last edited:
Back
Top