…and I’m really upset. For now, I'm going to ride without the other side on until my replacement come in. I was heading North on Route 17 (South of route 301) after leaving Norfolk Va. on Saturday just in case anyone is out that way and see a Pearl panel lying on the side on the road.
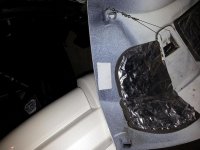
There are many threads on the forum about this topic and I like “Jim & Teresa” post #4 method of securing
panels using a Paracord. Jim quick question, what connectors did you use?
http://www.spyderlovers.com/forums/showthread.php?66153-RT-panels&highlight=panel+lost
There was another forum thread that discussed getting parts from “CheapCyclePart.com”, so if anyone else is interested in 2014 RT LTD parts:
http://www.cheapcycleparts.com/oemp...027104d4a6a1/2014-spyder-rt-limited-se6-parts
Also, here is the shopping list for a RH Side Panel replacement ($276.39 +S/H):
- Chrome Side Panel Cap Kit Model-RT LTD (Part #: 219400195): $84.99
- Torx Screw K40 X 16 (Part #: 250000294): $1.99
- RH Side Panel Foam (Part #: 518324752): $14.42
- White RH Lateral Side Panel Model-White (Part #: 705009000): $174.99
Last edited: