DocRags
New member
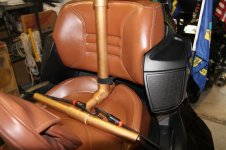
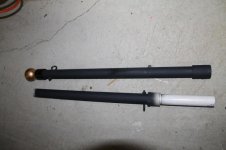
Here are some pictures of the solution Ed (Erags) came up with so I can fly a 3 x 5 ft flag for PGR missions without having to buy a trailer hitch. For our flag lines at PGR missions, our local PGR uses flagpoles constructed of PVC pipe which screws together midway. Ed decided to try a similar approach for a flagpole for the Spyder. He used 1" PVC pipe along with male/female adapters and T joints. The length of the pipe sitting crosswise on the passenger seat is 18 1/2" total (with T-joint in the middle). It is held in place on the seatwith a bungee cord which runs through the passenger grips. The piece that sits on the seat lengthwise measures 9 1/2" total, including the T joint at the end. The upright piece of PVC pipe is 17 1/2". For extra stability Ed used a piece of velcro which goes around the base of this piece into the back trunk. The flagpole itself consists of 2 pieces of PVC pipe 27" long (including the ball that he mounted on the top). The flag is held by carabiner clips through eye bolts (one on each section of the flagpole) set at a distance determined by the length of the flag width when the clips are through the grommets). If you decide to spray paint the PVC run something along the surface that will be resting on the seat (such as clear packing tape) or you will end up with paint rubbing onto the seat surface. (This was a lesson learned the hard way the first time we rode with the flag on...and ended up with a gold stripe going up the back of the seat). When the flag isn't in use (i.e. riding to/from the actual mission itself) it is folded up and stored in the trunk/saddlebag. The 2 pieces for the pole are a little too long to fit in the frunk so they are secured to the passenger seat using bungee cords when we are traveling to/from missions. I'm planning to sew a bag that will hold them (and the flag) but haven't had time yet. 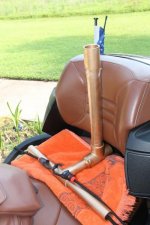
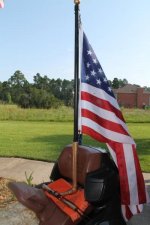
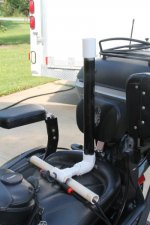
The overall look is quite nice; I think he did a great job. :thumbup: If you so desired, you could adjust the lengths of the PVC pipes. This set-up works for both our RT and RS, with slight modification in the way it is attached on the RS.


The overall look is quite nice; I think he did a great job. :thumbup: If you so desired, you could adjust the lengths of the PVC pipes. This set-up works for both our RT and RS, with slight modification in the way it is attached on the RS.
