• There were many reasons for the change of the site software, the biggest was security. The age of the old software also meant no server updates for certain programs. There are many benefits to the new software, one of the biggest is the mobile functionality. Ill fix up some stuff in the coming days, we'll also try to get some of the old addons back or the data imported back into the site like the garage. To create a thread or to reply with a post is basically the same as it was in the prior software. The default style of the site is light colored, but i temporarily added a darker colored style, to change you can find a link at the bottom of the site.

Any hints on safely removing the mirrors?

Bfromla

Well-known member
WFyi im gonna try new farkle
attachment.php
the mirrors on ST look ez , but tricky. More specific want to tie in to the blinkers in mirrors
Id just like to know if anyone has done something similar before. Thx (ya pic is sideays again:banghead:)
 

Attachments

  • image.jpg
    image.jpg
    80.9 KB · Views: 477
Last edited:
Does the mirror have a turn signal on the back of it like the RT? If it does then it will be easy to tap into that wire.
 
Do you have the service manual? It looks like you just remove some screws. I can't copy and paste from my Adobe or I'd do that for you.
 
TURN SIGNALS

SpyderAnn is heading you in the right direction, after taking off the OEM turn signal cover you can drill a small hole in the bottom and fish the wire thru.........but you may want to re-think those turn signal LED's you are going to use.....they are hugh compared to the size of the mirror glass. IMHO a small strip of 3 LED's at the bottom is all you need to notice the turn lite.........Check BANGGOODCOM.....I have seen them for sale there .....quite in-expensive. .Remember if your are changing lanes and using your signal....you had better be able to see if a car or truck is in that lane ....and your LED is going to block that ........just a thought........Mike :thumbup::thumbup:
 
Thx do noted & was going to add blind spot mirrors fyi 1 step at a time. No shop manual to go by only screws visible are for wind deflectors. No rush just an Idea keep me busy for now. Thx everyone


Sent from my iPhone using Tapatalk
 
STS MIRRORS

:gaah: wow I just checked out the parts " fiche " for the STS mirror.......I hope the light is an LED because if not when it goes out they are $149.95 each.......It's not a bulb re-placement thing the part is a " complete unit "......Talk about DUMB...Soooooooooooo be very very careful in there. It could get very expensive :agree: ........Mike :thumbup:
 
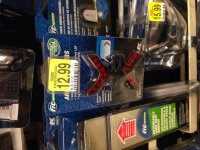
I did something similar. I got some of these
ed88624ff8574029494816fe69c08d3f.jpg
from TridLED.com - and after removing the mirror, I used the extra connector to power the LED strips I added to the top edge of the mirror. If you can do a tiny solder connection then just tap into the wires in the mirror. Just don't add too much or too little. I have had to add another set of strips to the side of the tail light so my turn signals can be seen from the side and to add more electrical load to the system because I replaced the rear turn signals to LEDs and the load resistor that came with the kit didn't work to good. My blinkers got faster. So adding more LEDs slowed them down.


Sent from my iPad using Tapatalk
 
Last edited:
Mirror removal on 2015 ST

Very late reply to this thread, but it might help someone in the future. I just removed my right side mirror in order to remove the upper body panel.

I recommend that you first remove the two piece mirror "shell" by removing 2 screws on the lower shell and 1 screw on the upper shell. The 2 lower screws also retain the wind deflector if you have that feature. After removing the 2 lower screws, you need to separate the lower shell half to gain access to the single screw that retains the upper shell half. The mirror can then be "yanked" from its mounting plate without any additional tools. Grasp the mirror near the extreme end and pull the END STRAIGHT UP, but only an inch or less. (think of the wings of a bird, you are just pulling up on the tip) This will "pop" the 2 lower spring pins out of their sockets and allow you to lift the entire mirror vertically. The 3rd and final mounting pin is at the top of the mirror base and is in a slotted hole that will "slip out" when raised vertically (but only after the 2 lower pins are released from their spring clips). You will be able to clearly see these 3 pins before you start yanking on the mirror. To re-attach, just get the top pin seated into its groove, and then press down vertically on the end of the mirror and the bottom 2 pins will "snap" into their spring channels.
 
Back
Top