IdahoMtnSpyder
Well-known member
Not yet. The search continues.
Although, the Lamonster Tech I spoke with earlier suggested I just ask the Tech changing out the tire, assuming it's a Spyder Tech of course.
I agree, after watching the youtube video, and how the Nut came off rather easily, it can't be Torqued too much. So hopefully I can get the specs when I have the new tire mounted. If not, I may just bite the bullet and let them do the bearing check / and replace if needed.
Maybe someone else would also know from previous bearing replacements. I'm finding it's a long shot, but worth a try.
I do believe this is what you are looking for! :2thumbs: I found it in the Drive System section of my 2014 RT Service Manual.

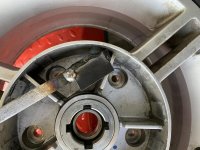

") . But I'd suggest NOT using a cold chisel like that!
. But I'd suggest NOT using a cold chisel like that! 