• There were many reasons for the change of the site software, the biggest was security. The age of the old software also meant no server updates for certain programs. There are many benefits to the new software, one of the biggest is the mobile functionality. Ill fix up some stuff in the coming days, we'll also try to get some of the old addons back or the data imported back into the site like the garage. To create a thread or to reply with a post is basically the same as it was in the prior software. The default style of the site is light colored, but i temporarily added a darker colored style, to change you can find a link at the bottom of the site.

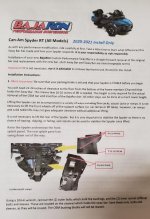
HowTo: 2020+ Baja Ron sway bar instructions

MONK

New member
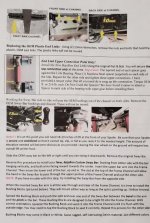
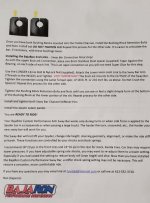
Not sure if this has been posted before. The instructions that came w/the sway bar were spot on. Hope you can read them.
 

Attachments

  • 2020+ Baja Ron instructions 1.jpg
    2020+ Baja Ron instructions 1.jpg
    50.2 KB · Views: 127
  • 2020+ Baja Ron instructions 2.jpg
    2020+ Baja Ron instructions 2.jpg
    64.1 KB · Views: 91
  • 2020+ Baja Ron instructions 3.jpg
    2020+ Baja Ron instructions 3.jpg
    54.6 KB · Views: 67
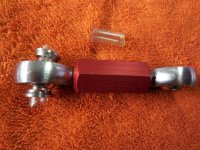
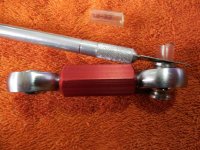
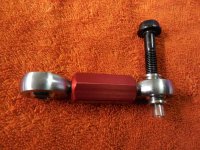
Here's a method I used to hold the spacers in place. I found a piece of neoprene tubing that has a bit of a friction fit and cut it flush with the spacers. Once it was lined up, the bolt pushes the tubing out and the assembly is secured.

DSCN2892.jpg

DSCN2893.jpg

DSCN2883.jpg
 
Here's a method I used to hold the spacers in place. I found a piece of neoprene tubing that has a bit of a friction fit and cut it flush with the spacers. Once it was lined up, the bolt pushes the tubing out and the assembly is secured.

View attachment 186069

View attachment 186070

View attachment 186071

:congrats:Boy, I wish I thought of that great approach! I spent tons of time and lots of cursing on that part of the installation. Another great tip from an old pro. Thanks lots!:bowdown:
 
There was a hint in the instructions I got about using a drop of superglue to hold the washer in place. I just used a very small pair
of needlenose pliers and easy, peasy.
 
You can get the bolt through the 1st spacer and the end link pretty well. If you push the 2nd spacer sort of in place then hold it by pushing the bolt through to trap it by friction, you can get a small screwdriver through the other side to push it in place. Once it's in place, the bolt slides right through. At least, that's what I did.
 
Back
Top