• There were many reasons for the change of the site software, the biggest was security. The age of the old software also meant no server updates for certain programs. There are many benefits to the new software, one of the biggest is the mobile functionality. Ill fix up some stuff in the coming days, we'll also try to get some of the old addons back or the data imported back into the site like the garage. To create a thread or to reply with a post is basically the same as it was in the prior software. The default style of the site is light colored, but i temporarily added a darker colored style, to change you can find a link at the bottom of the site.

2018 RT Console Switch Opening Size.

Want to install this Rocker Style 4.2A Dual USB Charger Socket in one of my blanks on 2018 RT console and wondering what size opening is under the blank cover. Do not want to modify opening. Thanks

https://www.amazon.com/gp/product/B076MSVQ9S/ref=ppx_od_b_detailpages01?ie=UTF8&psc=1

These type of switches are pretty much standard ….. might be a mm or two off but that isn't going prevent it from working ….. look at BANGGOOD.COM ….I think you will find the same at 1/4 the price on Amazon ….. Mike :thumbup:
 
MeudtPG, I just purchased the exact same from Amazon, but have not yet installed on my 2018 RT as it will require a little cutting......and I did not have an answer on wiring it up anyway.

That said, I did pull the blanks. The center blank on the 2018 uses a round hole.....the entire shape would need to be cutout for the USB. All of the blanks EXCEPT the center are precut rectangles roughly the size of the USB with two caveats. First, the slots on mine seemed just too narrow/small, but barely.....would either be a very tight fit, or it might need slight enlargement with a file etc. More important, the blanks in the bike are pure rectangles. The USB/Switch is a rectangle with a small "dog ear" on the top and bottom. The "dog ear" is square in nature, and is used for the clips that hold the USB in. You would have to cut these "dog ears" at a minimum.....you might be able to use a good file, or even a knife. Would be minimal cutting but you will have to do some. I BELIEVE this true of all of this type switch/device, everyone I've seen had the dog ears.

If you go to pull one, suggest removing the center first as it is much easier to get out. From there, you can reach under and try to push in on the clips for the outer blanks. Still a little work, but will come off much easier if you can at lest help from the center hole.

As a note, I had mine apart mainly to install a garage door opener that uses one of that style switch -- matches perfectly. If you are going to do a garage door opener install at some point, would be easiest to do at the same time. I used a "mo-door" that came with the RT switch, a little expensive, but installed and works VERY well and at much better range than my Honda and Mercedes Homelinks. The mo-door switch even used a perfectly rectangular switch with no ears, fit perfectly.

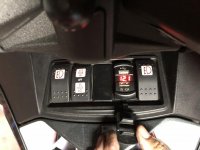
Thank you Mclendons! Your response is exactly what I needed in my plan to go forward with a doing things right the first time farkle. I think this Spyder TV by Pierre - Dual USB Charger - Presentation/Installation https://www.youtube.com/watch?v=pbxnh3VeLL4helps us at 11:25 in the video explaining the dog ear notch. You are correct recomending installing the "mo-door" at the same time as the dual USB. I will get my power from the newly installed FZ-1 fuzblock and the console should be complete with class.
 
Thank you Mclendons! Your response is exactly what I needed in my plan to go forward with a doing things right the first time farkle. I think this Spyder TV by Pierre - Dual USB Charger - Presentation/Installation https://www.youtube.com/watch?v=pbxnh3VeLL4helps us at 11:25 in the video explaining the dog ear notch. You are correct recomending installing the "mo-door" at the same time as the dual USB. I will get my power from the newly installed FZ-1 fuzblock and the console should be complete with class.

You're welcome, as it was my link to Pierre's video.
 
Would be interested in knowing about your fuzeblock install ---location, where you pulled switched power. That may be my next mod, and reason I held on the USB install. Thx
 
Would be interested in knowing about your fuzeblock install ---location, where you pulled switched power. That may be my next mod, and reason I held on the USB install. Thx

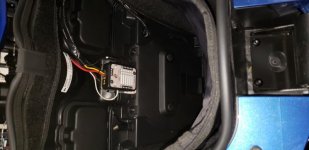
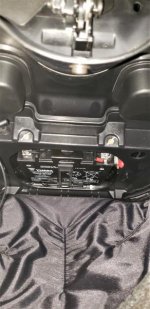
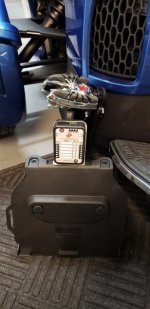
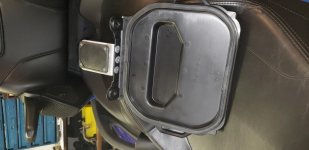
Do not have the USB switch installed yet but here is my FZ-1 location and where I connected the trigger wire to it.
FZ-1 LOCATION.jpg
Fuse Block Battery Cover.jpg
Fuse Block Mounting 1.jpg
FZ-1 Battery Cover Mount.jpg
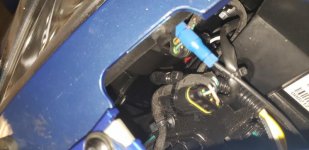
FZ-1 Trigger Wire .jpg
 
MedutPG, thanks for the pictures, very helpful. On the connection for the trigger wire, I have having trouble orienting towards where the picture actually is . It looks to be on the left side (left when on bike), and just below the headlight, Is that the right location? Also, do you happen to know what circuit that taps into?

I am going to try and find the Trunk Aux circuit next time I have a chance, but do not really want to pull the entire front of the bike off as the instructions from Can Am indicate. Am hoping I will be able to reach up and find it when I have panels off to do an LED light install, maybe pulling the battery.

Thanks for the info!
You are right. It is on the left side (sitting on bike) just below the headlight, remove black panel and there will be two connectors. One is a five wire connector and one is a two wire connector. I tapped into the two wire orange w/ red stripe going to the frunk light. Look over toward the outside and find the 2 wire harness and connector that goes to the frunk light. That is hot whenever the key is on. The one you want to tie into there is orange with red stripe. I used a posi-tap blue connector to tie in (do not cut any wires) https://www.amazon.com/Posi-tap-Connector-16-18-Gauge-Wire/dp/B00389R8KU
 
Back
Top