• There were many reasons for the change of the site software, the biggest was security. The age of the old software also meant no server updates for certain programs. There are many benefits to the new software, one of the biggest is the mobile functionality. Ill fix up some stuff in the coming days, we'll also try to get some of the old addons back or the data imported back into the site like the garage. To create a thread or to reply with a post is basically the same as it was in the prior software. The default style of the site is light colored, but i temporarily added a darker colored style, to change you can find a link at the bottom of the site.

2008 Spyder GS (RS) | Fire Damage

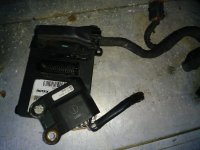
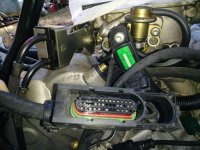
There are two black boxes, the Calibration Module, PN705600626, and the Engine Control Module, PN420266764, that you will have to have the BRP's B.U.D.S., software to diagnose if they were damaged in the fire or have a dealership check them out. I note too that neither BRP nor Cheap Cycle Parts list the Engine Wiring Harness Ass'y as available. That may mean an Ebay/junkyard search.

Good luck!

Heart absolutely hit the floor when I saw the calibration module mentioned. I was aware of this part existing but had no idea that it was ~$900 plus a dealer visit to even touch!

Fingers and toes crossed for me but it may be OK. To my knowledge, the CM 705600626 is located on the bottom of the machine and suffered no damage. ECM 420266764 is also in good shape cosmetically but was closer to actual fire damage than is comfortable for a part this expensive and tied to a dealer visit.

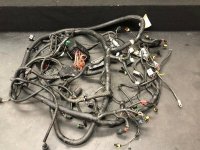
Engine Wiring Harness assembly is something I could use a bit of help with.
The third picture shows what I believe to be the part you are mentioning. Hopefully, between what can be seen and the wiring harness below...
I will have most (if not everything) required to restore the main components of the electrical system. Need a dash...

Thank you very much for the helpful info!
Keep it coming Spyder owners! :thumbup:
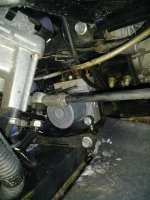
20201012_162835.jpg 20201012_163043.jpg
20201012_162910.jpg s-l1600.jpg
 
Another thing to consider is the price of a good used like machine. I would not be the least bit surprised if you could buy a good condition used machine for somewhat less than the rebuild cost of this one.
 
I saw this one on ebay that looks a good bit like your picture, but, unlike the BRP parts picture of the engine wiring harness it looks like both yours and the ebay one are of the complete vehicle wiring harness but I flat don't know.

Me either but we are going to find out!

Another thing to consider is the price of a good used like machine. I would not be the least bit surprised if you could buy a good condition used machine for somewhat less than the rebuild cost of this one.

This is on the forefront of my mind.

A used 08-09 in alright condition is ~5-8k in my area.
I am not the type of person who can dump thousands into a machine regularly which is why I ride Honda :D

If this project gets cost prohibitive it will be destined for parting out at least instead of scrapyard.

Most people are not comfortable fabricating their own body panels, seat, pillion handles etc but I certainly am. Would not consider buying a single piece at +$100 USD per panel when I can ride without or fabricate something myself. Same with the fender that was burnt... that is no biggie for me to repair to like new condition. There is no rush on this project lol

If I am missing something obvious that will cost a lot please spare me and let me know what to look out for!

Thank you for the responses!
 
If anyone could point me in the direction of some information on bypasses it would be greatly appreciated.

Evap canister I think I have a handle on but electronically very far away from where I need to be.
My understanding is that there will be several sensors or switches that have burned off of this machine.
I intend to bypass as many of these as possible.

My main goal being to start the engine and see how it sounds before proceeding any further.
No dash and ignition seem to be my biggest obstacles at this time. I would gladly use a different key and ignition module fit to this machine if possible. I would not need the seat pop feature of the ignition for example if building a custom seat and definitely not to start it. I do not know if the dash is even required to start the bike. Hard to find answers to questions like that in the service manual

Thank you for reading!
 
Here is the link to the aftermarket fuel pump for the spyders. https://www.highflowfuel.com/i-2389...m-spyder-f3-2008-2017-replaces-709000370.html
It fits all spyders 2008 to present.

Found this information in a different thread. 709000370 is a different part number from what comes up for 08 Spyder. (709000088)

From CCP... Pump module is 709000088 for the 08 GS SM5 and 709000370 is from a 2014 RTS SE6

Can anyone speak to the compatibility of these part numbers between years? The quote listed above is (so far) the only source of this info I have found.
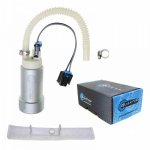
Pictures sure do look different from the OEM and aftermarket one. Anyone have one of these units in their machine? (Quantum Intank EFI Fuel Pump for Can-Am Spyder)

Thank you for looking!

pump1.jpg
pump2.jpg

F144221534.jpg
 
Have you gotten a service manual yet? If not you'll need it. Go to canammanuals.com. Don't know how good the wiring diagram is for the 2008 models. You may need to get a later version also to get a good copy of the wiring diagram. They're about $25, download only. With all the interaction of the computer modules and sensors I'm skeptical how much you'll be able to get by with bypassing sensors. The service manual will help a lot in that regard.
 
Have you gotten a service manual yet? If not you'll need it. Go to canammanuals.com. Don't know how good the wiring diagram is for the 2008 models. You may need to get a later version also to get a good copy of the wiring diagram. They're about $25, download only.

I do. Have skimmed the owner's manual and read over a few sections of the service manual.

I know I'm not telling most of you all anything new but that should be the first thing done if working on a project. Even if you aren't getting this far into it a service manual is a "must have" for anyone who plans on touching their bike for any reason.

With all the interaction of the computer modules and sensors I'm skeptical how much you'll be able to get by with bypassing sensors. The service manual will help a lot in that regard.

Me too... walled garden

The service manual seems to be very unhelpful in this regard for the most part.
Don't get me wrong there is great info that I need in there but the "bypassing our sensors" section is missing from mine

On a bit of a tangent... is there a reason the site does not offer service manuals for download? I know the arguments on both sides (Theft of personal property vs freedom and availability of information) but does SL have a rule about posting download links? I "man looked" as my wife calls it but I didn't see anything.

Capture.jpg
 
Found this information in a different thread. 709000370 is a different part number from what comes up for 08 Spyder. (709000088)

From CCP... Pump module is 709000088 for the 08 GS SM5 and 709000370 is from a 2014 RTS SE6

Can anyone speak to the compatibility of these part numbers between years?
You are going to encounter a real dearth of information among members here about these types of questions. About the only in-depth digging into the bowels of Spyders that has been done by more than a rare few are flashing the ECM, air box changeouts, suspension mods, and catalytic converter bypasses. I don't recall any discussion of differences in fuel pumps. Those most knowledgeable about the guts of Spyders are techs who work on them for a living, and of course they don't talk for free! You really are on a solo adventure so kudos to you for your intrepidness!
 
On a bit of a tangent... is there a reason the site does not offer service manuals for download? I know the arguments on both sides (Theft of personal property vs freedom and availability of information) but does SL have a rule about posting download links? I "man looked" as my wife calls it but I didn't see anything.
Links to products which are, or can be construed as, solicitations for purchase are banned except for those connected to paying sponsors of the site. Links inside posts that are provided as information to help others are OK, such as the one above for the manuals site.

Links to documents which can be legitimately downloaded are allowed. As far as the service manuals BRP has not made them available for purchase other than printed versions ordered through a dealer. The manuals that can be purchased online are of dubious legitimacy. As I see it the suppliers are so well hidden in the dark corners of the Internet that BRP can't reach them, or BRP has determined it's not financially worth it to take down the supplier. He provides a service that probably wouldn't be worth it for BRP to provide. My suspicion is that someone in the printing company, in China I think, probably diverts the BRP supplied PDF to the dark web supplier. China is notorious for counterfeiting. The last time I looked, Helms, the producer of many vehicle service manuals, no longer offers an electronic version of any vehicle manual.

Another thing to be aware of as you search for parts. BRP documentation is not 100% consistent in the use of nomenclature. You will find ample opportunity to exercise ingenuity in figuring out how to search for some parts. For example, the microswitch that operates the light in the frunk of S and L models is not called a microswitch. I don't remember what it's called. Also, the part names in the parts list aren't always the same as in the text of the service or owner's manuals.

Thank you very much for the helpful info and advice!

On the nomenclature front did you possibly mean like the dash/cluster/instrument panel/multifunction gauge/speedotach?

Seems like every single place I look has a different name for that part lol

If the manuals that are available for purchase online are copies then they should not be available for sale. If BRP wanted to sell the manual for a reasonable price they would certainly be capable of that. Until otherwise directed I will offer my owners and shop manuals for free download.

https://drive.google.com/file/d/1hty_CGPDPLW6AfEDGcme2P-TaPkkcPX3 for the owners

https://drive.google.com/file/d/1MuvUAz-hkiMAUaaqN7YfWgHhqPrisOOG for the shop
 
Last edited:
Well Spyder folks... here comes the bad with the good.

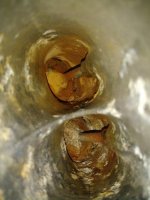
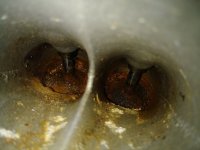
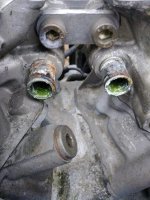
Said a prayer, crossed my toes and pulled the throttle body off to find exactly what I hoped not to.
As ready as I was for this kind of thing I would be lying if I said it wasn't a huge let down to find it in this shape.
Everything the PO said carries the weight of a feather in a windstorm with me from here forward... that is for sure.

Still a lot of meat on these bones but will need more TLC than I would have hoped.
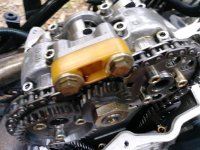
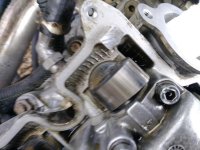
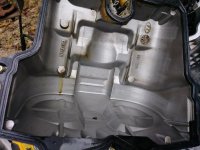
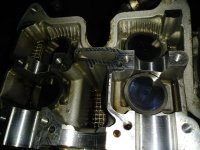
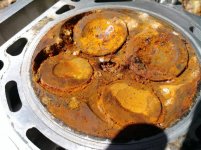
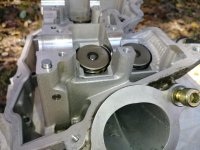
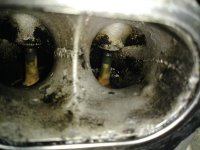
Here are some pictures of under the rocker cover. Not everything is doom and gloom. There is some surface rust on one of the cam lobes but no noticeable pitting and the timing chain appears to be in good condition. There may still be enough here to bring back to life but after researching how much parts are for these bikes I think I'll be OK either way.

Definitely going to pull the heads next and see how much I can clean up. May never go back together... :pray:

Cams are in amazing shape. Seen a lot of worn out engines and this is not one...
Still might be destroyed in some way but there are salvageable parts none the less. I go back to happy to see it not hit the crusher either way.

This thing is kinda fun to work on. Take apart anyway...
Most everything is 10mm and it does have some of what seems to be logical decisions in design from a smooth-brain like me.
Impact tools feel like cheating. I used to struggle for days with things that just zip right off with an impact.

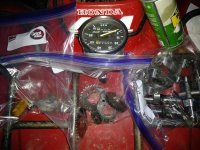
Bagged and tagged one head and took a shot or two before I put her to bed for the night.
Still proceeding forward with restoration at this time but will need a light top end rebuild at minimum as well.

Thank you for reading!

20201015_154322.thumb.jpg.64a36b9dbb3de6053e555dbd41885915.jpg 20201015_154348.thumb.jpg.6a27cfa1ad7fc570728a594aa2f72c4d.jpg 20201015_172733.jpg
20201015_162207.jpg 20201015_162228.jpg 20201015_162238.jpg
20201015_184848.jpg 20201015_184940~2.jpg
 
Hello again Spyder folks!

I do have a few more pictures of the damage for you to see.

Turn that frown upside down Spyderlovers. She isn't dead yet.
I am so much more intimated by BUDS than rebuilding a v-twin top-end it is hard to describe.
This sort of water coming along with fire damage thing is very common. Compared to bringing an ATV that someone sunk in a mud hole back to life... this is do-able.

I started by removing as much of the surface rust as possible taking special care to avoid debris getting into other parts of the engine.
My process for this type of thing involves getting rid of as much damage as possible before ever moving the cylinder within the bore.

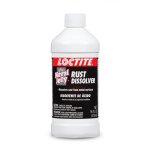
There are many chemical solutions to rust removal but for this application I prefer Loctite's product "Naval Jelly"
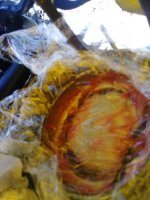
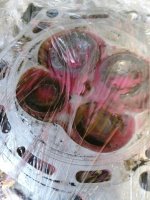
Brush on liberally, cover with plastic and place out of the sun. Usually wait about 10-15 minutes and then go and brush it again followed by a few hours of waiting. The longer you can wait the better essentially but the product will dry out in most conditions. You want to remove it before drying or hardening. Semi-concentrated Phosphoric Acid (The stuff in Coca-Cola) is the active ingredient. It will usually not damage the surface and is a great solution for removing light rust. This application is way over its general capabilities but helps with my process.

Next steps will be to fully disassemble the head and get everything cleaned up again. Valves need to be lightly resurfaced (lapped) due to likely pitting on the seats but the process is actually quite easy (all things considered) Cylinders will likely need a light hone and pistons will likely need new rings. This would come along with needing top end gaskets all around but not much more. Top end engine work is generally way more intimating before jumping on in. Timing an engine is as simple as following instructions and lining up some marks. The head did have a light wash in the parts washer if you were wondering why it looks different between photos.

Thank you for looking!

20201016_110248_HDR.jpg 20201016_110252.jpg
20201016_110145.jpg 20201016_110220.jpg
20201016_121418.jpg 20201016_121459.jpg packshot-front-teaser-us-loctite-navaljelly-rustdissolver-16oz-teaser-1280x1280.jpg
 
This is beginning to become quite interesting! Not that I would ever want to tackle something like this. The expected transformation is striking!
 
This is beginning to become quite interesting! Not that I would ever want to tackle something like this. The expected transformation is striking!

Thank you for looking and for the comment!

So here it is a few hours later and the Jelly treatment is done.
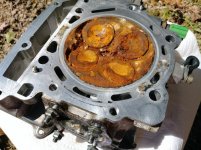
As said earlier I was asking more from the product than it was intended for but it did a great job either way. It accomplished my goal of eliminating some of the damage prior to more disassembly.

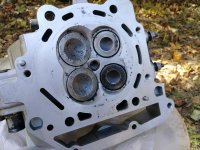
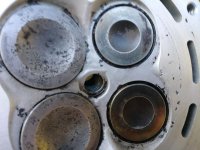
First pictures are of the head after treatment. As you can see the valves are still caked in some rust.
It will be fully disassembled and serviced as mentioned earlier.

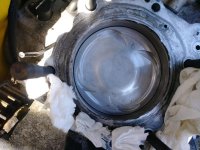
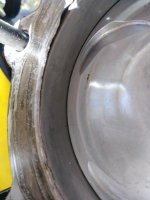
Next you will see the piston after treatment. Looks great in comparison but as you will see in the next pictures there is still more under the surface.
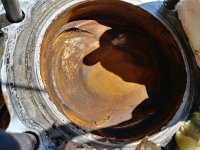
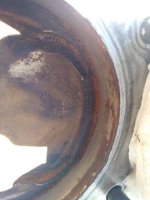
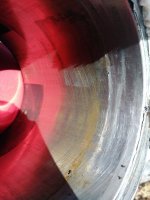
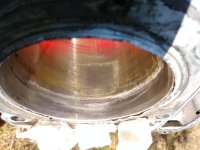
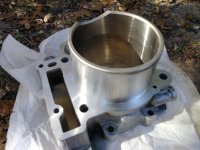
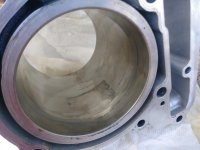
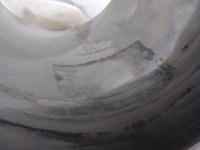
The next pictures show the empty cylinder before cleaning. Note the horizontal line where the piston was resting and some light staining on the bore. Also note the factory crosshatching and no signs of vertical scoring. The low mileage part seems to check out. That or it was rebuilt once already.

Lastly you can see the cylinder and bore after light cleaning. These parts are soon headed to the machine shop. My local shop is able to lightly hone the bore, resurface anything (if needed), blast the outside (to restore new cosmetic condition) and return to me cleaned (and dipped in anti-corrosion solution) parts for a very reasonable price.

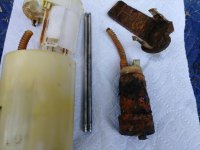
Edit: Added a picture to show the juxtaposition between parts after cleaning and parts that were not cleaned. (Fuel pump)

20201016_150937.jpg 20201016_150830.jpg 20201016_150952.jpg
20201016_150747.jpg 20201016_150732.jpg
20201016_151156.jpg 20201016_151231.jpg 20201016_152033.jpg 20201016_152048.jpg
20201016_154251.jpg 20201016_154202.jpg 20201016_154226.jpg

20201016_175746.jpg
 
Last edited:
When the bore is lightly honed, does the cross hatching get removed and they then re- cross hatch it?

The factory cross-hatching usually gets worn away within a certain number of miles. A light hone would be with the intention of removing only what is on the very surface and creates new hatch marks but doesn't really remove the old ones. A little of both to answer your original question. Seeing factory crosshatching with no noticeable spots that appear to be polished in comparison is a good indication of a young and healthy engine.
 
Back
Top