-
There were many reasons for the change of the site software, the biggest was security. The age of the old software also meant no server updates for certain programs. There are many benefits to the new software, one of the biggest is the mobile functionality. Ill fix up some stuff in the coming days, we'll also try to get some of the old addons back or the data imported back into the site like the garage. To create a thread or to reply with a post is basically the same as it was in the prior software. The default style of the site is light colored, but i temporarily added a darker colored style, to change you can find a link at the bottom of the site.
You are using an out of date browser. It may not display this or other websites correctly.
You should upgrade or use an alternative browser.
You should upgrade or use an alternative browser.
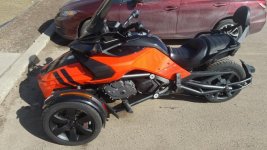
Edmonton F3 Build
- Thread starter llyrad
- Start date
joet82
New member
Almost forgot added the BRP 12v USB kit. I assumed this kit would have all the wiring required to make it plug and play which is why I paid the crazy amount they asked for it, but there is no wiring at all and still had to make a trip to Home Depot for the connectors. My advice to all those that are going to do this project, save the money and buy the plug adaptors from ebay or amazon for less than 10 bucks. The toughest part is finding the cable under the left service panel, it is covered in black tape and zip tied to a larger black cable.
FYI, the wiring for it, according to the instalation instructions is underneath the passenger's seat.
llyrad
New member
3 locations
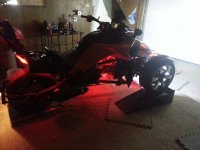
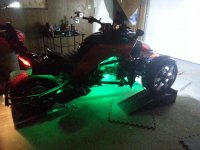
I haven't used the one under the seat (yet), but I think I might put another USB unit there and than run a cable to my saddlebags for more charging ability. I used the connection under the left service panel because of the proximity of where I planned to install the first USB adaptor. I have now used the front Electrical connector (found just above and to the right of the battery) for the LED lighting system, which works great as they only receive power while it is running.
-----------------------------------------
"I hope you had the garage door open while running the engine!"
I confess that I had the garage door shut for the duration of the video as I have it wired to only power when running and it was still midday when I took that video I work for Edmonton Transit System so I have a high tolerance for fumes
FYI, the wiring for it, according to the instalation instructions is underneath the passenger's seat.
I haven't used the one under the seat (yet), but I think I might put another USB unit there and than run a cable to my saddlebags for more charging ability. I used the connection under the left service panel because of the proximity of where I planned to install the first USB adaptor. I have now used the front Electrical connector (found just above and to the right of the battery) for the LED lighting system, which works great as they only receive power while it is running.
-----------------------------------------
"I hope you had the garage door open while running the engine!"
I confess that I had the garage door shut for the duration of the video as I have it wired to only power when running and it was still midday when I took that video
joet82
New member
also, unless you plan on having them painted, check out http://wrapmyspyder.com/vinyl-category/f3-wheel-kits/ for an interesting wat to black out the rims. 
CanAmChris
New member
llyrad, how hard was it to do the Plasti-Dip? Did you remove panels or just tape them off?
llyrad
New member
Remove Panels
For the side panel portion (covering where the accessory headlights) I removed the full side panels and than you remove 2 screws and the grey pieces slide out. 4-5 coats of plasti dip- 30min drying time per layer. Let dry for a day (just to be sure and to let it cure) and put back together. Taking the side panels apart and using Plasti-dip are incredibly easy (and I am not that 'mechanically inclined).
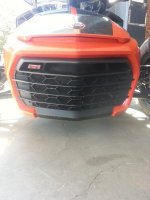
As for the front grill "S" accent. Remove the 4 black screws from the front grill(outside accessible), to remove the whole grill, then there are 10 screws to remove from the removed grill and you have your accent piece, very very easy to do.
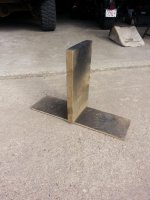
A couple little tips with Plasti-dip, you don't want to touch the pieces at all once you start spraying so I recommend using a stand like the one I made and make sure when you have 360' access to it (I had the stand on a table sitting in middle of garage), so you move around the object rather than moving the object itself. Doing it this way requires no taping at all. Just have the parts resting on the wood and your good to go.
If you need any more specifics shoot me a PM and I will help you out.

llyrad, how hard was it to do the Plasti-Dip? Did you remove panels or just tape them off?
For the side panel portion (covering where the accessory headlights) I removed the full side panels and than you remove 2 screws and the grey pieces slide out. 4-5 coats of plasti dip- 30min drying time per layer. Let dry for a day (just to be sure and to let it cure) and put back together. Taking the side panels apart and using Plasti-dip are incredibly easy (and I am not that 'mechanically inclined).
As for the front grill "S" accent. Remove the 4 black screws from the front grill(outside accessible), to remove the whole grill, then there are 10 screws to remove from the removed grill and you have your accent piece, very very easy to do.
A couple little tips with Plasti-dip, you don't want to touch the pieces at all once you start spraying so I recommend using a stand like the one I made and make sure when you have 360' access to it (I had the stand on a table sitting in middle of garage), so you move around the object rather than moving the object itself. Doing it this way requires no taping at all. Just have the parts resting on the wood and your good to go.
If you need any more specifics shoot me a PM and I will help you out.

12 V USB Question
OK, I just bought a USB Plug and fuse wire from Amazon as I need to connect my GPS. This seems like the perfect spot to install it. I did see the wire inside and now have a silly question. What did you use to make the hole in the cover? I don't want to damage it using the wrong tool/drill bit. Crazy, I know. BTW, the ryde looks awesome!
Thanks!
Almost forgot added the BRP 12v USB kit. I assumed this kit would have all the wiring required to make it plug and play which is why I paid the crazy amount they asked for it, but there is no wiring at all and still had to make a trip to Home Depot for the connectors. My advice to all those that are going to do this project, save the money and buy the plug adaptors from ebay or amazon for less than 10 bucks. The toughest part is finding the cable under the left service panel, it is covered in black tape and zip tied to a larger black cable.


OK, I just bought a USB Plug and fuse wire from Amazon as I need to connect my GPS. This seems like the perfect spot to install it. I did see the wire inside and now have a silly question. What did you use to make the hole in the cover? I don't want to damage it using the wrong tool/drill bit. Crazy, I know. BTW, the ryde looks awesome!
Thanks!
llyrad
New member
No trick to this one.
Nothing fancy for this install (12v plug). Just grabbed a wood bit for the drill that was about the same size as the plug and spun out a hole for it. Although I did have to slowly enlarge it so plug would fit in nice and tight, as there is a rubber washer on it that allows it to be waterproof.
Nothing fancy for this install (12v plug). Just grabbed a wood bit for the drill that was about the same size as the plug and spun out a hole for it. Although I did have to slowly enlarge it so plug would fit in nice and tight, as there is a rubber washer on it that allows it to be waterproof.
Nothing fancy for this install (12v plug). Just grabbed a wood bit for the drill that was about the same size as the plug and spun out a hole for it. Although I did have to slowly enlarge it so plug would fit in nice and tight, as there is a rubber washer on it that allows it to be waterproof.
Thanks!
Thanks. I figured out I'd start with a standard bit then use a round file to get to the right fit. Thanks again!
llyrad
New member
Minor Additions
Instead of using the Brp foglights I just went led lighting at the A frames.

Still haven't gotten around to upgrading the spring to the one BAM used as I am not sure what exactly needs to be done to it (not mechanically handy) but will ask those questions on my trip to Spyderfest 16!
Even with all the lighting I still hit a Coyote at highway speeds this fall in the evening at Highway speeds. Surprisingly little damage to the F3 other than body panels and the front rads considering that Coyote exploded (have pics but very graphic).
The 2015 Trip from Edmonton to New Orleans went very well (over 11000km) other than the extreme heat and the 2 chunks of gravel that put wholes in my drive belt.
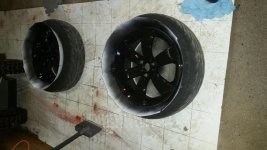
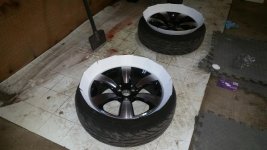
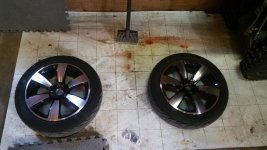
When the weather warms I'll be plasti-dipping the wheels black as I will need to save some money for all my purchases at Spyderfest (first timer, and so far the only Canadian going)
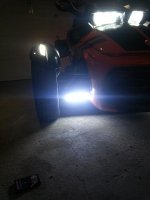
Instead of using the Brp foglights I just went led lighting at the A frames.
Still haven't gotten around to upgrading the spring to the one BAM used as I am not sure what exactly needs to be done to it (not mechanically handy) but will ask those questions on my trip to Spyderfest 16!
Even with all the lighting I still hit a Coyote at highway speeds this fall in the evening at Highway speeds. Surprisingly little damage to the F3 other than body panels and the front rads considering that Coyote exploded (have pics but very graphic).
The 2015 Trip from Edmonton to New Orleans went very well (over 11000km) other than the extreme heat and the 2 chunks of gravel that put wholes in my drive belt.
When the weather warms I'll be plasti-dipping the wheels black as I will need to save some money for all my purchases at Spyderfest (first timer, and so far the only Canadian going)

llyrad
New member
Minor Upgrade
Still snow on the ground here in Northern Alberta, but we had a couple of nice days so I took the F3 into get the recall done for the shock support plate. And I figured while I'm here I upgraded the rear shock to the one designed for 2 up ($210 bucks = to about $170 of your US bucks ) much thicker spring and more coils, noticed a huge difference right away, it sits about the same height but is stiffer on the bumps and keeps it from bottoming out, and got the belt replaced. Now to find the time between snowfalls to get a 1000km on the bike (so it can be adjusted) before I leave for Spyderfest!
Still snow on the ground here in Northern Alberta, but we had a couple of nice days so I took the F3 into get the recall done for the shock support plate. And I figured while I'm here I upgraded the rear shock to the one designed for 2 up ($210 bucks = to about $170 of your US bucks ) much thicker spring and more coils, noticed a huge difference right away, it sits about the same height but is stiffer on the bumps and keeps it from bottoming out, and got the belt replaced. Now to find the time between snowfalls to get a 1000km on the bike (so it can be adjusted) before I leave for Spyderfest!
Still snow on the ground here in Northern Alberta, but we had a couple of nice days so I took the F3 into get the recall done for the shock support plate. And I figured while I'm here I upgraded the rear shock to the one designed for 2 up ($210 bucks = to about $170 of your US bucks ) much thicker spring and more coils, noticed a huge difference right away, it sits about the same height but is stiffer on the bumps and keeps it from bottoming out, and got the belt replaced. Now to find the time between snowfalls to get a 1000km on the bike (so it can be adjusted) before I leave for Spyderfest!
Spyderfeast
Enjoy the the trip. Wish I could join you, but I haven't got my RSS out of storage yet!
Recommended Brand of Plasti Dip?
Your plasti-dip work looks awesome!! I have the exact same colored F3, and hope to do the same black outs you did on the wheels, can am panels and front fender that is grey also. What brand of Plasti- dip did you use, and where did you get it from? I am looking forward to giving that project a try
For the side panel portion (covering where the accessory headlights) I removed the full side panels and than you remove 2 screws and the grey pieces slide out. 4-5 coats of plasti dip- 30min drying time per layer. Let dry for a day (just to be sure and to let it cure) and put back together. Taking the side panels apart and using Plasti-dip are incredibly easy (and I am not that 'mechanically inclined).
As for the front grill "S" accent. Remove the 4 black screws from the front grill(outside accessible), to remove the whole grill, then there are 10 screws to remove from the removed grill and you have your accent piece, very very easy to do.
A couple little tips with Plasti-dip, you don't want to touch the pieces at all once you start spraying so I recommend using a stand like the one I made and make sure when you have 360' access to it (I had the stand on a table sitting in middle of garage), so you move around the object rather than moving the object itself. Doing it this way requires no taping at all. Just have the parts resting on the wood and your good to go.
If you need any more specifics shoot me a PM and I will help you out.

Your plasti-dip work looks awesome!! I have the exact same colored F3, and hope to do the same black outs you did on the wheels, can am panels and front fender that is grey also. What brand of Plasti- dip did you use, and where did you get it from? I am looking forward to giving that project a try
llyrad
New member
Sir, did you use any gloss with your plasti-dip work?
No gloss used, just the flat black.
Similar threads
- Replies
- 4
- Views
- 630
- Replies
- 3
- Views
- 585
- Replies
- 8
- Views
- 3K
- Replies
- 16
- Views
- 4K
- Replies
- 1
- Views
- 300

