Gwolf
Well-known member
This thread has active links to Can Am help videos and previous posts on the Spyderlovers Forum dealing with questions or problems which come up frequently. Click on a link and jump to your answer, or at least more information than you had before.
Click the spoiler buttons to open the subject. Click again to close the subject.
(Continued Next Post)
Click the spoiler buttons to open the subject. Click again to close the subject.
★(1) The cable controlled latches on the seat & frunk. It is a recurring problem if you lock the keys in the frunk or need to get under the seat and the cables have stretched slightly, the ignition key will not open them. There is a whole other section dealing with how to get the seat to release or how to open the frunk when the key will not release the latching mechanism. There are certain things you can do before hand to make out of adjustment latch bolts, stretched cables and whatever else is preventing things that are supposed to open from doing it. If you go ahead before the problems occur and put emergency latch releases on them, The fix should not take more than an hour at most. Doing it now will be better than having to go through the problems of getting the stuck latch open, and then needing to fix it also. How to get a stuck latch to open is one of the most frequently asked questions on the forum.
★(2) The oil drain plugs.The same preemptive strike recommendation goes for them. The drain plugs are in a bad place to begin with. They are upside down and unless you have been turning wrenches for several decades, you will have to stop and think about which way loosens or tightens. Next problem is the plugs have tiny little Allen hex or Torx bits that go in the OEM plugs to turn them, The under side of the engine has a lot of plastic covers in the way, one of the plugs is on a slightly tilted alignment, the little Allen or Torx fittings in the plugs may be stuffed full or hard dried mud or hardened limerock dust so that the tools do not go in deep enough, and visibility under there is not good. The thing to do is before your very first oil change, order the after-market plug set with the large hex heads on them that a socket will fit on. Get the OEM plugs out and drop them in the coffee can where the other stuff you will never use again is stored.
★(2) The oil drain plugs.The same preemptive strike recommendation goes for them. The drain plugs are in a bad place to begin with. They are upside down and unless you have been turning wrenches for several decades, you will have to stop and think about which way loosens or tightens. Next problem is the plugs have tiny little Allen hex or Torx bits that go in the OEM plugs to turn them, The under side of the engine has a lot of plastic covers in the way, one of the plugs is on a slightly tilted alignment, the little Allen or Torx fittings in the plugs may be stuffed full or hard dried mud or hardened limerock dust so that the tools do not go in deep enough, and visibility under there is not good. The thing to do is before your very first oil change, order the after-market plug set with the large hex heads on them that a socket will fit on. Get the OEM plugs out and drop them in the coffee can where the other stuff you will never use again is stored.
★ Current Motorcycle Laws of All 50 States --LINK-- AMA Database
State by state laws of the USA that pertain to motorcycles provided and updated by the American Motorcyclist Association.
The AMA database is the most comprehensive and accurate place to find out about the motorcycle laws in every State. The website asks you to sign in, but you don't have to. All you have to do is, where you fill in the blanks on the main page, just put the State you are researching in the first blank space. All the State laws that apply to motorcycles will pop up for the State you selected just below where you are. It's easy to switch to a different State... put another State in the first blank space. You can filter for specific laws, but there's no need to do that unless you want to.
★ A general guide to the laws of Australia which pertain to motorcycles from the Australian Government Licencing Information Website.
-- LINK - Jump to website
★ Visitor & Tourist Guide to some of the laws and license requirements for Motorcycle Touring in Europe..- LINK - Jump to Website
As stated on the website, be sure to research further the specific laws of the countries you plan to visit.
★ Most other countries have specific laws and provisions for licencing of visitors and tourists. Research the specific countries you wish to visit . The American Embassy in those countries should be able to provide you up to date and accurate information.
★ Introduction and Information on the Motorcycle Safety Foundation - LINK - Go to MSF website
Turn on the sound for your device in order to hear the video sound track.
★ (1) U-Tube Video - Putting emergency release cable on your seat latch-3.24 minutes-- Using Fishing leader
★ (2) U-Tube Video by Keith Johanson forum member how to put emergency release cables
on Frunk and/or Seat Release Latches- 9.36 minutes-- Using Bicycle brake cables
★ (3) U-Tube Video by Martin The Vlogger on removing Passenger Seat for Spyder RT 20+ - 3.04 minutes-- RT 20+ Pax Seat Removal
★ (4) U-Tube Video Spyder RSS seat removal and installation- 6.02 minutes-- Spyder RSS seat removal and installation
★ (5) U-Tube RT Seat Pin Adjustment- 4.54 minutes -- Adjusting RT seat lock pin
★ (6) Removing Seat when the key will not unlatch it. Spyderlovers Forum Thread link, with pictures of latch and many other links, during the entire removal of a seat when the key no longer unlocked it. -- Member Poasttown successfully removes a seat that is locked and key won't work.
★ (7) Another stuck seat that won't unlock thread -- Some useful suggestions on this thread
★ (8) More stuck seat threads -- https://www.spyderlovers.com/thread...a-key-any-hints-on-how-to-get-it-open.147576/
★ (9) And more stuck frunks and seats -- https://www.spyderlovers.com/threads/frunk-and-seat-wont-open.121204/
★ (10) U-Tube Video - Martin The Vlogger gets in a LOCKED FRUNK without any tools. -6.58 minutes.
Best method yet! LINK TO Video- How To Do It!
★ Official BRP Operator's Guide Manuals for Spyder and Ryker, all years, all models. These are for digital downloading in PDF format.
This is the standard Operator Manual, containing all the specifications, explanation of controls, meaning of dash symbols, starting/stopping procedure, trouble shooting guide, and all the other information that is in the Operator Manuals. If you bought used and did not receive the manual, or just want a digital copy for the smart phone, download the correct year and model for your Spyder or Ryker. If you are considering buying a new or used Spyder or Ryker download the manual for it and get all the most important information for the one you are considering.
Click to go to BRP Download Website
International in several languages, current through 2026 models, contains instructions for adjusting dash for MPH or KPH, setting clock, modes, controls, and other information the owner should know. Random Sample Screen Shot of the Owner Guide Index;
★ Official BRP Spyder and Ryker Shop & Repair Manuals Website with manuals listed for most models and years.
--- BRP Manuals This link opens the BRB Spyder & Ryker Manuals website in another tab if you have tabbed browser.
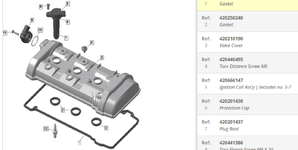
★ On line Parts Manuals for Spyders, Rykers, and many other brands of recreational vehicles. You will need to fill in the information requested, such as model, year, and on or off road. When you have submitted enough information the website will open with illustrations and exploded view of most of the parts categories of your model. the illustrations have identification numbers on them or on arrows pointing to smaller parts that will cross reference to the factory part number for that part. It is international and lists the Japanese, European, North American, etc parts separately.
Parts Manuals
Threads that have information and hints on posting your pictures:
★ (A) Attach files and post Thumbnails on new forum software
Attaching Files and posting thumbnails
★ (B) Trouble up-loading Pictures / Making pictures smaller
Making pictures smaller
★ (C) About re-sizing pictures
About re-sizing pictures
★ (D) Finish up the job...... Properly insert the thumbnail and finishing up by Peter Aawen - step by step. Only one post.
Go to the post on finishing up the job
(Continued Next Post)
Last edited:


