mecsw500
Well-known member
OK, so it was time to install my battery tender's permanent charging connector tail for the winter. Last year I used the clamp tail, but this year I was going to do a neater job as per my motorcycles.
I use this tender I bought off Amazon:
Battery Tender 022-0209-BT-WH Selectable Charger is an AGM/Standard or Gel/Lithium Iron, 12v or 6v Switchable at 4a, Includes Rings & Clips.
I use these on all my motorcycles with the direct battery attachment tails installed, the ones where the rings install directly on the battery. Easy to just connect and disconnect the tender in a few seconds. They have an inline fuse, so they are safe to use.
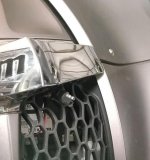
So, on my 2021 RT LTD, I got behind the frunk lining by unzipping it. By undoing the two Torx head screws at the top I removed the battery cover. Next, I undid the battery leads one at a time and fitted the rings from the tail and tightened the leads back up.
Feeling really pleased with myself. I put the cover back and put one of the Torx bolts back on with the tail poking out the side of the cover. All good so far. :thumbup:
Now the disaster, in picking up the second Torx bolt, I dropped it. Down between the frunk surround and the bodywork under the lighting bar it went. :banghead:
Looking in from the sides and the top I could just see it, perched precariously on the framework, way down in the front of the engine. So, a two-minute job took much longer. Off came the service Tupperware cover on the left-hand side. Not enough, I had to take off the main bodywork panel. I got all three push pins off and all the three Torx bolts out. Did the cover want to pop out then? Oh heck no. After thirty minutes of trying and attempting not to break any clips, it finally popped out and I could slide it forwards and off. :gaah:
Could I reach the stupid bolt. Oh no! If I tried to pick it out, I knew it was going to fall down and then I'd have to take the underside panels off. I finally managed to retrieve it with some long nose pliers, sticky duct tape, and a lot of cursing. :yes:
Finally, got the Tupperware back on after much wiggling to get the bottom clip in then getting the top clips in place. Got the push pins back in no problem. Who for the love of all that is holy designed this stuff?
Oh no, two of the Torx bolts were shorter and one was longer, didn't notice that when I took them off. Another ten minutes messing about to get the right bolts in the right holes and then I got the service panel back on. :hun:
So, a simple idiot proof task took over an hour and a half of my arthritic old body crawling around on the garage floor.
Went for a two-hour ride round Utah Lake and back up to home. Some days. hyea:
hyea:
I use this tender I bought off Amazon:
Battery Tender 022-0209-BT-WH Selectable Charger is an AGM/Standard or Gel/Lithium Iron, 12v or 6v Switchable at 4a, Includes Rings & Clips.
I use these on all my motorcycles with the direct battery attachment tails installed, the ones where the rings install directly on the battery. Easy to just connect and disconnect the tender in a few seconds. They have an inline fuse, so they are safe to use.
So, on my 2021 RT LTD, I got behind the frunk lining by unzipping it. By undoing the two Torx head screws at the top I removed the battery cover. Next, I undid the battery leads one at a time and fitted the rings from the tail and tightened the leads back up.
Feeling really pleased with myself. I put the cover back and put one of the Torx bolts back on with the tail poking out the side of the cover. All good so far. :thumbup:
Now the disaster, in picking up the second Torx bolt, I dropped it. Down between the frunk surround and the bodywork under the lighting bar it went. :banghead:
Looking in from the sides and the top I could just see it, perched precariously on the framework, way down in the front of the engine. So, a two-minute job took much longer. Off came the service Tupperware cover on the left-hand side. Not enough, I had to take off the main bodywork panel. I got all three push pins off and all the three Torx bolts out. Did the cover want to pop out then? Oh heck no. After thirty minutes of trying and attempting not to break any clips, it finally popped out and I could slide it forwards and off. :gaah:
Could I reach the stupid bolt. Oh no! If I tried to pick it out, I knew it was going to fall down and then I'd have to take the underside panels off. I finally managed to retrieve it with some long nose pliers, sticky duct tape, and a lot of cursing. :yes:
Finally, got the Tupperware back on after much wiggling to get the bottom clip in then getting the top clips in place. Got the push pins back in no problem. Who for the love of all that is holy designed this stuff?
Oh no, two of the Torx bolts were shorter and one was longer, didn't notice that when I took them off. Another ten minutes messing about to get the right bolts in the right holes and then I got the service panel back on. :hun:
So, a simple idiot proof task took over an hour and a half of my arthritic old body crawling around on the garage floor.
Went for a two-hour ride round Utah Lake and back up to home. Some days.
hyea:
Last edited by a moderator: