• There were many reasons for the change of the site software, the biggest was security. The age of the old software also meant no server updates for certain programs. There are many benefits to the new software, one of the biggest is the mobile functionality. Ill fix up some stuff in the coming days, we'll also try to get some of the old addons back or the data imported back into the site like the garage. To create a thread or to reply with a post is basically the same as it was in the prior software. The default style of the site is light colored, but i temporarily added a darker colored style, to change you can find a link at the bottom of the site.

Ryker rear fender “luggage” provisions

SportsterDoc

New member
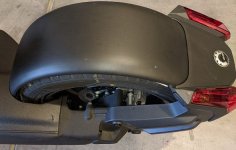
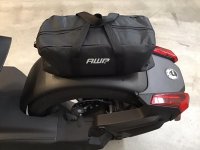
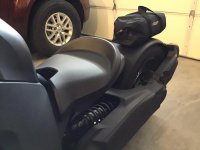
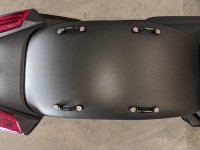
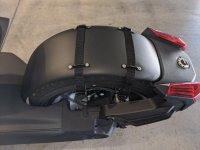
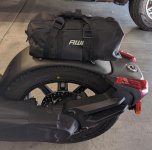
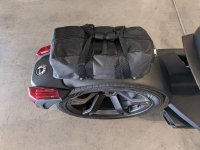
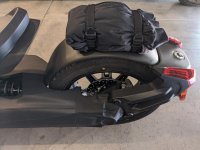
Wanting to be able to strap a small bag (~6x14”) and/or a light weight jacket onto the rear fender, I ordered four black oxide footman’s loops, to mount directly to the plastic fender. Load is not expected to be more than two, perhaps three pounds.

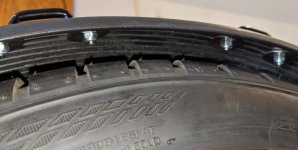
Holes are 1 1/4 inches from the edge of the fender, which fits between structural ribs and are 6 1/8 inches apart going across the fender.

Preparing to use 5 mm flat head screws the holes were drilled to 3/16 inch...allowing enough interference for the screws to thread into the plastic to better hold them in place while adding a washer and then a lock nut.

The second hole for each loop will be drilled after the loops are mounted through the first hole.

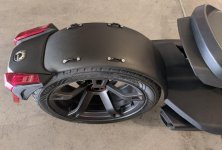
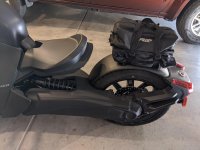
I enjoy custom modifications and want to keep the Ryker more sporty, rather than adding touring luggage.

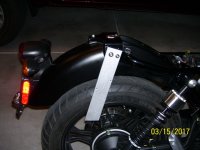
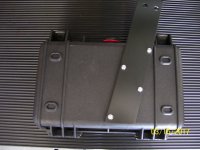
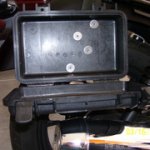
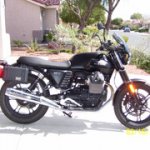
This should be much easier than what I did on the Moto Guzzi:

https://wildguzzi.com/forum/index.php?topic=89090.0

...to be continued
 

Attachments

  • 7097C593-8ECD-4370-BFAD-1E75405F4DA6.jpeg
    7097C593-8ECD-4370-BFAD-1E75405F4DA6.jpeg
    105.8 KB · Views: 82
Have you thought about when you go over any bumps? That area above the plastic fender is clearance for the the rear swing arm. Anything mounted to it could get crushed or impede your shock travel.
 
Have you thought about when you go over any bumps? That area above the plastic fender is clearance for the the rear swing arm. Anything mounted to it could get crushed or impede your shock travel.

Thank you for your concern

1. There is nothing over the rear fender, with a solo seat.
2. Clearances were a consideration for the Moto Guzzi, including opening without contacting mufflers.

This link explains pre-fab preparation

https://wildguzzi.com/forum/index.php?topic=88877.msg1405164#msg1405164
 

Attachments

  • 723C5D46-EFF7-4FEA-8CD1-305387D7CAE3.jpeg
    723C5D46-EFF7-4FEA-8CD1-305387D7CAE3.jpeg
    87.6 KB · Views: 51
  • 6348C250-CA62-4410-AFD0-B23E0D1A6724.jpeg
    6348C250-CA62-4410-AFD0-B23E0D1A6724.jpeg
    99 KB · Views: 45
  • 116858DF-3581-4A7C-AEA9-D32B9F806EAB.jpeg
    116858DF-3581-4A7C-AEA9-D32B9F806EAB.jpeg
    29.4 KB · Views: 502
  • 785FBDB8-8A3D-4CE7-97C5-862A42C64BD0.jpeg
    785FBDB8-8A3D-4CE7-97C5-862A42C64BD0.jpeg
    37.1 KB · Views: 503
Ahh, ok....I didn't know it was a solo seat.

Still, wouldn't getting the max mount extension up behind the solo seat allow for more allowable carrying weight?
 
The Ryker rear fender mounted to the swing arm drive shaft & rear wheel. The Guzzi rear fender is mounted to the frame. Not the same thing.
 
Ahh, ok....I didn't know it was a solo seat.

Still, wouldn't getting the max mount extension up behind the solo seat allow for more allowable carrying weight?

Don’t need to carry much weight, per post one: “ Load is not expected to be more than two, perhaps three pounds.”

I prefer the Ryker’s solo seat appearance.

Footman loops should arrive tomorrow. Expect more photos.
 
The Ryker rear fender mounted to the swing arm drive shaft & rear wheel. The Guzzi rear fender is mounted to the frame...

I mounted the Pelican cases to the frame of the Goose. They were extremely rigid.
My point, or attempted point, is that all clearances and stresses were carefully considered before proceeding with the mod.
 

Attachments

  • CA28318D-E33D-4B65-B6EA-967335C15637.jpg
    CA28318D-E33D-4B65-B6EA-967335C15637.jpg
    44.6 KB · Views: 70
  • 977CDA7B-C3A6-4B57-A24A-CB48B7B4F311.jpg
    977CDA7B-C3A6-4B57-A24A-CB48B7B4F311.jpg
    39.3 KB · Views: 62
Lotsa older 'bikes used to do just that... (think WLA Harley - IIRC the carry rack & rear panniers were all fender mounted?!?) I don't see why it would be too much of an issue for lightweight gear, or hard to do for that matter?! :dontknow:

Be interested to see pics of it being done, as well as the final result! :thumbup:
 
Last edited:
Should receive the footman loops tomorrow.
Just 4 more holes to drill.
Put a putty knife under the fender, should the drill bit break through too far.
 
Loops arrived and installed.
Not much clearance under fender, but sufficient to install SST fender washers and locknuts.
 

Attachments

  • 3-under fender.jpg
    3-under fender.jpg
    42.5 KB · Views: 79
  • 2-footman loops.jpg
    2-footman loops.jpg
    51.6 KB · Views: 72
  • 1-footman loops.jpg
    1-footman loops.jpg
    58.3 KB · Views: 69
  • 4-straps with footman loops.jpg
    4-straps with footman loops.jpg
    54.4 KB · Views: 72
Photos of jacket and/or bag strapped down
 

Attachments

  • 5-bag only.jpg
    5-bag only.jpg
    48.2 KB · Views: 71
  • 6-bag only.jpg
    6-bag only.jpg
    68.3 KB · Views: 59
  • 7-jacket only.jpg
    7-jacket only.jpg
    60.5 KB · Views: 62
  • 8-jacket + bag.jpg
    8-jacket + bag.jpg
    59.8 KB · Views: 64
Loops arrived and installed.
Not much clearance under fender, but sufficient to install SST fender washers and locknuts.

Well done. My only worry is the threaded side of the bolt is near the tire and will get dirty and difficult to remove.
I think I would have flipped the bolts around and had the nuts facing up. Then use castle nuts on the threads to keep it clean looking.
 
Well done. My only worry is the threaded side of the bolt is near the tire and will get dirty and difficult to remove.
I think I would have flipped the bolts around and had the nuts facing up. Then use castle nuts on the threads to keep it clean looking.

Footman loops are designed for flat head screws (3mm hex bit-Allen)
Do not expect to ever remove, but if necessary, spray cleaner and old toothbrush would remove dirt for access by 8mm box wrench.

Fasteners (screws, fender washers & lock nuts) are all stainless steel.
 
i was skeptical of this when i first saw you trying it. looks pretty good tho

Thank you, but this was not much of a challenge. The last 20 years of my different careers was industrial automation (systems integrator-automation house). When I retired 3 years ago, at age 70, the most difficult aspect of retirement was leaving a complete machine shop.
 
Hi SportsterDoc ref plc of bolts , the threads should have been cut flush with castellated nuts , you need a much clearance as possible, but it’s a nice idea and well done regards nico75
 
Hi SportsterDoc ref plc of bolts , the threads should have been cut flush with castellated nuts , you need a much clearance as possible, but it’s a nice idea and well done regards nico75

Considering that the fender does not move in relation to the tire, 19 mm of minimum clearance to tip of screw seems adequate and removing 1-2 mm not worth tire removal.

Screws are A-2 (A2-70) stainless, so filing or cutting with hacksaw would not be easy with tire in place.

To grind off protrusion would require tire removal and heat generated may affect the nylon insert in the locking nuts.

That's my story and I am sticking to it!
 
Back
Top