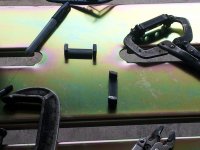
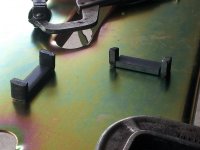
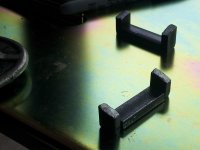
Thanks for that. The outer brackets are designed to have some "spring" action to integrate with the slight movement of the plastic. The way it is designed the more the plastic flexes towards the center of the bike the more load the outer brackets take up. My front hinge was so broke it had 1/4" of play back and forth and was barely held at the top. When I installed the outer bracket and tightened it up it immediately stopped wiggling and was like it had allways been. The outer bracket makes 1/2" of contact on both front and back in a solid area of the case plastic. Longer bolts with shorter heads compensate for the thickness of the outer bracket to make sure both bolt heads do not press against each other with the lid closed. The longer bolt sticks out far enough through the metal bracket so that the inner bracket can be nutted on. The inner bracket makes contact with both the metal plate and the raised and reinforced area beside where the factory metal plate fits. This covers the hinge from outer and inner pressure, making it much stronger than before. The matte black powder coat will not only look natural in place, but the rough friction surface will help to keep it in place. Should never have an issue. I wouldn't throw a bowling ball on the lid to test it, but for normal usage it will help to disperse and distribute the forces that have caused it to break in the past.
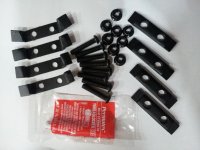
For those of you 2014 RT owners that are wanting to get these on, I will have 4 sets ready for sale by the weekend. Send me a PM and I will invoice you. They are going to run about $65, which includes shipping. They will come with a lifetime warranty against their breakage. There is nothing that can break on them. Title your PM with Side Case Upgrade/Repair Kit.
Obviously, you can wait on Bob's report, but for the 14' RT's I know the kit will fit.

 ray: What have I done??!!?!?:yikes: