-
Ozzie Ozzie Ozzie
2013 RT Ltd Pearl White
Ryde More, Worry Less!
-
 Originally Posted by Peter Aawen
The Spyders use their rear shock as the 'limiting strap', so it's not one of those!
However, I reckon it looks a helluva lot like the 'earth strap' for the radio antenna!  The RT's had their antenna high up there well clear of any real 'metal ground plane' on the back alongside the lid of rear trunk & behind the pillion 'arm-rest' - well, those pads where a pillion passenger might be tempted to put their elbows anyway.... IF they can get them on there!
Sounds (& from the pics, looks like it too!  ) like you're having a lotta fun doing this Mega  Good stuff, keep on at it!  Watching your progress with much interest. 
Thank you, I couldn't figure out what it is. That is exactly ground for antenna as seen on "Electrical Accessories 3" schematics in parts catalogue. I don't have antenna though, or radio. All lost. I have CB module and I don't know what to do with it :P.
I will probably use one of round marine radios when I'll be making my cargo harness but there is not much space in front for that. Oh, will see.
-
Very Active Member
 Originally Posted by megagame
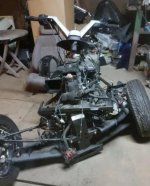
Does anybody know what is this below? It looks like steel strap for ground but it is definetely not that. Maybe something to stop suspension from from going too much down like in racing prerunner trucks  .
I think it is in fact a ground strap, probably to the radio antenna. Did by chance the bike have a CB? If so it probably is the ground strap for the CB antenna.

2014 Copper RTS
Tri-Axis bars, CB, BajaRon sway bar & shock adjusters, SpyderPop's Bumpskid, NBV peg brackets, LED headlights and modulator, Wolo trumpet air horns, trailer hitch, custom trailer harness, high mount turn signals, Custom Dynamics brake light, LED turn signal lights on mirrors, LED strip light for a dash light, garage door opener, LED lights in frunk, trunk, and saddlebags, RAM mounts and cradles for tablet (for GPS) and phone (for music), and Smooth Spyder belt tensioner.
-
Very Active Member
I just saw your comment about the CB module. You'll just have to toss it in the trash unless you install an OEM radio. As far as the radio goes, it was controlled by the left handlebar controls via CANbus so if you do use a marine radio you'll have to figure out some other way to control it.

2014 Copper RTS
Tri-Axis bars, CB, BajaRon sway bar & shock adjusters, SpyderPop's Bumpskid, NBV peg brackets, LED headlights and modulator, Wolo trumpet air horns, trailer hitch, custom trailer harness, high mount turn signals, Custom Dynamics brake light, LED turn signal lights on mirrors, LED strip light for a dash light, garage door opener, LED lights in frunk, trunk, and saddlebags, RAM mounts and cradles for tablet (for GPS) and phone (for music), and Smooth Spyder belt tensioner.
-
 Originally Posted by IdahoMtnSpyder
I just saw your comment about the CB module. You'll just have to toss it in the trash unless you install an OEM radio. As far as the radio goes, it was controlled by the left handlebar controls via CANbus so if you do use a marine radio you'll have to figure out some other way to control it.
I'm in struggle here. I have option to buy used radio but it will be more expensive than new branded marine radio. And I don't have radio controller for passenger. And oem radio only has ... radio, right? Marine solutions have already built-in options to use bluetooth, usb, spotify etc. But, no remote control through cable, only remote pilot which passenger will lose in no time. Or, i need to 3d print housing for the pilot and that would actually work fine.
Another problem is, as you said, no control through multiswitch. Creating can reader for radio and controlling it that way would be PITA. I've never had radio on my bikes before, so I'm not convinced it is so important to have it, or even have control through multiswitch. I need to put something there, start using it and check afterwards what is working for me and what I want to change. Now it is only theory if I'm not riding.
-
Very Active Member
The OEM radio has several world region options but I don't know what happens with all the bands when a region other than US is selected. The US bands are FM, AM, iPod, Aux, Weather, and CB if a CB is connected. In the grand scheme of FM radios, the BRP radio's ability to clearly pull in stations has been the subject of much criticism. If for you a radio is low priority then go with the marine radio, or even rely on the radio in Bluetooth helmet headsets. Your other challenge will be to find a usable place to mount a marine radio if you need to access its front panel controls. The OEM is mounted under the right side body panel under the passenger hand grip.

2014 Copper RTS
Tri-Axis bars, CB, BajaRon sway bar & shock adjusters, SpyderPop's Bumpskid, NBV peg brackets, LED headlights and modulator, Wolo trumpet air horns, trailer hitch, custom trailer harness, high mount turn signals, Custom Dynamics brake light, LED turn signal lights on mirrors, LED strip light for a dash light, garage door opener, LED lights in frunk, trunk, and saddlebags, RAM mounts and cradles for tablet (for GPS) and phone (for music), and Smooth Spyder belt tensioner.
-
 Originally Posted by IdahoMtnSpyder
The OEM radio has several world region options but I don't know what happens with all the bands when a region other than US is selected. The US bands are FM, AM, iPod, Aux, Weather, and CB if a CB is connected. In the grand scheme of FM radios, the BRP radio's ability to clearly pull in stations has been the subject of much criticism. If for you a radio is low priority then go with the marine radio, or even rely on the radio in Bluetooth helmet headsets. Your other challenge will be to find a usable place to mount a marine radio if you need to access its front panel controls. The OEM is mounted under the right side body panel under the passenger hand grip.
I appreciate your help, it allows me to have better understanding of the system.
Having some space for radio is my biggest issue. I don't see any place to do that, especially if radio will be with built-in amplifier. Also, branded marine radio is usually quite expensive and this is another problem.
Another option is to buy small class D amplifier, put it where oem radio was and allow connection through jack audio connector in front and back. That would allow to use MP3 player or bluetooth transmitter for cars both for driver and passenger. I could also use phone connected through jack and buy cheap 5$ bluetooth controller mounted on steering wheel. Loosing that would not be an issue.
I think I will go that route since there is no space for marine radio.
BTW there is a solution for F3 to put radio controller in center of handlebar and amplifier in front trunk. This makes sense because controller itself is small and big amplifier is hidden.
Thanks again
-
-
-
-
megagame, thank you very much for this very informative series of posts. Stay safe and continue the good work.
Eckhard
Spyder RT Ltd, 2011
-
 Originally Posted by Eckhard
megagame, thank you very much for this very informative series of posts. Stay safe and continue the good work.
Hopefully this will be of some help or encouragement to anyone trying to fix/modify their spyder.
Stay safe.
-
Customer Support
 Originally Posted by megagame
I've bought this one for 2,5k USD. My goal was to keep within 5k USD but ABS unit did not allow that. 
To be honest when I bought this spyder I didn't know how many things could fail because of bad engineering. Normally I don't use cars/bikes with too much electronics. I have older Hilux, Honda from 93 and old bikes like KLX 650 from 94. They all run great. If something happens you can fix them with simple tools. This is not the case with spyder and this is bad judgement from my side. But, I still want to learn how things are done and want to be first to fix problems which are giving people headache.
Also, I hate when things (expensive and cheap) are thrown to garbage.
Great project, thank you for your contribution to the community.
I understand almost none of it but I'm reading with fascination anyway.
Last edited by LeftCoast; 12-14-2020 at 01:49 PM.
2015 Pearl White RTL
Baja Ron Sway Bar
Russell Day Long Seat
Strobe Brake Light
Mirror Mount Turn Signal Indicator

-
Very Active Member
 Originally Posted by megagame
I have a small favour for someone with automatic rear air shock adjustment. I don't have a switch and I'm not sure which one I should buy.
Is up/down swich for compressor a momentary switch for both up and down option?
If one of rear cases is opened will suspension go up or down?
When going up/down with one of rear cases opened, will opened state be indicated in cocpit?
Schematics are showing something strange.
2 and 6 goes to cocpit.
3 - case switches resistor
1 - "down" resistor
5 - "up" resistor
Free and Up option seems to check whether rear cases are opened, but not Down option. It doesn't make sense.
Either case switches are always active, and then it doesn't make sense to connect them through compressor swich, or they are not active when up/down is pressed.
What year is the RT you're working on? If you mentioned it I can't find it. How about adding it to your signature block? The wiring diagram for 2010 is different from the one you show. The 2014diagram is the same as what you show except Up is Hard and Dwn is Soft. On the 2010 the circuit from pin 3 is closed to ground only when the switch is in the Free position and a case lid is open. In 2010 each case switch has a resistor across the switch but for 2014 there is one resistor in that line ahead of all three case switches. So for 2010 the case switches have no affect when choosing either hard or soft. For 2014 they would have an affect only when Hard is pressed. Pin 2 & 6 go to the cluster so obviously the cluster monitors the current draw through that line to determine what action is to be taken.
The switch is a double pole momentary on/off/momentary on configuration. That much I can tell you. I haven't checked if the lids being open affect the compressor operation or not, but I'm going guess right now, no. If you aren't aware the compressor will run, or the air relief valve open, only when the Spyder is running and in gear.

2014 Copper RTS
Tri-Axis bars, CB, BajaRon sway bar & shock adjusters, SpyderPop's Bumpskid, NBV peg brackets, LED headlights and modulator, Wolo trumpet air horns, trailer hitch, custom trailer harness, high mount turn signals, Custom Dynamics brake light, LED turn signal lights on mirrors, LED strip light for a dash light, garage door opener, LED lights in frunk, trunk, and saddlebags, RAM mounts and cradles for tablet (for GPS) and phone (for music), and Smooth Spyder belt tensioner.
-
Very Active Member
2013 STL SE5 BLACK CURRANT
SpyderPop's: LED bumpskid
SmoothSpyder: dualmode back rest
T r * * LED:foam grip covers, Tricrings, FenderZ,
brake light strips, wide vue mirrors
Rivico SOMA modulation brake leds
sawblade mowhalk fender accents
minispyder dash toy
Lid lox
KradelLock
Pakitrack
GENSSI ELITE LED H4 headlights
FLO (Frunk Lid Organizer)
BRP fog lights, trailer hitch
SENA 20S EVO
-
Very Active Member
-
Very Active Member
 Originally Posted by megagame
I have a small favour for someone with automatic rear air shock adjustment. I don't have a switch and I'm not sure which one I should buy.
Is up/down swich for compressor a momentary switch for both up and down option?
If one of rear cases is opened will suspension go up or down?
When going up/down with one of rear cases opened, will opened state be indicated in cocpit?
Schematics are showing something strange.
2 and 6 goes to cocpit.
3 - case switches resistor
1 - "down" resistor
5 - "up" resistor
Free and Up option seems to check whether rear cases are opened, but not Down option. It doesn't make sense.
Either case switches are always active, and then it doesn't make sense to connect them through compressor swich, or they are not active when up/down is pressed.
I just tried it. The best I could tell the compressor works even when the case lid is open. Because of the automatic system the rear moves very little from a set position when the button is pressed either way, but it looked to me like it did move. The engine noise covered up the compressor and air relief valve sound so much I couldn't hear if they functioned or not. The indicator bars on the cluster moved also.
The case open warning shows even when the switch is pressed. The hard/soft indicator bar moves even with the case open icon at the bottom of the screen. The full screen case open warning stayed even when the switch was pressed.
Hope all this helps!

2014 Copper RTS
Tri-Axis bars, CB, BajaRon sway bar & shock adjusters, SpyderPop's Bumpskid, NBV peg brackets, LED headlights and modulator, Wolo trumpet air horns, trailer hitch, custom trailer harness, high mount turn signals, Custom Dynamics brake light, LED turn signal lights on mirrors, LED strip light for a dash light, garage door opener, LED lights in frunk, trunk, and saddlebags, RAM mounts and cradles for tablet (for GPS) and phone (for music), and Smooth Spyder belt tensioner.
-
 Originally Posted by IdahoMtnSpyder
What year is the RT you're working on? If you mentioned it I can't find it. How about adding it to your signature block? The wiring diagram for 2010 is different from the one you show. The 2014diagram is the same as what you show except Up is Hard and Dwn is Soft. On the 2010 the circuit from pin 3 is closed to ground only when the switch is in the Free position and a case lid is open. In 2010 each case switch has a resistor across the switch but for 2014 there is one resistor in that line ahead of all three case switches. So for 2010 the case switches have no affect when choosing either hard or soft. For 2014 they would have an affect only when Hard is pressed. Pin 2 & 6 go to the cluster so obviously the cluster monitors the current draw through that line to determine what action is to be taken.
The switch is a double pole momentary on/off/momentary on configuration. That much I can tell you. I haven't checked if the lids being open affect the compressor operation or not, but I'm going guess right now, no. If you aren't aware the compressor will run, or the air relief valve open, only when the Spyder is running and in gear.
I'm sorry, I've forgot to mention most important thing. It is 2011. It is slightlu different than 2010. On 2011 there is one resistor for all case switches.
I've tried to find datasheet for compressor switch based on numbers but it seems it is special production batch (starts with VXD).
-
 Originally Posted by IdahoMtnSpyder
I just tried it. The best I could tell the compressor works even when the case lid is open. Because of the automatic system the rear moves very little from a set position when the button is pressed either way, but it looked to me like it did move. The engine noise covered up the compressor and air relief valve sound so much I couldn't hear if they functioned or not. The indicator bars on the cluster moved also.
The case open warning shows even when the switch is pressed. The hard/soft indicator bar moves even with the case open icon at the bottom of the screen. The full screen case open warning stayed even when the switch was pressed.
Hope all this helps!
Thank you so much for checking.
This means that case resistors are used while compressor switch is used and shematics might be wrong.
Connections according to state and final resistance in schematics:
FREE - 2-3. Resistance 1500 Ohm
UP - 2-3, 6-5. Resistance 1/1500 Ohm + 1/825 Ohm = 1/X -> Final resistance: 532.26Ohm
DOWN - 2-1. Resistance 18200 Ohm.
There is no connection with case resistors when it goes down, but your description indicates there is.
Normally momentary carling switch works that way:
Free - nothing connected
On1 - 2-1, 5-4
On2 - 2-3, 5-6
If case resistor is always checked, it may be connected directly to connector 2. Down resistor to 3, up resistor to 1. There is no need for double pole.
Typical momentary double pole carling switch does not use separate connectors for led light. LEDs are between 7 (-) and 1 or 3. Led introduces additional resistance so I need to take it into account.
So, probably final setup should be:
- cocpit to 5
- case resistor to 5
- up to 6, down to 4 (or vice versa)
- led + 2
- led - 7
I will check it probably during coming weekend and let you know.
-
I've started on fixing plastic parts. So many of them are broken and I need to "weld" them.
This is first time I'm doing plastic welding so this should be fun.
I've started with test part from my wife's scooter. First I used hand-held soldering iron. To penetrate two pieces and mix melted plastic together I am making deep scratches first (not so deep to make a hole).
After that I'm trying to make rough surface a little bit more flat. I'm moving the tool constantly and trying not tu burn the plastic. It needs to be melting but not burning (no smoke!).
Once whole area is less rough and it is quite how it's easier to melt it slightly with fast moves. I'm using my finger to make surface even flatter - it's very hot so I'm suggesting using something else and melted plastic can stick to fingers .
Always both sides need to be fixed that way. For best results it is best to add more plastic to broken area with same parameters, ex. from another part. I didn't do that on test piece to check it strength after it's cooled.
I've put fixed part in vice and measured strength used to brake the piece. It was aroung 9 KG when it broke and the piece was bent so much that I'm curious if it would brake anyways if new.
One important thing to note is that I didn't try to break the piece by stretching it. I actually used worst case scenario which is pushing end of the piece like one would do to break branch on tree.

I've checked where it is broken and it seems pieces where I was welding plastic got separated - probably because of too little/to much heat. Or maybe I should have cleaned it with acetone instead of welding very dirty piece .

Now test run is over and I need to fix my left (or right?) case. I have a donor for that, another broken case from same side (came with spyder).
Part which holds pin securing case from opening is broken. Hot knife, sanding paper, and hole for new piece is done, and replacement is prepared.
This time I've cut small 2mm wide straps from donor part to add more "meat". Also, I've used small hobby torch instead of soldering iron. That way it is easier to see when color changes and plastic starts to melt and not burn. I stull used my fingers to cool down and flatten some areas, fortunately without burning myself.

In general I was surprised how easy it is to weld plastic parts.
But, it is essential to use same type of plastic as a donor. There can be small difference but exact comparrision chart one should find by google.
Cases are made from PP-GF30 (Glass fiber-reinforced polypropylene with 30% fibers). I think all PP-GF** could be mixed but it's best to double check before welding or even do a test weld in place not visible.
[EDIT] I've continued to fix more damaged parts and I've bought additional sticks used for PP-GF welding. My observation:
- Soldering iron is best to make deep "scratches" and therefore bond plastics from two parts in deep groves. with torch it is not so easy.
- Torch helps to keep high temperature of bigger area and you can change shape of this area with fingers or flatten it to make it look better.
- When introducing more plastic (straps) from donor part into welded area it is best to use soldering iron because you can use one hand to heat up parts and use force to combine them together.
- You need to watch out to not overheat bigger area because it could collapse when you use force from soldering iron. If bigger area starts to get too hot on both sides, you can always wait for part to cool down, or use water to cool it, or support welded area by holding ex. metal plate under it.
- Even if you buy proper sticks for welding you part it doesn't mean they will melt in exactly same temperature and same way. In my case stics started to melt sooner that parts from spyder. When sticks were already too hot and started burning, spyder parts were not melting yet. Because of that it was harder to bond these two and quality of bond was poor. If I used donor part with exactly same type of plastic, cut strips from it and use that for additional "meat", that was easier. Conclusion: Don't throw away damaged parts because you never know when you'll need them.
-
Very Active Member
Holy Moly.
I'm in awe at megagame's skill set.
If it ain't broke, don't break it.
IBA #47122
2020 RT Limited Asphalt Grey
-
Very Active Member
Hey mega, have you tried mixing ABS chips with acetone as has been suggested here on the forum to use as a paste glue? Most of the plastic on a Spyder is ABS and others here have said the acetone/shavings thing works good.

2014 Copper RTS
Tri-Axis bars, CB, BajaRon sway bar & shock adjusters, SpyderPop's Bumpskid, NBV peg brackets, LED headlights and modulator, Wolo trumpet air horns, trailer hitch, custom trailer harness, high mount turn signals, Custom Dynamics brake light, LED turn signal lights on mirrors, LED strip light for a dash light, garage door opener, LED lights in frunk, trunk, and saddlebags, RAM mounts and cradles for tablet (for GPS) and phone (for music), and Smooth Spyder belt tensioner.
-
Very Active Member
 Originally Posted by megagame
Thank you so much for checking.
This means that case resistors are used while compressor switch is used and shematics might be wrong.
I don't think so. Scratch my comments above about the test. I did it wrong. The engine has to be running, trans not in neutral, brake pressed, and park brake off. This time I heard the compressor and release valve operate.
The compressor and air release valve do not function directly in response to pushing the switch. You have to push the switch momentarily for each step change in the shock setting. In other words if you want to move up three bars you have to press the up, or hard, switch three times. After a few seconds the cluster sends the signal to make the change. Pushing and holding the switch is the same as pushing and releasing one time. The case open warning does not show when the down button is held down. It will show when the up button is held down. As soon as the down button is released the warning shows. In practicality this does not matter since the warning does not show continuously anyway and there is no reason to hold the button down.
Hope this helps!

2014 Copper RTS
Tri-Axis bars, CB, BajaRon sway bar & shock adjusters, SpyderPop's Bumpskid, NBV peg brackets, LED headlights and modulator, Wolo trumpet air horns, trailer hitch, custom trailer harness, high mount turn signals, Custom Dynamics brake light, LED turn signal lights on mirrors, LED strip light for a dash light, garage door opener, LED lights in frunk, trunk, and saddlebags, RAM mounts and cradles for tablet (for GPS) and phone (for music), and Smooth Spyder belt tensioner.
-
-
The case open warning does not show when the down button is held down.
Thank you for explenation. I missed that part - don't know why. And I assumed light were showing open cases all the time. Sorry for misunderstanding.
This would mean that cocpit can recognize state when up is pressed and and cases are open but we don't know if it would work when down is pressed and cases are opened. I need to check that.
It is not a problem if it would not recognize two resistors connected in parallel, in the end it doesn't make sense to have spyder running and in gear and have cases open . Still, I'm quite curious if it will work.
Posting Permissions
- You may not post new threads
- You may not post replies
- You may not post attachments
- You may not edit your posts
-
Forum Rules
|