|
-
Registered Users

 Easy mount for new 2014 RT for aftermarket horn like Stebel or Wolo Big Boy etc Easy mount for new 2014 RT for aftermarket horn like Stebel or Wolo Big Boy etc
I wanted to pass along an easy way to mount a new aftermarket horn to your 2014 Spyder RT. They now have room on the left side to make it easy to replace.
These horns are sold at most automotive stores or online for as low as $29. Some of the higher end ones they recommend getting the harness kit which will wire directly to your battery which are $25-35. I chose to try mine with the stock wiring for now as I didn't feed like running the wire harness at the moment.
spyder-horn-wolo.jpg
This picture will show the cut out on the top left designed to work well with this bolt setup I am about to show.
This setup consists of one M8-1.25 x 30 bolt, two M8-1.25 Nuts and two 5/16" Lock Washers with External tooth. (This stuff is less than $5.00 from Lowes)
spyder-horn-bolt-setup.jpg
Here it is mounted to the existing horn located on the left side.
spyder-horn-bolt-setup-mounted.jpg
Here is the horn mounted to the spyder with this bolt/nut setup.
spyder-horn-bolted-up.jpg
Very easy and quick! Enjoy!
** Loving my 5th Can-Am Spyder since 2007! **

-

Very Nice. A lot easier than the pre-14's for sure.

-

You can also use the existing horn bracket, mount it to the bad boy then use the same bolt onto the bike.
-
Very Active Member


 Originally Posted by spyder-dude

I wanted to pass along an easy way to mount a new aftermarket horn to your 2014 Spyder RT. They now have room on the left side to make it easy to replace.
These horns are sold at most automotive stores or online for as low as $29. Some of the higher end ones they recommend getting the harness kit which will wire directly to your battery which are $25-35. I chose to try mine with the stock wiring for now as I didn't feed like running the wire harness at the moment.
This picture will show the cut out on the top left designed to work well with this bolt setup I am about to show.
This setup consists of one M8-1.25 x 30 bolt, two M8-1.25 Nuts and two 5/16" Lock Washers with External tooth. (This stuff is less than $5.00 from Lowes)
Here it is mounted to the existing horn located on the left side.
Here is the horn mounted to the spyder with this bolt/nut setup.
Very easy and quick! Enjoy!
Does the existing wiring hook up directly or do you need to remove the connectors and put new ones on? How much louder do you think it is?
-
-
Very Active Member


Cool, thanks for sharing!
-
Very Active Member


Are you running a relay? There may be to much draw on the system without the relay and inline fuse?
Keep up updated on how its working for you.
Too bad we have a 2011 RTS. Dont have that much room.
Sent from my SCH-I545 using Tapatalk
2007 M109R LE - To many MODS to list. Its cheaper that way!!!
-
Very Active Member

-
-

the existing horn connections will work with a standard relay. Then all you have to do is run hot wire in an out the remaining relay posts and a ground to the horn.
-
-
Registered Users


Bob,
This will show the relay and wiring kit.
http://www.twistedthrottle.com/plug-...isted-throttle
I actually just wired to the exact same wires as the stock horn and didn't use the wiring harness/relay for right now. It seems to work just fine.
** Loving my 5th Can-Am Spyder since 2007! **

-

Thanks for the link! 
-
Very Active Member


Finally got around to installing mine today. Used existing wires and no relay. I used the existing bracket, just had to open up the hole a bit for the bolt from the horn to go though it. I did a SPL meter with my phone and it did not get any louder according to the app. Now its an app on my phone and that could very well be why it doesn't read. I put it the same distance away (not measured, but about 8 feet away from bike on my steps in my garage) and in the same spot. It sounds louder to me, but that could be because its a different sound than the original. Instructions say to mount it upright (very tight if you do that). I see you mounted yours sideways spyder-dude. At least it looks that way in last pic. You think that is going to be an issue? Ultimately I may make a bracket to move it down and toward the front, there is plenty of space down there. Will most likely have to extend the wires as well as mine are a little short. I am not sure if installing the relay will make it louder or not.
Edit: I had used one SPL app and it only saved the highest spl and it would not do a log. It registered 74db on it. I used a different one to take the log. I just went back out to try the original one again and it read 86db. So it did get louder. Again, this is an app on a phone, so it probably is not a good judge.
Last edited by Hawk; 03-11-2014 at 05:15 PM.
-
-
Very Active Member


 Originally Posted by stevedfive

Nice stevedfive!!! Do you have a pic of the bracket you made? That is exactly what I am talking about. Did you have to extend your wiring? Use the relay?
-
Very Active Member


I see the wire loom where you extended the wires. Did you use the relay? Is that just a right angle bracket?
-

I bent the existing bracket 90 degrees and drilled the hole to fit the bolt. It tucks in perfect and faces forward. I used the relay and ran it up to the space behind the trunk, under the black plastic cover, to protect it from the weather.
relay.jpg
-
Very Active Member


 Originally Posted by stevedfive

I bent the existing bracket 90 degrees and drilled the hole to fit the bolt. It tucks in perfect and faces forward. I used the relay and ran it up to the space behind the trunk, under the black plastic cover, to protect it from the weather.
relay.jpg
Nice. I will do this after I get back from Daytona. Leaving tomorrow. I want to run the relay, although it seems to do well without it.
-
Very Active Member


If you get a chance, can you tell me how you wired it all up? I see the existing horn wires run to the wire loom, assume they go back to the relay, etc.
Edit: I assume you did it this way:

If so, where did you ground to frame?
Last edited by Hawk; 03-12-2014 at 12:01 PM.
-

I just ran the wires according to the instructions that came with the horn.
-
formerly pman2011

 Horn wiring Polarity Horn wiring Polarity
I'm installing my Stiebel horn and need some help determining which wires are positive and negative. The wires that connect to the factory horn are Light Blue/Orange stripe and Green/White stripe.
Can someone let me know which of these wires they connected to the positive and negative terminals on their horn?
Thanks in advance
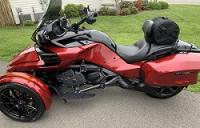
[B]  2018 Intense Red F3T
 (See About Me under My Profile for mods)
2010 Timeless Black RT-622 Trailer
2014 Timeless Black RTS-SE6, 34,300 Miles, traded May 2019
2011 Timeless Black RTS-SE5, 15,180 Miles, traded April 2014
-

 Originally Posted by spyder-dude

I wanted to pass along an easy way to mount a new aftermarket horn to your 2014 Spyder RT. They now have room on the left side to make it easy to replace.
These horns are sold at most automotive stores or online for as low as $29. Some of the higher end ones they recommend getting the harness kit which will wire directly to your battery which are $25-35. I chose to try mine with the stock wiring for now as I didn't feed like running the wire harness at the moment.
spyder-horn-wolo.jpg
This picture will show the cut out on the top left designed to work well with this bolt setup I am about to show.
This setup consists of one M8-1.25 x 30 bolt, two M8-1.25 Nuts and two 5/16" Lock Washers with External tooth. (This stuff is less than $5.00 from Lowes)
spyder-horn-bolt-setup.jpg
Here it is mounted to the existing horn located on the left side.
spyder-horn-bolt-setup-mounted.jpg
Here is the horn mounted to the spyder with this bolt/nut setup.
spyder-horn-bolted-up.jpg
Very easy and quick! Enjoy!
Im probably an idiot for not knowing how to know this. But what Tupperware has to be removed to get to the horn on the 2014 RT?
-
Very Active Member

 Baloo is my name. Spyders are my game. Well, it's a doo-bah-dee-doo, yes, it's a doo-bah-dee-doo, I mean a doo-bee, doo-bee, doo-bee, doo-bee, doo-bee-dee-doo. And, well, now. Ha ha! What have we here?
2020 Petrol Blue Metallic RTL
 Posting Permissions
- You may not post new threads
- You may not post replies
- You may not post attachments
- You may not edit your posts
-
Forum Rules
|


 Reply With Quote


 Thanks for posting this information!

 Let's see, wolo horn, utopia backrest. Then there is the tri axes bars already installed. Spyder cover due in this week also.
  She better not look at this site.
  I be in trouble.
  Tom
Tom 
 )
)


 Baloo is my name. Spyders are my game. Well, it's a doo-bah-dee-doo, yes, it's a doo-bah-dee-doo, I mean a doo-bee, doo-bee, doo-bee, doo-bee, doo-bee-dee-doo. And, well, now. Ha ha! What have we here?
