RICZ
New member
Like a lot of you with motorcycles, I'm thinking up things to do on mine during these weird times. Using the motorcyclist's favorite motto; Well enough should never be left alone, I commenced with The Horn Project.
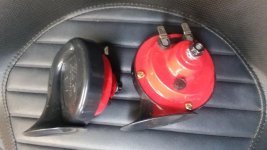
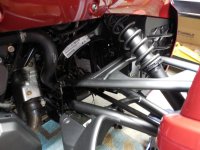
Not liking the anemic single stock horn on my Spyder, I waned to install louder dual horns, that should be simple I thought. I'll remove the stock horn and place the new pair in its location. I thought wrong! The stock horn is deep in the Dark Hole of Calcutta past the right front wheel and extracting it was a challenge, necessitating getting the bike on the lift and operating from under it. Fortunately, I like challenges.
When I had that horn removed, I tried to see how I'd get the new pair into that space. No can do! I had to invent another location. You'd think something as large as the Spyder is, there'd be lots of places for a pair of horns. Nope!
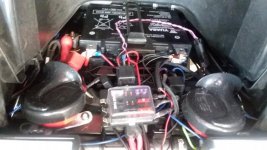
Spyders have a front trunk we call the frunk and when its bin is lifted out, the battery and two fuse boxes can be accessed. Under the fuse boxes was just enough space to fit the horns, but it would be another challenge. Did I tell you I like challenges? Not only did the horns need to clear the bin, but there's the relay to consider as well. One should always energize more powerful horns through a relay.
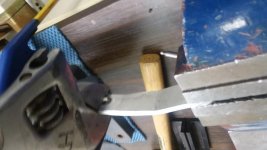
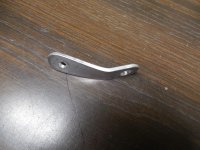
The first task was to make the brackets that will support the horns. There were hours spent twisting and bending to get each horn snuggled into its recess. Luckily, there were holes in the bike on each side that could be used to fasten the brackets to the bike, once I tapped threads into them. That was the easiest part of the project.
Also easy, was locating the relay - whew! Once those three were in place, all that was left was the wiring. That was another challenge as space was extremely tight. Did I tell you....yeah, I did. I gave the horns a test beep and boy did they beep. I replaced the frunk bin, closed the lid and......well, I'm looking for other things to do on the Spyder and finding them. It's therapeutic to polish chrome, so I got me some therapy.
Not liking the anemic single stock horn on my Spyder, I waned to install louder dual horns, that should be simple I thought. I'll remove the stock horn and place the new pair in its location. I thought wrong! The stock horn is deep in the Dark Hole of Calcutta past the right front wheel and extracting it was a challenge, necessitating getting the bike on the lift and operating from under it. Fortunately, I like challenges.
When I had that horn removed, I tried to see how I'd get the new pair into that space. No can do! I had to invent another location. You'd think something as large as the Spyder is, there'd be lots of places for a pair of horns. Nope!
Spyders have a front trunk we call the frunk and when its bin is lifted out, the battery and two fuse boxes can be accessed. Under the fuse boxes was just enough space to fit the horns, but it would be another challenge. Did I tell you I like challenges? Not only did the horns need to clear the bin, but there's the relay to consider as well. One should always energize more powerful horns through a relay.
The first task was to make the brackets that will support the horns. There were hours spent twisting and bending to get each horn snuggled into its recess. Luckily, there were holes in the bike on each side that could be used to fasten the brackets to the bike, once I tapped threads into them. That was the easiest part of the project.
Also easy, was locating the relay - whew! Once those three were in place, all that was left was the wiring. That was another challenge as space was extremely tight. Did I tell you....yeah, I did. I gave the horns a test beep and boy did they beep. I replaced the frunk bin, closed the lid and......well, I'm looking for other things to do on the Spyder and finding them. It's therapeutic to polish chrome, so I got me some therapy.