• There were many reasons for the change of the site software, the biggest was security. The age of the old software also meant no server updates for certain programs. There are many benefits to the new software, one of the biggest is the mobile functionality. Ill fix up some stuff in the coming days, we'll also try to get some of the old addons back or the data imported back into the site like the garage. To create a thread or to reply with a post is basically the same as it was in the prior software. The default style of the site is light colored, but i temporarily added a darker colored style, to change you can find a link at the bottom of the site.

Synthia the SpYder mods....Let the farkling begin !

robtdonna

New member
Yeah named the SpYder - "Synthia". So, first round:

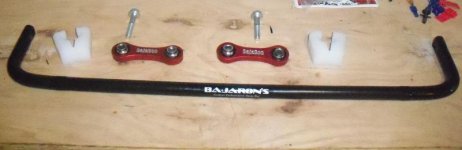
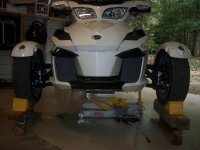
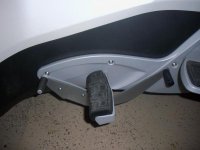
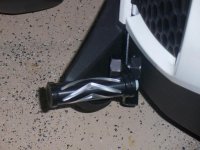
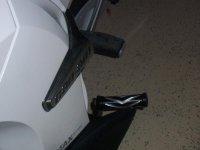
1) Spyderpops rockguard, there are paved roads throughout where I live except for an 800 foot stretch to access my property. So before I ever rode it, (trailered it home), I installed this, cheap insurance. BTW its a 10 mm socket/wrench to remove the nuts from the stock belt guard.

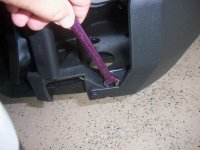
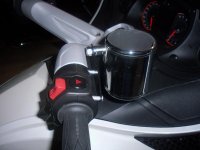
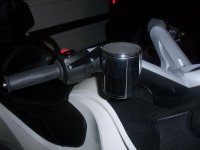
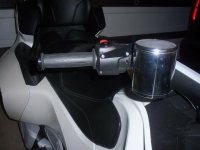
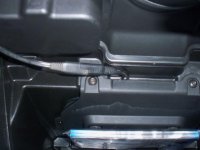
2) Quick disconnect pigtail for my trickle charger. Big believer in these, have had on previous two wheelers and really extends life of battery. Come home, open frunk and plug in. Easy-peasy.

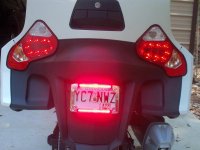
3) Chrome LED license plate frame. THIS HAS TWO SETTINGS ONE FOR RUNNING LIGHTS AND ONE FOR BRAKE LIGHTS. Its too low IMO for brake lights but I wanted the brightness so wired the brake light side to the plate light. Much more visible. A high mount brake light will come in the future.

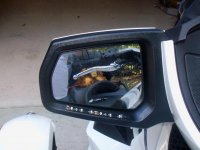
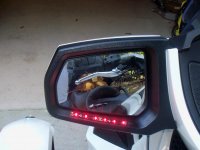
4) LED strip turn signals on mirrors. A four inch LED strip on the bottom of the mirror. Hard to see the green indicator during the day and at night gives additional visibility. Worse part of install was removing and re-installing the mirrors. I am going to fix that mickey mouse clip arrangement in the near future.
 

Attachments

  • 100_3747.jpg
    100_3747.jpg
    39.4 KB · Views: 200
  • 100_3742.jpg
    100_3742.jpg
    46.4 KB · Views: 183
  • 100_3744.jpg
    100_3744.jpg
    48.3 KB · Views: 157
  • 100_3745.jpg
    100_3745.jpg
    52.1 KB · Views: 181
  • 100_3746.jpg
    100_3746.jpg
    51.4 KB · Views: 198
What to say to someone who has spent thousands on farkling their Spyder:

"That's a good start!! " :ohyea::ohyea::ohyea:
 
Last edited:
Keep it up!!!

Nice work!
Go Light Your World and Brighten the Corner Where You Are!!!
 
5) Right side mirror top post bracket broke and like a lot of others I was not pleased with how the mirrors are mounted. So...fabricated 3 clips, the top one is essentially vertical, the two on bottom are approx. 90 degrees.

Took some tweaking but mirror now slides over the top bracket and the bottom brackets are level with bottom of mirror trim. The tweaking allows the two bottom brackets to fit inside an existing slot in the mirror. I carefully drilled a small pilot hole (after measuring three times) through the black trim on the bottom of the mirror up through the bottom bracket. I then used a small self tapping screw with a large neoprene faced metal washer to secure the mirror.

Screw cannot be seen unless u bend down and look under the mirror and is nice and secure. Also - removed the 3 clip plates from the inside of the mirror that are no longer needed.

Perhaps not the most elegant solution but it works for me.
 

Attachments

  • 100_3759[1].jpg
    100_3759[1].jpg
    53.9 KB · Views: 255
  • 100_3760[1].jpg
    100_3760[1].jpg
    48.8 KB · Views: 235
  • 100_3758[1].jpg
    100_3758[1].jpg
    86 KB · Views: 208
6) Bajarons sway bar- As many say, do it when you can take your time, I did not and was a bit frustrated. But it is on.

A couple of tips that may help others:


  1. Removing the #23 bolt and #42 nut in order to remove the grill moulding, drove me nuts. Looking straight on as per the diagram in the instructions I could not see it, is actually covered . Finally saw it from underneath and removed a push pin to get a wrench on it better. The purple wrench shows the area in question and then the bolt exposed.
  2. Removing the heim end links - takes a 13 mm wrench, actually two. Two ratchet end wrenches, if you have them would work much better than two open end or box end due to the space constraints.
  3. Jacking it up to the required 20-22 inches is quite interesting...I lowered it back down onto blocks as soon as I could. I saw another members set up, if I had to do it again, I'd do the same, jack and put all three wheels on blocks, jack again, more blocks. The pic shows it stable, I had to raise it up another foot over what it shown to slid the bar out.
 

Attachments

  • 280.jpg
    280.jpg
    25.1 KB · Views: 93
  • 281.jpg
    281.jpg
    56.9 KB · Views: 111
  • 282.jpg
    282.jpg
    51.4 KB · Views: 103
  • 283.jpg
    283.jpg
    50.9 KB · Views: 106
  • 285.jpg
    285.jpg
    55 KB · Views: 132
7) Rivco heel toe shifter. Well made, easy install but not thrilled with, might be better with floorboards. Have small feet and getting off peg to use heel shifter part is clumsy at best.

8) Drink holder. Had the holder from a previous bike, ordered the SpYder specific bracket and there ya go !
 

Attachments

  • 880.jpg
    880.jpg
    40.8 KB · Views: 68
  • 878.jpg
    878.jpg
    45.9 KB · Views: 68
  • 877.jpg
    877.jpg
    39.6 KB · Views: 69
  • 879.jpg
    879.jpg
    44.2 KB · Views: 69
9) LaMonster Highway pegs. Really like these, fairly easy install. Hey LaMonster, you (we) need matching grips!
:yes:
 

Attachments

  • 100_3797.jpg
    100_3797.jpg
    58.1 KB · Views: 90
  • 100_3800.jpg
    100_3800.jpg
    34.7 KB · Views: 75
Back
Top