• There were many reasons for the change of the site software, the biggest was security. The age of the old software also meant no server updates for certain programs. There are many benefits to the new software, one of the biggest is the mobile functionality. Ill fix up some stuff in the coming days, we'll also try to get some of the old addons back or the data imported back into the site like the garage. To create a thread or to reply with a post is basically the same as it was in the prior software. The default style of the site is light colored, but i temporarily added a darker colored style, to change you can find a link at the bottom of the site.

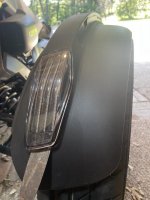
Slingmods Reflectors with Sequential LED Turn Signals & Running Lights

RickD

New member
Ordered mine yesterday (including rear facing red). I've been reviewing installation instructions and videos. It looks pretty straightforward albeit tedious. Anyone have any tips not in the videos? Thanks!
 
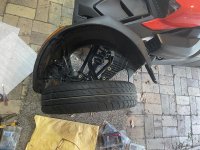
Your observation is pretty accurate..."straightforward albeit tedious." Working on the fender while tethered to the bike was a pain...so I completely unplugged it and removed it, that helped some. Definitely need to protect the glossy black paint of the A-arms as it's almost impossible to maneuver the fenders without making contact.
 
Was looking at those, but not all that sure about the sideways sequential thing. I'd prefer a solid flashing blinker. Less confusing for other drivers I'd think (Is he signalling he's going forward, or backing up?).

Also be nice to have a wiring harness for just the red lights.

* Bonus points to the first one to figure out how to hook those up as brake lights ... ;-}
 
Good tips here. I’ll add that I taped a towel to the A ams for protection and there’s a zip tie to cut at the very bottom of the fender. Also, when removing the existing directional, the front of the fender has to bent downwards pretty hard to get it UN clipped.
Good luck
 
Take the fender off. Place on towel and sit at a table and work on them. Lots of patience needed for routing the wires so they fit nicely. I highly recommend adding some clear silicone where the wires go into the lights and also around the perimeter near the double tape to seal them from water.
 
* Bonus points to the first one to figure out how to hook those up as brake lights ... ;-}

I tried hooking them up as brake lights. I applied a constant 12v to test and they started flashing! Built in flashers! I suppose because they're LED, if they didn't have their own built in flashers, they'd cause a hyperflash?
 
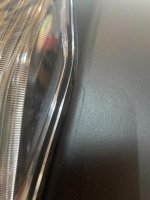
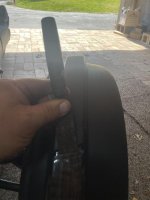
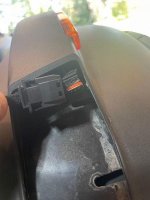
light.jpglight 2.jpg the bottom of the front light has to be pried the whole way out. i used a putty knife to keep it out. then there are tabs on both sides of the light about where the bend is. the fender needs pried out until they pop out. once i got it started to come out i used the putty knife in the groove at the top and tapped it out. i just finished two rykers. first fender took 6-8 hours, last one about 3light 3.jpglight 4.jpg if you cut the wheel you can get the mounting bracket over the tie rod. i used zip ties through mounting holes to keep it in place. i tried the keep the sensor wire slack
 
there are a couple youtube videos, search ryker fender lights. i don't think you need the shrink tube because they changed the splitter end. the new end goes over the red rubber seals. if you watch the slingmods video the end is different. plug.jpg
 
Back
Top