• There were many reasons for the change of the site software, the biggest was security. The age of the old software also meant no server updates for certain programs. There are many benefits to the new software, one of the biggest is the mobile functionality. Ill fix up some stuff in the coming days, we'll also try to get some of the old addons back or the data imported back into the site like the garage. To create a thread or to reply with a post is basically the same as it was in the prior software. The default style of the site is light colored, but i temporarily added a darker colored style, to change you can find a link at the bottom of the site.

Routing heated-gear wiring: I is nervous about that Tupperware

Columbia

Member
Greetings—
The wife is willing to ride with me on the Spyder. She wouldn't get on my 'cycle, which I no longer ride.
I ride year around, stopping only for snow on the ground or ice in the same place. Years ago I bought "Warm'n'Safe" (what's up with that name?) hereafter "WnS", heated gear (socks, pants, jacket and glove liners) which has never failed me. We bought her a set.
We're heading north into Idaho B.C. and Montana late next month and I know the mornings will be cold. She'll want to wear the heated gear. She lacks the natural in-body insulation that I have in abundance.
The electrical leads are to connect to the battery and end with a socket into which the heated gear is plugged. The leads are less than 36 inches; I'll want them to reach the seat front, for the "driver" and the seat back for the pillion.
All clear or sufficiently confuzzled?
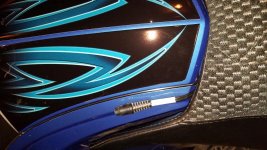
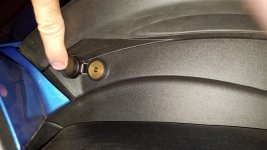
What's the best route for a wire from the battery to the seat, or near the seat, where I will then attach the WnS wires (since the WnS leads are not long enough on their own)
I've read a lot here and one consistent message is along the lines of "CanAm sure didn't care about the owners when it attached the body panels."
So for those who like some DIY, how do you suggest I route a two-strand flexible copper-core wire (think 120v extension cord wire) from frunk to near under the seat?

(I'm in Edit mode now: a separate but equal question: location for a ignition-keyed plus relay fuse-block near the seat would accomplish the same thing. Still the same question remains.)

Many thanks, with each "thank you" on steroids.

Columbia AKA Steve
 
I did the ignition keyed fuse block with a relay trick. I then used stranded #12 wire for my leads to the rear. 12 is plenty large enough, but I had plenty of it so I used it. I ran my wire through the corrugated plastic wire wrap that you can find at most auto stores. This will protect the wires from any rubbing or sharp areas that it comes in contact with. I mounted the fuse block behind the frunk and ran my wiring to the back and put my wife's connector in the panel beneath her left hand grip. Just keep the harness away from anything that gets hot. It's isn't difficult once the confounded plastic panels are out of the way. We'll be going into fifth winter with this setup and no issues so far.
 
I did a fuse block install in the frunk. I used 2 of the 6 connections to run single #14 primary wire along the left side under the tupperware to a pair of heated gear coax connections. I found a handy bolt on the frame for a ground so I wouldn't have to run a wire all the way back to the frunk. One wire terminates under the seat and I just pull it out when I need to plug into it. For the passenger, I installed a coax port from Warm & Safe on the left side near the rear of the hand grips. There is a knockout where there was some access to a control or plug in at one point on past RT's. Pics below. Also here is a link to my frunk fuse lock install: https://www.spyderlovers.com/forums/showthread.php?116532-Fused-electrical-distribution-block
 

Attachments

  • coax outlet 3.jpg
    coax outlet 3.jpg
    74.2 KB · Views: 35
  • coax outlet 2.jpg
    coax outlet 2.jpg
    60.1 KB · Views: 36
I did a fuse block install in the frunk. I used 2 of the 6 connections to run single #14 primary wire along the left side under the tupperware to a pair of heated gear coax connections. I found a handy bolt on the frame for a ground so I wouldn't have to run a wire all the way back to the frunk. One wire terminates under the seat and I just pull it out when I need to plug into it. For the passenger, I installed a coax port from Warm & Safe on the left side near the rear of the hand grips. There is a knockout where there was some access to a control or plug in at one point on past RT's. Pics below. Also here is a link to my frunk fuse lock install: https://www.spyderlovers.com/forums/showthread.php?116532-Fused-electrical-distribution-block

Exactly what I did with my 15 RT except I went with #12 wire because I had a roll handy. Works great and looks good too.
 
Steve WnS makes an extension cord for your set up that is plug and play. If I remenber right it comes in a couple of dufferent lengths. BTW for AMA membership, you get a 20% discount.
BTW congrats for buying WnS. They are the supplier for First Gear which is sold by BajaRon also at a great discount.
For those who don't know Ron sells lots of stuff besides sway bars and oil change kits. All a a great discount.
 
WAAAAY off topic, but I started the thread...
"Discount" was mother's milk for me. I accused my then 90-year old mother of being cheap. She said "I'm frugal." I disagreed, told her a couple of stories about her shopping and she said "You're right! I'm cheap!"
I no longer belong to the AMA; membership cost exceeded value gained. But I am a part of ADVrider.com, which shows WnS as a vendor and provides a discount.
Like mother like son.
My BJRon sway bar has arrived (no discount from Spyderpops though!) and is going in on 10 September. Excited to enjoy the improvements.

Back ON topic:
What I'm most interested in is which body panels need to come off to route the wires? Minimum. Absolute minimum, please.
 
That was where all of the work came in on my 2015 RT. I removed pretty much all the panels including the saddlebag panels on the left side of my bike. It isn't as difficult as it is time consuming and a good tip is to take pictures as you go. This will help a lot upon reassembly. It was a bit of a job, but I have a very clean and professional looking installation. Don't be afraid to tackle the job. It isn't hard and you will learn a lot about your ride.
 
Thought I'd give you an update. Costco had a jar of courage on sale, so I bought some and dove in. (The project, not the jar.)
Found things easier than I feared. More difficult than necessary, but not too difficult. Everything came off fairly easily. Went back without as much ease, but eventually the Tupperware returned with no hardware or fasteners left over. Wiring went in easily and works fine.
Thanks, all!
 
Back
Top