nycgordonf
New member
Hey Everyone,
Happy join this forum. I'm coming off a Harley Sportster which, unfortunately, burned down in a garage fire where it was winterized a few years ago. Insurance company covered the loss, including all of my aftermarket add-ons - which - I hate to admit it - took up more money and time than I care to admit.
Wife wasn't too happy about me getting another bike, citing our four kids as the prime reason. Can't say I blame her.
So after a 2-year hiatus, I managed to convince her on a compromise. A three wheeler instead of two. Inherently more stable, practically impossible to drop, and still somewhat cool.
Two weeks ago, after a brief search, I managed to find the only manual transmission F3-S in Pennsylvania. My 9 yo boy and myself made a day of it.

In short, I love it! You can't really tell you're riding a three-wheeler until you start to turn. Instead of leaning you steer, and move your butt over the seat if the turn is sharp the way you would on a snowmobile. I love the front trunk's utility, and am about to install front controls to Position 5 (I'm 6'2").
Being big on lighting, my first mod was to upgrade the OEM halogen capsules used in the headlights ton LEDs. I skipped the half-baked stuff on Amazon, and ordered Philips -treme Ultinon H4 capsules: https://www.powerbulbs.com/us/store/search/Philips%20X-tremeUltinon%20gen2%20LED%20H4%20%28Twin%29
THey're certainly not cheap, and took three weeks to get here, but with a coupon code I paid about $150 shipped.
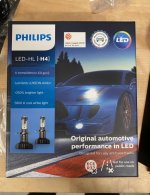
Knowing Philips, they probably over-engineered the heck out of this thing. The last thing I wanted was some cheap LED replacements that blind other drivers and melt your harnesses.
These units are considerably deeper than the OEM halogens. You can remove the left access panel and left side panel to sneak your hand through and remove the OEM capsule with some maneuvering. For those of you with large sausage hands, you might end up with a few scrapes and cusses.
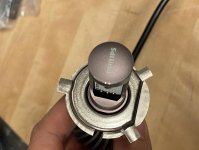
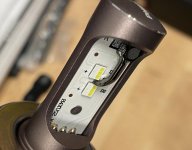
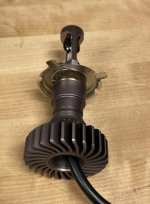
Unfortunately, fitting these LED units in there using this method is a bit of a pain, if not impossible. You need to insert the capsule in a particular orientation into the housing, then use the two clips (part of the housing) to secure them in place. Then you need to sneak in the rubber gasket that prevents the inside of the light enclosure from getting dust in it, and lastly, screw on the LED heatsink. Due to the air filter location, screwing on that heatsink isn't possible while the headlamp is still attached to the spyder.
In the end, I've ended-up taking the whole top trim off in order to remove the headlamp from the front, and attach the LED heatsink that way.
Certainly a bit more work, but - the way I see it - another reason not to use a cheap LED unit, as replacing it is a bit time consuming.
Here is a photo of the LED headlamp (top) vs the halogen headlamp (bottom).
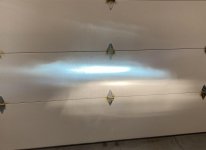
The reason the LED light is higher is because the headlamp is still detached from the spyder and not aligned. Something i am saving for tomorrow.
The Philips LEDs state they're for offroad use only, and I had trouble finding them in the US, however, looking at the beam dispersion and cut-off line, I don't think I'll be blinding anyone on the road once they're properly aimed.
Some more photos:
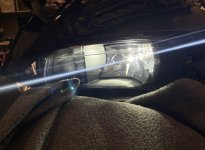
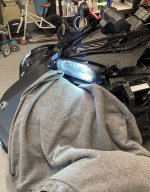
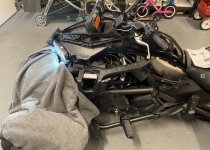
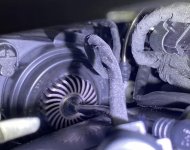
Looking through the inside, you can see the rubber grommet securing the LED into the housing, and the heatsink that had to be screwed on last, with the headlamp assembly detached from the vehicle.
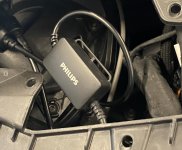
Control unit (that I still need to ziptie and attach).
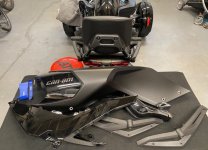
Panels that had to come off:
Apologies for not writing a more thorough DIY method. I was only able to squeeze in a 2-hr window between work and family schedule. Tomorrow I do the right side headlamp
Thanks for reading, and I look forward to hanging out here and reading all about various types of mods, and when things need fixing.
Cheers-
Gordon
Happy join this forum. I'm coming off a Harley Sportster which, unfortunately, burned down in a garage fire where it was winterized a few years ago. Insurance company covered the loss, including all of my aftermarket add-ons - which - I hate to admit it - took up more money and time than I care to admit.
Wife wasn't too happy about me getting another bike, citing our four kids as the prime reason. Can't say I blame her.
So after a 2-year hiatus, I managed to convince her on a compromise. A three wheeler instead of two. Inherently more stable, practically impossible to drop, and still somewhat cool.
Two weeks ago, after a brief search, I managed to find the only manual transmission F3-S in Pennsylvania. My 9 yo boy and myself made a day of it.

In short, I love it! You can't really tell you're riding a three-wheeler until you start to turn. Instead of leaning you steer, and move your butt over the seat if the turn is sharp the way you would on a snowmobile. I love the front trunk's utility, and am about to install front controls to Position 5 (I'm 6'2").
Being big on lighting, my first mod was to upgrade the OEM halogen capsules used in the headlights ton LEDs. I skipped the half-baked stuff on Amazon, and ordered Philips -treme Ultinon H4 capsules: https://www.powerbulbs.com/us/store/search/Philips%20X-tremeUltinon%20gen2%20LED%20H4%20%28Twin%29
THey're certainly not cheap, and took three weeks to get here, but with a coupon code I paid about $150 shipped.

Knowing Philips, they probably over-engineered the heck out of this thing. The last thing I wanted was some cheap LED replacements that blind other drivers and melt your harnesses.
These units are considerably deeper than the OEM halogens. You can remove the left access panel and left side panel to sneak your hand through and remove the OEM capsule with some maneuvering. For those of you with large sausage hands, you might end up with a few scrapes and cusses.


Unfortunately, fitting these LED units in there using this method is a bit of a pain, if not impossible. You need to insert the capsule in a particular orientation into the housing, then use the two clips (part of the housing) to secure them in place. Then you need to sneak in the rubber gasket that prevents the inside of the light enclosure from getting dust in it, and lastly, screw on the LED heatsink. Due to the air filter location, screwing on that heatsink isn't possible while the headlamp is still attached to the spyder.
In the end, I've ended-up taking the whole top trim off in order to remove the headlamp from the front, and attach the LED heatsink that way.
Certainly a bit more work, but - the way I see it - another reason not to use a cheap LED unit, as replacing it is a bit time consuming.
Here is a photo of the LED headlamp (top) vs the halogen headlamp (bottom).

The reason the LED light is higher is because the headlamp is still detached from the spyder and not aligned. Something i am saving for tomorrow.
The Philips LEDs state they're for offroad use only, and I had trouble finding them in the US, however, looking at the beam dispersion and cut-off line, I don't think I'll be blinding anyone on the road once they're properly aimed.
Some more photos:


Looking through the inside, you can see the rubber grommet securing the LED into the housing, and the heatsink that had to be screwed on last, with the headlamp assembly detached from the vehicle.

Control unit (that I still need to ziptie and attach).

Panels that had to come off:

Apologies for not writing a more thorough DIY method. I was only able to squeeze in a 2-hr window between work and family schedule. Tomorrow I do the right side headlamp
Thanks for reading, and I look forward to hanging out here and reading all about various types of mods, and when things need fixing.
Cheers-
Gordon
