robhowen
New member
Yesterday I installed the Lamonster 1330 Performance Pipe on my 2014 RT Ltd which replaces the Catalytic Converter. The product seems to be well made with frame hangers and spring connectors similar to the factory catalytic converter. The product does not come with any instructions, and Lamonster is clear about this on his website. I don't know why he doesn't include any instructions, but so be it. I installed by leaving the bike on the ground. I did not raise or jack up anything. Here are the steps I took for the installation:
1. My first challenge was removing the 3 springs that connect the Cat Convert to the exhaust pipe coming from the engine. I tried pliers, an awl, screw driver, vise grips, ring expander pliers, etc. and nothing worked. I found the following video on youtube and followed this method for both removal and replacement. This worked very well, but not as effortless as implied by the video. Still, it's the best solution I've found. The video link is:
2. Disconnected the clamp holding the muffler to the Cat Convert. I loosened it a great deal and left it on the muffler side.
3. I removed the muffler to give myself more room in dealing with removing the Cat Convert as I figured I would have to move it around to get it out of the top mounting rubber bracket and the two front ones. I don't know if you have to remove the muffler, but I'm glad I did.
4. I then removed the Cat Convert by push/prod/giggle until it came out. I was careful to make sure I didn't mess up any of the rubber mounts.
5. I then installed the 1330 Performance Pipe to the upper rubber bracket and into the two forward rubber mounts and connected two of the three springs using the method in the video. My exception to the video was I used my leg/foot to pull the spring open as I needed both hands free to position the spring into the clip. I was laying on my side on the garage floor next to the bike using my foot for leverage and my hands for positioning. I took my rope and created a loop at the end where I could push with my leg to pull (expand) the spring. This freed my hands for positioning. I was unable to get the inside-most third spring by myself. I'll do it when my neighbor can help me. I could probably get it done by myself, but I didn't want to risk getting a finger pinched by the spring as I was trying to pull using my leg and use my hands in an area that is tough to see.
6. I then re-hung the muffler from its single mounting bolt, leaving the bolt loose. Note: This muffler is heavy! Now I'm wondering if I should consider an after market muffler as my next option to reduce weight and improve performance.
7. I positioned the muffler end connection to the pipe end connection and giggled everything to get all of it in the best position possible. I then reinstalled the clamp connecting the muffler to the pipe.
8. Lastly I tightened up the muffler mounting bolt and made sure everything seemed secure and proper.
I've taken only one short ride since doing the installation. There is a bit more of an exhaust note, but nothing obnoxious. The bike sounds a bit more like a high performance engine vs. just louder. I don't like a loud exhaust as I find it gets tiring on a long ride. I think this exhaust note change will be fine. I also don't know anything yet about performance. As I learn more I'll share more.
I hope these instructions help you as I always appreciate the guidance I get from others.
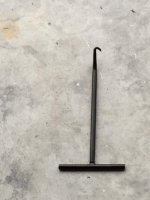
Update: 6/15/15 - Got the 3rd spring on with both a rope and the Harbor Freight spring puller suggested by Jaymac. I put the rope around the T-Handle and used my foot to pull the spring; finally got it in. Had to tweak the muffler to exhaust clamp as the muffler was sitting too close to the parking brake cable connector. I loosened the clamp and pulled the muffler out a bit further from the bike and retightened the clamp. After about 300 miles riding the muffler is staying a comfortable distance from the parking brake cable connector. Everything else continues to look good.
Rob
1. My first challenge was removing the 3 springs that connect the Cat Convert to the exhaust pipe coming from the engine. I tried pliers, an awl, screw driver, vise grips, ring expander pliers, etc. and nothing worked. I found the following video on youtube and followed this method for both removal and replacement. This worked very well, but not as effortless as implied by the video. Still, it's the best solution I've found. The video link is:
2. Disconnected the clamp holding the muffler to the Cat Convert. I loosened it a great deal and left it on the muffler side.
3. I removed the muffler to give myself more room in dealing with removing the Cat Convert as I figured I would have to move it around to get it out of the top mounting rubber bracket and the two front ones. I don't know if you have to remove the muffler, but I'm glad I did.
4. I then removed the Cat Convert by push/prod/giggle until it came out. I was careful to make sure I didn't mess up any of the rubber mounts.
5. I then installed the 1330 Performance Pipe to the upper rubber bracket and into the two forward rubber mounts and connected two of the three springs using the method in the video. My exception to the video was I used my leg/foot to pull the spring open as I needed both hands free to position the spring into the clip. I was laying on my side on the garage floor next to the bike using my foot for leverage and my hands for positioning. I took my rope and created a loop at the end where I could push with my leg to pull (expand) the spring. This freed my hands for positioning. I was unable to get the inside-most third spring by myself. I'll do it when my neighbor can help me. I could probably get it done by myself, but I didn't want to risk getting a finger pinched by the spring as I was trying to pull using my leg and use my hands in an area that is tough to see.
6. I then re-hung the muffler from its single mounting bolt, leaving the bolt loose. Note: This muffler is heavy! Now I'm wondering if I should consider an after market muffler as my next option to reduce weight and improve performance.
7. I positioned the muffler end connection to the pipe end connection and giggled everything to get all of it in the best position possible. I then reinstalled the clamp connecting the muffler to the pipe.
8. Lastly I tightened up the muffler mounting bolt and made sure everything seemed secure and proper.
I've taken only one short ride since doing the installation. There is a bit more of an exhaust note, but nothing obnoxious. The bike sounds a bit more like a high performance engine vs. just louder. I don't like a loud exhaust as I find it gets tiring on a long ride. I think this exhaust note change will be fine. I also don't know anything yet about performance. As I learn more I'll share more.
I hope these instructions help you as I always appreciate the guidance I get from others.
Update: 6/15/15 - Got the 3rd spring on with both a rope and the Harbor Freight spring puller suggested by Jaymac. I put the rope around the T-Handle and used my foot to pull the spring; finally got it in. Had to tweak the muffler to exhaust clamp as the muffler was sitting too close to the parking brake cable connector. I loosened the clamp and pulled the muffler out a bit further from the bike and retightened the clamp. After about 300 miles riding the muffler is staying a comfortable distance from the parking brake cable connector. Everything else continues to look good.
Rob
Last edited:
") . Only I expect that if anyone still keeps on making gas powered ICE motorcycles into the future that'll probably change over time.
. Only I expect that if anyone still keeps on making gas powered ICE motorcycles into the future that'll probably change over time.  . But for right now, a cat delete is one of the first mods made to many of the new bikes that come with them - I've even seen some brand new Pre-delivery Police Motorcycles destined for service in a couple of States lining up to get that done as part of their Pre-delivery Police Spec set-up. :thumbup: