kevorama
MOgang Member & Pyro-Man
Installation of BrightSides & Fender Tips RT-S (Part 1)
I think that the hardest part was just getting the cajoles up to actually start taking the Tupperware off. Then there was the wiring diagram that would make a color blind person insane. I'm used to AC with Black, Red and sometimes White being hot, but usually just neutral. BRP just picked a color and started making their harnesses. We used to make our own at GM and there was no variance in the color of the wire. I'm glad that at least, on the RT/RTS, that they started using numbered ports for function or polarity. Anyway, I'm going to try and do a series for folks that are as basically challenged in Spyder RT/RTS lighting upgrades as I am.
Here is where I am starting: GloRyders are already installed on the front wheels. New options for RT-622 trailer in the works. For this Brightsides & Fender TIPS project I am using the Custom Dynamics light and wiring kits. You can find their website on the home page of this forum.
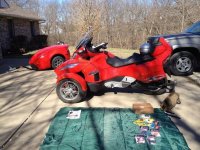
Time to start pulling off the panels.
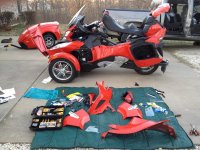
It starts to look like you're picking up the pieces from a crash!
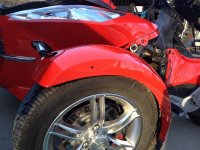
Front reflector pried off using two nylon bones or spatulas. Commonly used in the auto industry to keep
from scratching paint. I'll put a a link later on today. Should be able to get them at any auto parts store.
A must have.
URL for the nylon bones. You can use these anywhere that they say to use a screwdriver to 'pry' on a painted or
pristine surface that you don't want mucked up by a metal tool. They are around $4 each. Pretty cheap for a 'must have' tool.
http://www.ewindowtint.com/window-gasket-tool.html I suggest that you get at least two of them and use them in tandem.
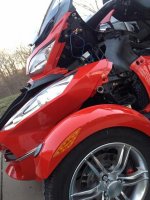
New Custom Dynamics front Brightside installed. Note: The left one had a defect and the middle row of LED's didn't light up. I contacted CD by email Saturday afternoon and
they replied back shortly thereafter that they would send me a replacement on Monday. You can add them to the growing list of vendors that have excellent customer service.
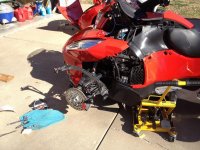
In order to put the Custom Dynamics LED mud flap in you have to jack the wheel up, remove the wheel, remove the 4 bolts holding the fender on to expose the fender frame support.
I think that the hardest part was just getting the cajoles up to actually start taking the Tupperware off. Then there was the wiring diagram that would make a color blind person insane. I'm used to AC with Black, Red and sometimes White being hot, but usually just neutral. BRP just picked a color and started making their harnesses. We used to make our own at GM and there was no variance in the color of the wire. I'm glad that at least, on the RT/RTS, that they started using numbered ports for function or polarity. Anyway, I'm going to try and do a series for folks that are as basically challenged in Spyder RT/RTS lighting upgrades as I am.
Here is where I am starting: GloRyders are already installed on the front wheels. New options for RT-622 trailer in the works. For this Brightsides & Fender TIPS project I am using the Custom Dynamics light and wiring kits. You can find their website on the home page of this forum.

Time to start pulling off the panels.

It starts to look like you're picking up the pieces from a crash!

Front reflector pried off using two nylon bones or spatulas. Commonly used in the auto industry to keep
from scratching paint. I'll put a a link later on today. Should be able to get them at any auto parts store.
A must have.
URL for the nylon bones. You can use these anywhere that they say to use a screwdriver to 'pry' on a painted or
pristine surface that you don't want mucked up by a metal tool. They are around $4 each. Pretty cheap for a 'must have' tool.
http://www.ewindowtint.com/window-gasket-tool.html I suggest that you get at least two of them and use them in tandem.

New Custom Dynamics front Brightside installed. Note: The left one had a defect and the middle row of LED's didn't light up. I contacted CD by email Saturday afternoon and
they replied back shortly thereafter that they would send me a replacement on Monday. You can add them to the growing list of vendors that have excellent customer service.

In order to put the Custom Dynamics LED mud flap in you have to jack the wheel up, remove the wheel, remove the 4 bolts holding the fender on to expose the fender frame support.
Last edited:
