• There were many reasons for the change of the site software, the biggest was security. The age of the old software also meant no server updates for certain programs. There are many benefits to the new software, one of the biggest is the mobile functionality. Ill fix up some stuff in the coming days, we'll also try to get some of the old addons back or the data imported back into the site like the garage. To create a thread or to reply with a post is basically the same as it was in the prior software. The default style of the site is light colored, but i temporarily added a darker colored style, to change you can find a link at the bottom of the site.

Help with trailer wiring

Mikel53

Member
I have acquired a small pull behind trailer and need some help making sure the wiring matches my 2015 RTL that is already wired by dealership with a 4 wire square plug. I have purchased a square plug for the trailer. The plug on the trailer now is 4 wire flat. The instructions on the new plug says white-ground ...yellow-left turn ...green-right turn ...brown-taillight... Sounds easy enough but i have heard and read horror stories about weird wiring when you are doing trailer hookups. Is there anything i need to worry about or do that is different from above instructions?
 
I bought a male square plug and a female flat plug and spliced them together to make a jumper for my 2016 RTS. This way you can hook to any four flat and have power. I have two trailers that I haul behind my Spyder. My son uses the trailers and has four flat on his Harley. Works for us.
 
The wire colors are the same on a 4 flat as on the 4 square. So as long as you match up the colors there will be no problem. You should also consider just making an adapter as suggested on the previous post.
 
Where can you find that square plug for can am hitch to put on trailer end

https://www.amazon.com/Hopkins-47975-Pole-Square-Set/dp/B004BE60ZU
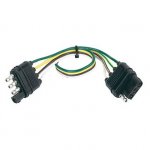
One option Other is little more involved diy: find a trailer extension that has the both sides, usually under $10.B9EF3310-D904-4BE1-B4B4-7F1FE770F4F1.jpeg*note that 1pin is opposite the other 3- either side ;that’s the ground wire*
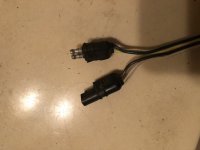
Carefully cut the end that has 3pins exposed (male end) in half
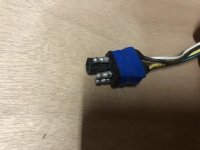
47C89B12-B413-47DD-8B3E-B0357B3CA9EE.jpegStack the halves to make square
F338E83C-61E7-4954-A6B8-1D6C2AFE37E8.jpeg Not very pretty, functional all the same. :thumbup:
No need to splice & solder.
 
Back
Top