• There were many reasons for the change of the site software, the biggest was security. The age of the old software also meant no server updates for certain programs. There are many benefits to the new software, one of the biggest is the mobile functionality. Ill fix up some stuff in the coming days, we'll also try to get some of the old addons back or the data imported back into the site like the garage. To create a thread or to reply with a post is basically the same as it was in the prior software. The default style of the site is light colored, but i temporarily added a darker colored style, to change you can find a link at the bottom of the site.

F3 RH Body Panel removal (pictures?)

UCLA F3S

New member
Did a search for this one, nothing specific popped up, if there IS something out there...apologies for a duplicate post.

Getting ready to do the 3k oil change (1st one) on my F3S. Watched Lamonster's video on it...all pretty straightforward. Just wondering if anyone out there has any detailed pictures on the RH side panel removal to access the oil filter housing?

Pictures would be preferred, but if anyone has a detailed step by step on how to pull this panel, that would probably work, as well...just don't want to bust any plastic.


Thanks!

Russ
 
PULLING THE PLASTIC

Pulling the RH panel on the F3 is pretty straightforward. First, pull off the plastic cover that is located under the headlights after you have raised the trunk lid. Remove the RH lateral panel and you will see three plastic push pins. Remove those. Now there are 4 screws holding on the panel. Two below the seat and two below the fog light. Remove those 4 screws and then gently pull off the panel. Now you have access to the oil filter. To remove, you can use channel locks, an adjustable wrench, or a 36 mm socket. If the brake reservoir is in the way you can lift it up and then forward toward you to have more room. Hope this helps.
 
Pulling the RH panel on the F3 is pretty straightforward. First, pull off the plastic cover that is located under the headlights after you have raised the trunk lid. Remove the RH lateral panel and you will see three plastic push pins. Remove those. Now there are 4 screws holding on the panel. Two below the seat and two below the fog light. Remove those 4 screws and then gently pull off the panel. Now you have access to the oil filter. To remove, you can use channel locks, an adjustable wrench, or a 36 mm socket. If the brake reservoir is in the way you can lift it up and then forward toward you to have more room. Hope this helps.


Thanks, brother! Seems pretty straightforward.


Russ
 
Pulling the RH panel on the F3 is pretty straightforward. First, pull off the plastic cover that is located under the headlights after you have raised the trunk lid. Remove the RH lateral panel and you will see three plastic push pins. Remove those. Now there are 4 screws holding on the panel. Two below the seat and two below the fog light. Remove those 4 screws and then gently pull off the panel. Now you have access to the oil filter. To remove, you can use channel locks, an adjustable wrench, or a 36 mm socket. If the brake reservoir is in the way you can lift it up and then forward toward you to have more room. Hope this helps.

JKM:

Just wanted to make sure I had this all down, so I snapped some pictures (see below) to reference what you describe above. Let me know if I'm on the money, or not. Also, got the Spyder up on ramps to locate the drain plugs...found those pretty easy. Okay, here we go...

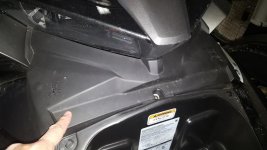
Plastic cover that you reference first in your steps above:

20170221_172213.jpg

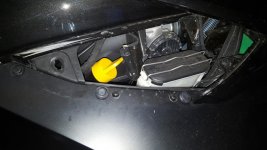
RH Lateral Panel:

20170221_173716.jpg

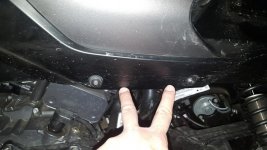
Plastic push pins under the RH lateral panel (looks like there's actually four of them, instead of three):

20170221_173737.jpg

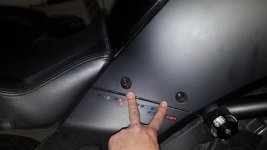
The four screws you mention last (below the seat and below the fog lights):

20170221_172300.jpg20170221_172307.jpg

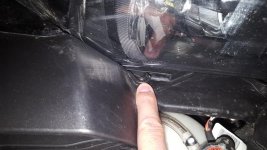
Is this all correct? One thing I did notice was an extra Torx screw immediately under the headlight (see below). Does that have to come off, as well? If so, how do you even get a Torx bit in there...access is tight!
 
Back
Top