• There were many reasons for the change of the site software, the biggest was security. The age of the old software also meant no server updates for certain programs. There are many benefits to the new software, one of the biggest is the mobile functionality. Ill fix up some stuff in the coming days, we'll also try to get some of the old addons back or the data imported back into the site like the garage. To create a thread or to reply with a post is basically the same as it was in the prior software. The default style of the site is light colored, but i temporarily added a darker colored style, to change you can find a link at the bottom of the site.

Large left side inner panel removal assistance needed (Madison, WI area)

troop

Well-known member
OK. Trying to remove the large inner panel on my 2022 RT S2S is kicking my butt :( I have a new Lamonster belt dampener I want to install. Plenty of videos on (3) panel removal, but zero on the large panel removal. I popped off what I could, but access is still not available. If anyone is near the Stoughton, WI area (20 miles south of Madison) who has knowledge of this, wanna help? :) And nothing for free! :) Thx for any input.
 
Hello,
The left big side panel is not too hard to take off, take out ALL the screws and especially the one bolt and nut underneath the left saddlebag in the front of it (right front corner). You have to work it and since it is plastic and pliable, just take your time. I removed mine about a year ago, MartintheVlogger had a video on it on YouTube. The right side is harder because of the brake pedal. But you shouldn’t have too much trouble with the left side. I even left the floorboard on for right and left side, didn’t have any serious issues. Just work loose and move it around to get it off….
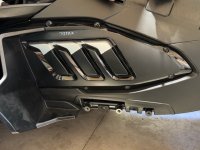
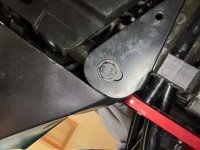
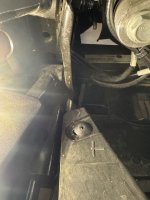
Thank you. I have the saddlebag nut/bolt off, along with the upper push pins and the long torx screw. Did you remove yours as one big piece? I haven't removed the (6) torx screws in the gloss plastic piece. Also, does the shown threaded push pin need to come out? That's giving me a PIA as it doesn't thread out at all. Also, I'm wondering about the larger bottom screw? I saw the video where Martin removed the (3) side panels, but not the video on him removing the big panel. Thx for your input!

43c48742-6129-4776-99cc-db9d2e4e9e31.jpg - b14a5770-e049-4bc9-b8cb-01a68afe275f.jpg - 9859dfc7-9f20-4d46-ade7-31d2338802f2.jpg
 
You don't have to remove the Torx screws on the gloss black insert, it is a "sub-panel". The threaded push pin has to be removed as do 3 plastic rivets along the bottom rail under the floor board. Don't mess with the hex bolt, it connects the bottom rail to the bike. I think it's helpful to turn the wheels all the way left, also. To release the panel, pull the front out and up to release it from the bottom rail, then wiggle it down and forward to release it from the rear side panel. Hope this helps.
 
It's not necessary to remove get the top loose long extension to remove bolts and replace
I remember you saying that, but I haven't even got to the point of being able to pull it out! :( Maybe once I get the 3 lower push pins removed? :)
 
Last edited:
You don't have to remove the Torx screws on the gloss black insert, it is a "sub-panel". The threaded push pin has to be removed as do 3 plastic rivets along the bottom rail under the floor board. Don't mess with the hex bolt, it connects the bottom rail to the bike. I think it's helpful to turn the wheels all the way left, also. To release the panel, pull the front out and up to release it from the bottom rail, then wiggle it down and forward to release it from the rear side panel. Hope this helps.
Thank you. I didn't even see (or look for) the 3 lower push pins. That screw type push pin is being a PIA. I'll work at it a bit more before I just cut it off. I do have a large kit of various size push pins to replace it with.
 
I've found it easier to remove the "glossy" panel first. Use a Philips screwdriver to back out the head on the one plastic pin, then pull it out like the other plastic pins. Don't forget the plastic pins that are beneath the floor boards. However, the most important thing is to remove the passenger floorboards. Immediately to the rear of the oval slot for these boards are two snap in "claws". Pull the panel outward until these release and then slide it forward until it is clear of the side saddlebags. From there, just wiggle it around to get it out. The motion required will be obvious at that point. Remember what it takes for reassembly, and remember to hold the panel outward until it is past the passenger footboard slot or you WILL shear off the claws.
 
"Use a Philips screwdriver to back out the head on the one plastic pin, then pull it out like the other plastic pins."
The issue with my Philips head push pin is that it just spins without retracting . I'll try again with it in the next couple of days. Thx
 
"Use a Philips screwdriver to back out the head on the one plastic pin, then pull it out like the other plastic pins."
The issue with my Philips head push pin is that it just spins without retracting . I'll try again with it in the next couple of days. Thx
I've found over the years since these (bloody!!) push pin things were introduced that ^ this happens often, and the only real solutions are to either cut the head off the push pin or to prise the centre 'Philips head' bit up in order to get it out, then toss it away!! Sometimes, you can get them out by prising that middle bit up with a flat bladed screw driver while you turn the Philips head so that it screws out and then you can remove them as you would normally, but other times you'll just hafta use whatever sharp thing you can get in there to cut the head off. 😖

Good Luck. (y)

Ps: back when we first started using them, they were considered to be single use only... :cautious:
 
..... Sometimes, you can get them out by prising that middle bit up with a flat bladed screw driver while you turn the Philips head so that it screws out and then you can remove them as you would normally, but other times you'll just hafta use whatever sharp thing you can get in there to cut the head off. 😖 .....

This what I'm going to try before I cut it off. I'm sure I have a replacement size in my multiple size pack.
 
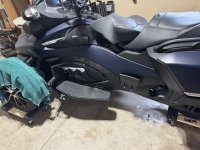
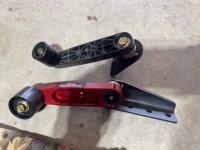
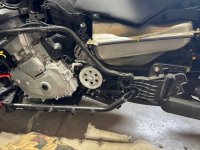
DONE!! Once I got the lower front push pin out, the panel came off with a little wiggling. Putting it back on took a bit more finagling, but was not terrible. My Spyder did not have the two lower push pins installed, as the panel/holes didn't line up. Hmmm.. I did have a shiny white front pully.


6230e333-ccd3-4b55-b61c-cfeba7dbcf65.jpg - 89114fc3-cbad-4369-afed-26a9767204db.jpg - 43c8b9da-e911-474e-85a1-e48fe16c69f0.jpg


Now on to my next project .. getting my passenger seat installed with my bigger Russell Day Long driver seat.
 
Back
Top