Sealed the cement on the new shop floor and the outside floor for the new Spyder shop built from the old milk barn. Now to get the wiring insulation and sheet rocking done hopefully before winter sets in to hard.
Way to go Paul, congrats, your Spyder will love you.
Every rear tire I brought lasted around 10 to 12000 miles max...even the factory one...the rear tire is inexpensive and easy to replace.. regardless of the brand..enjoy the ride!!
Shortly after I bought our F3L, I tapped a concrete wheel stop and fortunately ended with only a small hairline crack in the chin piece. Wanting to make a bumper that looks good, is minimal and does the job, here's what I came up with. The longitudinal bars are 1/4" X 1" aluminum bar and the bumper is 1/2" X 1/2" channel. The bumper is fastened to the bars with one screw per side from the bottom, so the top is smooth. Shined it with Flitz.
Ours is a red, black and chrome 2017 F3 Limited. Bought new in 2/2019. The avatar is my first bike back in 1952, a Simplex Servi-Cycle. Photo taken at the Barber Museum.
Today I installed a +2 kit for the footrests. I bought them from Hotspyderacccesssories.com. I tried twice to order from BRP. Never again. Both times I got the email saying I would get an email when shipped and when the dealer received them. Never happened! Both times I call customer support and they had no record of the purchase. Anyway, I took it for a ride after the installation. Wow!! What a difference! Everything was bettter. My seating position was much improved and the shifter and brake pedal were easier to use. I wish I had ordered from HSA earlier. It's the best thing I've done to it.
Shortly after I bought our F3L, I tapped a concrete wheel stop and fortunately ended with only a small hairline crack in the chin piece. Wanting to make a bumper that looks good, is minimal and does the job, here's what I came up with. The longitudinal bars are 1/4" X 1" aluminum bar and the bumper is 1/2" X 1/2" channel. The bumper is fastened to the bars with one screw per side from the bottom, so the top is smooth. Shined it with Flitz.
Fitted my new Spyder Extras belt tensioner. Bought it a few weeks ago to fit before my last trip but didnt get to it..
And used my Big Bear Ezylift for the task. Doesn't fit under my '17 RTL, so I have to use my ATV lift to get it onto bricks, then get the Big Blue under the RTL and jack it up. Has anyone got a source on say Amazon for a 1/2" Square drive to hex spindle that will fit a 1/2" drill chuck? I had to resort to using a speed brace and while awesome exercise for my arms i'd rather use the power drill.
My small amount of trepidation was confirmed, does anyone know of a belt tensioner that tensions the return side of the belt. The one I bought does help but not as well as I had hoped. I was perplexed when the instructions showed it had to be mounted on the drive side.
Being a Mechanical Fitter who worked in a Power Station for 19 years belt/chain/cable-drive tensioners were always fitted on the return side to reduce the amount of jumping around it does due to less tension on that side (the drive side is under load so tends to flap around less).
I hope it helped
"Friend to those who have no friends. Enemy to those who need no enemies. Headache to those who have no aspirin."~ The Phantom Texter
2019 F3 s , Neutrino Aurora Accessory Fuse Block Blue
My small amount of trepidation was confirmed, does anyone know of a belt tensioner that tensions the return side of the belt. The one I bought does help but not as well as I had hoped. I was perplexed when the instructions showed it had to be mounted on the drive side.
Being a Mechanical Fitter who worked in a Power Station for 19 years belt/chain/cable-drive tensioners were always fitted on the return side to reduce the amount of jumping around it does due to less tension on that side (the drive side is under load so tends to flap around less).
The opinions seem to vary, but some of the builders do iterate they are "harmonic dampeners", not "belt tensioners".
Not really, to me a "belt tensioner" would serve a different purpose than a "belt dampener". One would keep the belt taut,
and the other would merely dampen the harmonics in the belt. Different definitions, different purposes.
The serpentine belt on your car's/truck's engine has a belt tensioner. In my book, what you put on a Spyder is a vibration damper.
Ours is a red, black and chrome 2017 F3 Limited. Bought new in 2/2019. The avatar is my first bike back in 1952, a Simplex Servi-Cycle. Photo taken at the Barber Museum.
Today I installed my volt meter/usb outlet in the dash of my ‘14 RTS, replacing the temperature gauge. I bought it 3 weeks ago and just installed it today. Looks good and seems to work ok, but only time will tell for sure. Easy install.
The serpentine belt on your car's/truck's engine has a belt tensioner. In my book, what you put on a Spyder is a vibration damper.
I too have seen it described both ways, the dampener/tensioner is only half as effective as it could be if it was mounted on the portion of the belt not under load. Screenshot_1.jpg. It didn't matter if it was set of V pulleys driving a crusher, a flat toothed belt driving a fan, or a chain driving a 1400 Ton Coal Reclaimer bucket wheel, we'd fit the dampener/tensioner to the opposite side to stop the unloaded portion from jumping about.
They show only a drawing of a tensioner that applies pressure to the bottom (slack) run, but all the photos and info are for top mounts. If belt vibration ever becomes a concern for me, I love DYI projects and will make my own bottom mount.
Ours is a red, black and chrome 2017 F3 Limited. Bought new in 2/2019. The avatar is my first bike back in 1952, a Simplex Servi-Cycle. Photo taken at the Barber Museum.
They show only a drawing of a tensioner that applies pressure to the bottom (slack) run, but all the photos and info are for top mounts. If belt vibration ever becomes a concern for me, I love DYI projects and will make my own bottom mount.
Yes if I were still on the tools as a fitter I'd be doing the same.
20201124_125627.jpg20201124_130622.jpg 2 new Vredestein Quatrac 5 165/60-15 front tires installed to go with my already installed rear General Altimax RT43 215/60-15. Balanced using Ride-On tire sealer. Now I have to wait till spring to try it


 Reply With Quote


 (sold)

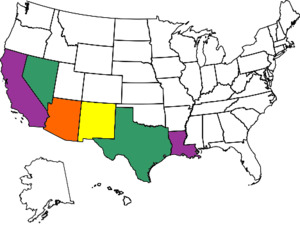 6 states down 42 states to go
