|
-
 Change Rear Tire Change Rear Tire
I got 9,000 miles out of my Kenda. Needless to say I haven't been doing burnouts. It was time to change. Someone asked for a write up on an ST. I thought I took more pictures but this is it.
Remove the two covers over the axle bolts and crack the 36mm nut loose while the bike is still on the ground.
Place chocks in front and in back of both front wheels.
Jack the bike up from the frame just in front of the cat converter. Lift the rear wheel off the ground. Check your belt tension. Lower the bike until the rear wheel just touches the ground. Remove the lower shock bolt. 15mm if I remember correctly.
Raise the bike until the rear wheel barely is off the ground. The belt can now be slipped off the rear drive cog.
Lower the bike until the rear wheel barely touches the ground. Remove the cotter pin from the axle. Remove the 36mm nut. The axle will now slide out to the left of the bike. When the axle gets past the brake support, the brake will fall out of the way. There is NO need to remove the brake caliper. When it falls, it falls hard enough to scratch the paint on the rim. So place a towel between the brake and the rim before you remove the axle. When the axle comes out two metal pieces may fall. They may stay in the wheel. For lack of a better explanation, they will like like a top hat. The brim goes against the swing arm. The top part goes into the rubber seal that keeps dirt out the bearings.
This pic shows how far down the brake mount will fall.
ImageUploadedByTapatalk1425573995.821302.jpg
Raise the bike some more, and the wheel will come out. You will need to raise the fender. Only gravity is holding it down. The fender will come up with one hand.
The black metal pieces that are in the rear of the swing arm may come loose. These are the pieces that the belt adjustment bolts are in. It does not matter. The bolt will not turn. If you are worried about this, you can take these pieces to the swing arm before you remove the rim/tire.
Remove the brake disk. Five 13mm bolts.
ImageUploadedByTapatalk1425574071.971069.jpg
You will now see five 15mm bolts holding the approx 4" by 7" aluminum axle cover. Don't bother with them yet.
Lay the wheel down on the ground with the drive cog facing up. Stand on the tire and grab the drive cog. Begin to rock it back and forth. It will come up. There is another top hat looking piece that is different than the two on the axle. It may come loose at this point. I will show how to install it later. Remove the five pieces of rubber. You can now see the nuts that attach to the bolts holding the axle cover.
You need to access both the bolt and the nut to get them loose. I needed an impact wrench to get mine loose. There is a lot of locktite plus the nuts are nylock. Having a second person may help. When you get all five loose, the axle cover may come off. I had to persuade mine with a soft blow mallet. When it comes loose, you will see a six inch long piece of pipe. It is the axle spacer and MUST be put back in.
ImageUploadedByTapatalk1425574151.254775.jpg
I took my rim to Discount Tire and they mounted a new Kumho Ecsta. They could not balance it because the bearing size was too small for their machine. So they refunded the price of balancing.
Then I took the tire to the Harley Dealer, paid twice the Discount Tire price and they balanced the tire.
Reinstall the pipe/spacer and axle cover. Five bolts and nuts. The nuts go on the drive side of the wheel. I used locktite. I believe the specs are 35 foot pounds.
Turn the rim over and reinstall the top hat looking piece. Pic shows how it goes in.
ImageUploadedByTapatalk1425574177.454860.jpg
Reinstall the o-ring. You may be able to see the groove in the above picture. My o-ring was cut when the factory installed the drive cog. I got a new one at the local auto parts store. About $2.25. It might help to oil the o-ring before reinstalling the drive cog.
Now reinstall the five shock absorbing rubber pieces. They only go one way. It does not matter which one goes where. Now reinstall the drive cog. Make sure the top hat looking piece is still in place. I had to stand on my drive cog and rock back and forth. I then used some big clamps. I got the cog as far down as I could. The only thing holding it on is friction. Make sure you clock it correctly. The spokes on the drive cog should line up with the spokes on the rim. It is not hard to figure it out.
You can now replace the brake disk. I used locktite. Once again I believe the torque spec is 35 foot pounds.
Now put the tire back under the bike. Lower the bike until the holes in the swing arm line up with the hole in the rim. Put the left side top hat looking piece in-between the rim and the swing arm. The rim of the hat goes against the swing arm. The top part goes into the rubber seal. Push the axle in. It should go easy if the holes line up. If your pieces that hold the belt adjusters came out, you will need to put them back into the swing arm. They just slide in. No force is necessary.
Replace the top hat looking piece on the right side of the rim. The brim of the hat goes gainst the swing arm.
Now comes the hard part. You need to swing the brake caliper back up into position. I had to fuss with the alignment and move the pads around until the pads were far enough apart to start over the brake disk. Once it starts, it is easy. My axle was too far into the whole assembly to allow the brake bracket to go fully into position. So I had to pull the axle back to the bike's left a little. Once the caliper assembly was in position, I could push the axle the whole way through. It should go easy. Do NOT use a hammer. If you need a hammer, something is not right. Make sure both Top hat pieces are in place.
Make sure you have NO left over parts. You can then reinstall the 36mm axle nut. No need to get it tight just yet. You just want it on enough that the axle does not come out.
At this point you can put the drive belt back on the cog. Raise the bike until the wheel is off the ground. I had to struggle a little to get the belt past the frame that holds the fender. There is about an inch clearance between the tire and the frame. And the belt is slightly wider. Once I got the belt above the cog. I simply rotated the tire and belt went back on.
Now lower the bike until the shock and the lower mount line up. Reinstall the long bolt and the nut. You might want a new nylock nut.
Raise the bike until the rear wheel is off the ground. Rotate the tire a few turns to make sure belt tracking is close. Check your belt tension. It should not have changed.
Start the bike and put it in first gear. Allow the wheel to spin to check tracking. It should not have changed. Tighten the 36mm axle nut. I believe the torqe spec for 2013 is 95 foot pounds. Install a new cotter pin. Reinstall the two axle nut covers. check again for left over pieces. Lower the bike and take it for a test.
Sent from my iPhone using Tapatalk
Last edited by Craniac; 03-05-2015 at 01:17 PM.
-
Very Active Member

-
Very Active Member

 Originally Posted by Craniac

Sent from my iPhone using Tapatalk
You typed all that on your iPhone? Color me seriously impressed!
Trb-- (Roger)
2014 Cognac STL:Ultimate Seat, Nelson Rigg Tail Pack, Nelson Rigg RS/ST Half Cover, TL fender lights, Squared Away Laser Alignment, BajaRon sway bar and links, Akropovic Sport Silencer
2022 White Pearl F3T
Gone but not forgotten: 2019 F3S Special Series Liquid Titanium
Spyder States Visited

-
Well done..!!
congrats..!!  gotta love the diy guys. Not for everyone I know but it is adventurous and satisfing... gotta love the diy guys. Not for everyone I know but it is adventurous and satisfing...
2012 RS sm5 , 998cc V-Twin 106hp DIY brake and park brake Classic Black
-
Originally Posted by Trbayth
You typed all that on your iPhone? Color me seriously impressed!
Actually, I cheated. I uploaded the pics from the I phone and then went to my desktop. Clicked on "Edit post" and typed away.
Some day I need to try the voice function on the phone for creating posts.
-
Very Active Member

Nice work on that tire change! What tire did you put on?
2016 F3 Limited
2019 Ryker Rally
2014 Suzuki V Strom 650
2020 CSC TT 250
-
Very Active Member

Why did you remove the brake disc and wheel hub? I have changed several tires and not done that.
2018 F3 LIMITED
-
I put a Kumho Ecsta 225/50 15 on it.
I removed the brake and hub because I thought it would be easier for to Discount tire to mount and balance. Turns out they couldn't balance the tire. Perhaps it could be done without removing all the pieces.
-
Very Active Member

My local BRP dealer says they balance them w those pieces in place.
-
Very Active Member
You forgot to include switching off the parking brake?
Unless your ST is different than mine. Mine is an SE5, need to switch off the parking brake.
I switched mine off and disconnected the battery because I knew it would be a day or so before putting back together.
-
Nice idea to let the brake caliper and bracket fall off which means not having to replace the 2 bolts.
Turning the parking brake off with the caliper not mounted to the rotor will compress the pads and make for a struggle to get them apart. Just turn off the key and let the beeping quit in about 20 seconds.
What about the bearings? I'm getting a pretty good impression that they only last about 20K miles and Kuhmo's last that long if not longer. I've never replaced bearings on my Goldwing so they should last, but quite a few riders/dealers recommend replacing them.
-
Very Active Member
Nice piece of info knowing the park brake beep stops after 20 secs or so. Thanks
-
Very Active Member

RT
nice work Craniac, that info should be the same for an RT right? I want to remove my rear wheel, but i'm a little skeptical. All that talk of wheel bearings, belt tension worries me. 
-
Very Active Member
You just have to unhook the leveling link and drain the air from the air bag on an RT
2016 F3 Limited
2019 Ryker Rally
2014 Suzuki V Strom 650
2020 CSC TT 250
-
Very Active Member
Originally Posted by Highwayman2013
You just have to unhook the leveling link and drain the air from the air bag on an RT
....and they say Snoopy has useless info? 
.
-
Originally Posted by SNOOPY
Nice piece of info knowing the park brake beep stops after 20 secs or so. Thanks
I always park mine in the garage with the parking brake off. When the Spyder is in my way of doing other work I can just push it around. No key required.
-
Very Active Member
Originally Posted by 900Dave
I always park mine in the garage with the parking brake off. When the Spyder is in my way of doing other work I can just push it around. No key required.
Cool, never thought of that.
-
Very Active Member
Good to see these how to threads still here. I need to do this again.
This will be my second replacement tire. Factory tire lasted 6000 miles, my Ecsta lasted about 14,000 miles. Now putting another Ecsta on at 20,000 miles.
Hard to believe the bike will be 10 years old next year. 
.
-
Very Active Member

Greg Kamer
"It's better to be not riding and wishing you were than be riding and wishing you weren't."
USAF, 20 years, retired
Sheriff's Office, 23 years, retired
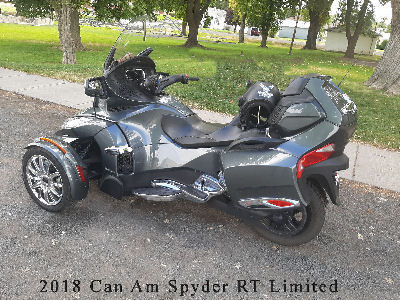
2018 Can Am Spyder RT-Limited
-
Very Active Member
This thread seriously helped me today. Brought back things I forgot the first time. Gonna get tire mounted next week then remount.
.
-
Very Active Member

Originally Posted by SNOOPY
Good to see these how to threads still here. I need to do this again.
This will be my second replacement tire. Factory tire lasted 6000 miles, my Ecsta lasted about 14,000 miles. Now putting another Ecsta on at 20,000 miles.
Hard to believe the bike will be 10 years old next year.
.
14,000 on an " ecsta " I find that very Odd ..... I expect to get 30,000 mi on my Pirelli P-4 ..... just ayin .... What PSI did you run the Ectsa at ????? ..... Mike
-
Can anyone tell me if these instructions apply exactly to a 2021 RTL or is there newer info on 2020+ models?
I’ve got 9250 miles on the OEM tire and it’s shot. I have a new Quatrac sitting in the garage and will be changing out ASAP.
2021 Spyder RT Limited (Sea-To-Sky)
2022 Ryker Rally
-
Ozzie Ozzie Ozzie

Originally Posted by Adventurer
Can anyone tell me if these instructions apply exactly to a 2021 RTL or is there newer info on 2020+ models?
.....
This thread started out back in 2015 as a 'How To:' DIY description for a 2013 ST, which would've meant the instructions were also fairly applicable to the 2010 - 2019 RT's..... That said, while there are clearly a few minor differences between the ST's & RT's of that vintage, and even more differences between them & the 2020+ RT's, when it comes to changing the rear tire, I believe that most of the frame is close enough for these instructions to still apply to your 2020+ Spyder. However, be aware that some time around 2017/18, the rim changed from being a 2-piece rim that could be separated, making it easier to strip/refit a tire on traditional tire changing equipment, to a 1-piece rim - meaning it's still not impossible to change a tire on it using the tire changing equipment your local tire shop is likely to have, but it'll definitely make it somewhat harder for anyone less than a skilled & competent operator with a little bit of a flair for thinking & operating outside of the 'traditional' box! No real difference or a biggie for anyone using manual strip/refit equipment or even basic tire irons tho! 
So all that said, these instructions might not apply EXACTLY to a 2021 RT-L, but in all significant &/or applicable respects, they should be close enough to work for most operators. It's not really all that difficult a task, IF you can get down there ") but there are a few fiddly bits & it will probably take you a bit longer than you might expect when you're doing it for the first time. Pay attention to how the speed sensor is mounted & where any shims used on it might go, cos you REALLY don't want to damage that sensor or the wire, kink or over-stress the wiring, or get the sensor's clearance/flying height above that notched wheel wrong on re-assembly; and you don't want to damage or bend the notched wheel either (it's the spinning part of the speed sensor); nor do you want to 'clock' the drive sprocket incorrectly when re-fitting it either! but there are a few fiddly bits & it will probably take you a bit longer than you might expect when you're doing it for the first time. Pay attention to how the speed sensor is mounted & where any shims used on it might go, cos you REALLY don't want to damage that sensor or the wire, kink or over-stress the wiring, or get the sensor's clearance/flying height above that notched wheel wrong on re-assembly; and you don't want to damage or bend the notched wheel either (it's the spinning part of the speed sensor); nor do you want to 'clock' the drive sprocket incorrectly when re-fitting it either!
Oh, and I find it a whole lot safer to actually TAPE the belt tensioners on the ends of the swing arms into place - just run a 9-12" long piece of duct tape or similar a few inches or so along the top of the arm, down over the end of the arm & the tensioner/tensioner bolt, then along the underside of the arm for a few inches. That way, the tensioners can't fall out or the bolts be turned, & when you walk the belt off during wheel removal & back on again during the wheel refit, you should find it easier & you shouldn't need to re-tension the belt afterwards, altho you should check it anyway! But if you get the wheel refit done correctly & the axle tightened up squarely & properly, it should all go back exactly where it was before it came off! 
Over to you! Good Luck. 
Last edited by Peter Aawen; 05-13-2022 at 06:06 PM.
Reason: Oh...
2013 RT Ltd Pearl White
Ryde More, Worry Less!
-
Thanks for the input Peter Aawen. I continued to search after posting my question and found most of the suggestions you mentioned, very helpful. One additional help is to use a ratchet strap thru the wheel and secured to the pegs (or in my case probably the passenger floorboards on the RTL) to keep the wheel pulled forward.
I didn’t find any mention about loosening the belt tensioner that is standard on late build 21’s. Does that need to be loosened and/or removed?
Last edited by Peter Aawen; 05-13-2022 at 07:48 PM.
2021 Spyder RT Limited (Sea-To-Sky)
2022 Ryker Rally
-
Ozzie Ozzie Ozzie
2013 RT Ltd Pearl White
Ryde More, Worry Less!
 Posting Permissions
- You may not post new threads
- You may not post replies
- You may not post attachments
- You may not edit your posts
-
Forum Rules
|


 Reply With Quote


 I need help with that.

