|
-
 Fender eliminated side mount license plate on 2015 F3 Fender eliminated side mount license plate on 2015 F3
Hello all.
I really like the look of the F3 without that fender on the back tire. And as you may have realized it's not really a kit for the F3 to relocate your license plate. So I took it upon myself to make something work.
I found a side mount vertical license plate holder on a motorcycle website which I will not reveal because I had terrible experience with their service. They were a middleman internet company that didn't stock their own items. They basically take your money right away and order the parts from China and you don't see him for 10 to 12 days. Which would have been okay had they communicated with me what so ever. Unfortunately the only way to contact them is via email they have no phone number. And needless to say they never got back to me on my questions about where the item was and why they took my money without it shipping. OK rant over. I will tell you that this particular license plate holder was designed for a 90s to 2000's honda/yamaha cruiser. I took a chance after really looking at the pictures that I thought I could modify this to fit my F3.
I also ordered LED illuminated bolts that go in the license plate holder so that I could light the plate.
So removing the fender is fairly easy. You do have to remove the right side body panels to get to where the license plate light wiring harness is connected. All in all it took about 20 minutes to remove the fender and the wiring. There is one small screw in the bottom of the plastic housing of the fender and once you remove that cover you can see where there's a clip the wiring goes into where the light on the fender is. That way I was able to use the wiring harness that was existing instead of doing my own wiring.
The 4 bolts you have to unscrew to get the fender off save those because one of those bolts you use to screw in the new side mount license plate holder. I got lucky and the existing hole for this particular license plate holder was perfect for the bolt that held the fender on the F3.
The license plate holder comes in 2 pieces. the bracket that connects to the bike and then the curved peace that you screw into this bracket. Both are made of powder coated aluminum. I chose the powder coated black to match the swing arm.
I had to modify the circular part of the bracket that screws on to the bike to fit the existing curvature of where the fender screwed into the swing arm. This might have been less time consuming had I had metal working tools like a grinder. So I worked with what I had in my garage which was a hand held circular sander. If you tool around in your own garage then you might have guessed, this was a time-consuming slow going project to custom fit the curvature of the bracket that screws in 2 the swing arm to make it fit correctly. But I didn't mind too much.
Once I had the bracket sanded to fit the swing arm where the fender used to screw into I just use the existing bolt that came out of there and tightened it down.
I then screwed on the plate that screws into the bracket and I was ready to mount the license plate.
I mounted the two lighted mounting screws in the upper left and lower left quadrants of the license plate as I thought it would illuminate the plate better then putting them both in top considering the curvature of the vertical plate holder. I purchased a couple of Chrome license plate mounting screws from a local auto parts store for the other two holes.
It was now time to run the wiring harness from the existing right side of the bike over to the left side of the bike. It was pretty easy to get through under the driver's seat. Of course you have to take off the driver seat which I had already done because it's easier to get the one small side panel that has the F3 logo on it off the bike without the driver seat on. Once I ran it through under the driver's seat I was able to drop it straight down wire tie it to some existing wiring harness then wire tied to the swing arm back to the rear axle nut. I had to remove the belt guard just to give me access to the swing arm to wire tie them but it was just two screws and pretty easy.
Wiring the LEDs to the existing wiring harness I just found it was really easy I did have to cut the clip off to give me two exposed wires. But once I did that it was just a matter of twisting wires crimming connections and then using electrical tape to clean it up.
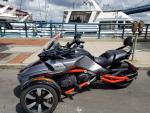
Hopefully the included pictures will help visualize this text. Please forgive the spelling of the words I put on the photos themselves. I was hampered by the amount of characters I could use while editing on my phone.
Peace all.
Bill
( see accompanied post for remainder of photos.)
2016-06-01 07.34.12.jpg
2016-06-01 07.49.08.jpg
2016-06-01 07.32.11.jpg2016-06-01 07.46.38.jpg2016-06-01 07.45.03.jpg
-
 More photos of side mount license plate holder mod. More photos of side mount license plate holder mod.
-
 Last two pics for F3 license plate holder mod. Last two pics for F3 license plate holder mod.
-
 Nicely done... Nicely done...
Like the visuals and full instructions. very complete job and looks great...congrats..
2012 RS sm5 , 998cc V-Twin 106hp DIY brake and park brake Classic Black
-
Very Active Member

-
Very Active Member


Nice mod
Live, Love, and Ride! God Bless!  
-

Looks like a job well done!
-
 Slick Slick
Nice mod, i am looking to do something similar in the near future. It makes the Spyder look so much sportier!
 Posting Permissions
- You may not post new threads
- You may not post replies
- You may not post attachments
- You may not edit your posts
-
Forum Rules
|


 Reply With Quote


