|
-
-
Very Active Member

You put the nuts (with the little black boxes) into the bracket area. These little boxes capture the nut so you should not need a wrench on the nut.
Feed the tubes into the seat hinges.
Put the seat in place and wiggle around until you can push the long bolts through.
Yes the tubes are longer than the seat hinge. They are suppose to be as they act like a bushing.
Bob
2011 RT-S SM5 - Black
Bought June 2013 with 450 miles. 27K on 8-1-2017.
Farkles - DIY Trunk Break Light, HMT Break Light, DIY Mirror Turn Signal Lights, DIY Bluetooth Dongle, DIY iPod Setup, DIY Alarm System Install, Show Chrome front fender / rear saddle bag lights, 4th break light around the trunk, Vented Windshield, Baja Ron Sway Bar, DIY GPS setup, Smooth Spyder, BRP Chrome Mirrors, Adjustable deflectors, Triaxis handlebars, NVB Pegs, Bad Boy Airhorn... More to come 
-
Very Active Member


 Originally Posted by finless

You put the nuts (with the little black boxes) into the bracket area. These little boxes capture the nut so you should not need a wrench on the nut.
Feed the tubes into the seat hinges.
Put the seat in place and wiggle around until you can push the long bolts through.
Yes the tubes are longer than the seat hinge. They are suppose to be as they act like a bushing.
Bob
No video?? 
I wasn't there but I still care!
POW MIA VETS
 2013 STL SE5 BLACK
 CURRANT
SpyderPop's: LED bumpskid
SmoothSpyder: dualmode back rest
T r * * LED:foam grip covers, Tricrings, FenderZ,
brake light strips, wide vue mirrors
Rivico SOMA modulation brake leds
sawblade mowhalk fender accents
minispyder dash toy
Lid lox
KradelLock
Pakitrack
GENSSI ELITE LED H4 headlights
FLO (Frunk Lid Organizer)
BRP fog lights, trailer hitch
SENA 20S EVO
-
Very Active Member

and remember to put a couple of rags in the black hole so when it all falls out you don't lose it.

Happy TRAils/NSD
Paul
2012 RT L
AMA 25 years Life Member
TRA
PGR
Rhino Riders Plate #83
Venturers #78
TOI

-
happy old fart

[QUOTE=Bob Denman;1146078]Hi Guys!
Well; I finally mounted a set of armrests for the Missus. 
Only thing is: I've got a seat sitting loose, and I haven't figured out the right version of the "hokey-0Pokey", to get it back into place. 
At least I haven't lost the square nuts, or collars down into the recesses of the bike yet. 
Since the collars seem longer than the area where you put them: does the part that sticks out go to the outside? Is there a trick to getting the seat to slide rearward into place?
Once in place: do you then put the square nuts down there, and attack them from the other side with the mounting bolts?
 [/QUOTEHaving replaced the stock seats on two Spyders, here's what I do. Remove the passenger backrest to provide a little extra space to see and work. Also remove the strut (or at least disconnect it from the seat). Have a piece of 2X4 or something to hold up the seat at times. The most important thing I learned is to put tape over the fronts of the channel in which the square "nuts" slide so that they remain close to where they'll be needed. Just leave the tape on in case you have to remove the seat again. There's no need to worry about the sleeves sticking out one side or the other. They'll take care of themselves when you tighten things down. The bolt will be inserted from the outside with the nut on the inside. Of course the bolt goes through the sleeve and the "slider." To get the seat reinstalled, slide it back, keeping it as level as possible while you're eyeing the mounting holes. Once you get it in (you may need to use that short wood piece in the front of the seat to see back there) insert the bolt, sleeve and nut on each side, but DON'T TIGHTEN THEM TOO MUCH because you'll have to "play" with the seat it get it properly positioned. Rather than working under the seat I work from above. It's easier on my back and there's enough space since the passenger backrest if off. To make it even easier I bought a ratchet that not only operates in the usual way, but also allows you to tighten just by turning the handle as you would with a screw driver. There's not much room to swing a regular ratchet. Since you didn't tighten the seat you can move it forward and backward and even the front of the seat left and right to obtain proper alignment. You'll want to be certain the seat lock engages properly. Then some fine tuning. It might take a couple of tries. You may find that you must tighten the bolts a little more to retain the seats position. Once you have the seat in the right spot tighten the bolts (they don't have to be real tight) reconnect the strut and replace the passenger backrest. [/QUOTEHaving replaced the stock seats on two Spyders, here's what I do. Remove the passenger backrest to provide a little extra space to see and work. Also remove the strut (or at least disconnect it from the seat). Have a piece of 2X4 or something to hold up the seat at times. The most important thing I learned is to put tape over the fronts of the channel in which the square "nuts" slide so that they remain close to where they'll be needed. Just leave the tape on in case you have to remove the seat again. There's no need to worry about the sleeves sticking out one side or the other. They'll take care of themselves when you tighten things down. The bolt will be inserted from the outside with the nut on the inside. Of course the bolt goes through the sleeve and the "slider." To get the seat reinstalled, slide it back, keeping it as level as possible while you're eyeing the mounting holes. Once you get it in (you may need to use that short wood piece in the front of the seat to see back there) insert the bolt, sleeve and nut on each side, but DON'T TIGHTEN THEM TOO MUCH because you'll have to "play" with the seat it get it properly positioned. Rather than working under the seat I work from above. It's easier on my back and there's enough space since the passenger backrest if off. To make it even easier I bought a ratchet that not only operates in the usual way, but also allows you to tighten just by turning the handle as you would with a screw driver. There's not much room to swing a regular ratchet. Since you didn't tighten the seat you can move it forward and backward and even the front of the seat left and right to obtain proper alignment. You'll want to be certain the seat lock engages properly. Then some fine tuning. It might take a couple of tries. You may find that you must tighten the bolts a little more to retain the seats position. Once you have the seat in the right spot tighten the bolts (they don't have to be real tight) reconnect the strut and replace the passenger backrest.
-
Very Active Member


Lot's of good suggestions.
I've never removed the passenger back rest, but it seems like a good idea.
I agree with pegasus. Stuff some rags or tape over the holes in the back of the pan so that when you drop the fasteneres, they don't fall into a black hole.
Hold the nuts in place with a little tape just like finless Bob suggested. That man has a powerful set of skills.
You can mount the tubes in place using some vaseline or other thick grease to hold them in place while you set it in place.
Leave the bolts in the back a little loose so the seat can move forward and back.
Latch the seat in place. Once latched in place tighten down the bolts in the back to lock it in place. That way the seat will pivot up and down in the right place.
If it ain't broke, don't break it.
IBA #47122
2020 RT Limited Asphalt Grey
-
Very Active Member

To align the seat, after the nuts and bolts are connected, I leave them loose. Then, lower the seat so the locking mechanism catches. That's where the seat is perfect. Then, tighten the seat bolts.
Reinstall the seat piston and the backrest. Job is done.
2020 Chalk, RT Limited, Dark and matching RT622 trailer and BRP hitch. BRP Drivers Backrest, Auxiliary Light, Garmin Zumo XT, GPS Support, RT Rear Panel and Travel Cover. Spyderpops LEDs on fenders, mirrors, saddlebags, top case and RT rear panel. Spyderpops Rock Guard. BajaRon Swaybar, Wolo Bad Boy horn, Freedom Windshield, Elka Shocks.

-
-
Very Active Member


Ultimate has an install video that was was very helpful for me when I installed my comfort seat.
https://ultimateseats.ca/installation-help
Ed
They told me not to give up on my dreams, so I went back to sleep.
Champagne 2017 RTS SE6
Quantum Blue 2012 RTS-SE5 "Bluebell, Bell for short" - Traded 09/2017
-

Thanks for the video link; that may just "turn the tides". 
-
Very Active Member


 Originally Posted by Bob Denman

Thanks, Guys! [emoji106]
I'm going to tape up the "chasms", that swallow hardware... (I already lost a 10mm socket...  )
Taping the square nuts into place seems like an excellent idea! 
When I attempted to get the seat slid back into place, it seemed that I couldn't get the bushings started on the proper path. They just sort of hit something; went "thunk!", and would stop... 
The bushings fit snug & slide into grooves.
Sent from my SM-T350 using Tapatalk
2014 Copper RTS
Tri-Axis bars, CB, BajaRon sway bar & shock adjusters, SpyderPop's Bumpskid, NBV peg brackets, LED headlights and modulator, Wolo trumpet air horns, trailer hitch, custom trailer harness, high mount turn signals, Custom Dynamics brake light, LED turn signal lights on mirrors, LED strip light for a dash light, garage door opener, LED lights in frunk, trunk, and saddlebags, RAM mounts and cradles for tablet (for GPS) and phone (for music), and Smooth Spyder belt tensioner.
-

Thanks!
Using the benefit of hindsight; I probably was just being too careful... 
-
Very Active Member

post pics when you are done. lotsa good info.
2015 rts-white pearl- mods- '16 F3 fat 6 chrome wheels,
and some little stuff. setback utopia backrest, baja ron
sway bar, oem adj. air deflectors, marlin gps compass,
lamonster fbb foot pegs[modified brackets], lamonts
vibration damper, rock guard, and side case stiffener kit,
. brp comfort seat. , fomozas and
altimax, magic mirror mts, and wide mirrors.
[joyce & irvin toms]
-

The armrests bolt down to the bike; they're already in place.
Pics later on today! 
-
Very Active Member

I solved the seat bolt problem by not using them. Two zip ties. The largest you have. It works.  Tom Tom 
 Baloo is my name. Spyders are my game. Well, it's a doo-bah-dee-doo, yes, it's a doo-bah-dee-doo, I mean a doo-bee, doo-bee, doo-bee, doo-bee, doo-bee-dee-doo. And, well, now. Ha ha! What have we here?
2020 Petrol Blue Metallic RTL
-
Very Active Member

 There you go.... There you go....
You can't not get it now.... so much information, suggerstions and even a video link. Put down the coffee and get to it.... so much information, suggerstions and even a video link. Put down the coffee and get to it....
Gene and Ilana De Laney
Mt. Helix, California
 2012 RS sm5
2012 RS sm5 , 998cc V-Twin 106hp DIY brake and park brake Classic Black
-
-
 Some Pictures Some Pictures
Armrests1.jpgArmrests2.jpgArmrests3.jpg
I like the way that they bolt to the "guts" of the bike. They seem to mount nice and solid, with very little flexing. You can easily set the amount of effort it takes to have them pivot out of your way. 
-
 Epilogue... Epilogue...
After last weekend; I only had the seat hinges "cable-tied", to their moorings... 
After grinding the final fitment in my molars all week  ; I tackled the homestretch: armed with a couple of tools, and a Magnum-sized lack of common sense. ; I tackled the homestretch: armed with a couple of tools, and a Magnum-sized lack of common sense. 
I finally decided to remove the passenger backrest, in order to give me better "eyeballs-on the prize" capability. This made a HUGE difference, I have to heartily suggest this step for anyone who is attempting any work that involves removing the seat.
Now that I had more room, I Duct-Taped up the three spots that could swallow hardware and tools. While I had the tape out, I also used it to capture the nuts in their proper locations.
I greased the spacers, slid them in place, (Covered the "tank" with protective cloths), and positioned the seat into a rough location.
Surprisingly: it slid into place with almost no wiggling or cussing needed. I guess that I got lucky!
 Then: I couldn't get the bolts to start! Then: I couldn't get the bolts to start! 
Taking a wild swing at the problem, I decided to latch the seat into place up front. I figured that it would at least give me the proper fore and aft positioning.
That did the trick! 
It only took a little bit of playing with the vertical plane, and the bolts slid into place, and I was able to get them started into the nuts! 
At that point: it was just down to tightening things up, replacing the strut, plugging in the passenger sensor, and replacing the strut.
Now, I'm a happy camper again! 
-
Active Member


 Originally Posted by Bob Denman

Hi Guys!
Well; I finally mounted a set of armrests for the Missus. 
Only thing is: I've got a seat sitting loose, and I haven't figured out the right version of the "hokey-0Pokey", to get it back into place. 
At least I haven't lost the square nuts, or collars down into the recesses of the bike yet. 
Since the collars seem longer than the area where you put them: does the part that sticks out go to the outside? Is there a trick to getting the seat to slide rearward into place?
Once in place: do you then put the square nuts down there, and attack them from the other side with the mounting bolts?

Just sayin....did anyone suggest how to insert the square nuts thingy in or thingy out and why. Oh.....by the way your instal was quite interesting....Congratulations!
-
-
Very Active Member

Current Ride
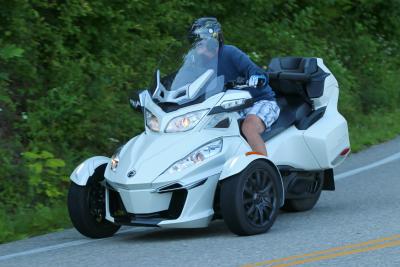
2015 RT-S SM6 Cocaine
Pearl White
Diamond R Web Armrests
Shorty Windshield
Previous Ride
2012 RT SM5 The Beast
Pure Magnesium Metallic
-

The more that I thought about the "Thingy"; it's probably is used as an indexing tab, and should be tried to the inside. There's probably a hole in there, that captures it, and holds the nut in exactly the correct spot. 
Last edited by Bob Denman; 06-27-2016 at 07:27 AM.
-
Member

 ultimate video ultimate video
go to ultimate seats... they have great videos on seat removal/install...
also great tips of tape over nut slot and handle driver that turns.
hope this helps.... btw just changed ultimate seat over yesterday myself
-
Very Active Member
 Posting Permissions
- You may not post new threads
- You may not post replies
- You may not post attachments
- You may not edit your posts
-
Forum Rules
|


 Reply With Quote


 )
)


 Baloo is my name. Spyders are my game. Well, it's a doo-bah-dee-doo, yes, it's a doo-bah-dee-doo, I mean a doo-bee, doo-bee, doo-bee, doo-bee, doo-bee-dee-doo. And, well, now. Ha ha! What have we here?
 so much information, suggerstions and even a video link. Put down the coffee and get to it....
 I've got to actually get around this entire "work thing"; before I can grab wrenches...


