|
-
Very Active Member

 What a mess
.. first oil change on my 1330 What a mess
.. first oil change on my 1330
I had the 3000 mile first service done on my 2015 RT yesterday. I did my oil change my self. I have done all of them on my 2011 so I figured it would be easy! I put the bike up on the lift and wow, there is very little clearance to reach under and work, especially if the catch pan is under. I removed the short drain plug on the drivers right side and let it drain. When it was done draining, I moved the catch pan under the longer drain plug (drivers left) with the two orings and backed to off enough to let the oils drain very slowly and walked into my house. When I returned a couple of hours later, I discover at least 3 gts of oil must have "puked" out of the right side where the drain pan had been removed! I figured that side was done draining! What a mess, 3-4 qts of used oil covered my lift and the floor of the garage! It was certainly a learning opportunity for me. I am considering using a dremel and enlarging the openings in the plastic covers underneath to make this job easier and less messy. Has anyone tried this?? I simply removed the cover on my 2011 but getting this sucker off is MUCH more work!!
Ideas anyone??
2015 an Am Spyder RT Limited
2013 Yamaha WR250R - Sold
2011 Can Am Spyder RT-S SE5 Limited - Sold
2011 Aspen Sentry Trailer
2003 BMW K1200LT - Sold
2007 Unigo Trailer - Sold
2001 BMW K1200LT - Sold
2001 Honda 750 NightHawk - sold

2015 RT Ltd , Canamspyderaccessories Brake pedal ext. Red
-
Very Active Member

Watch Shawn's video. He specifically talks about the mess.
One thing I would do differently is get a 3" long hose you can stick up into the hole of the pan, OD diameter large enough to tightly fit the hole of the pan and ID large enough to get the drain plug socket up inside it. This will allow the oil to not run all over the pan but out the hose.
Bob
2011 RT-S SM5 - Black
Bought June 2013 with 450 miles. 27K on 8-1-2017.
Farkles - DIY Trunk Break Light, HMT Break Light, DIY Mirror Turn Signal Lights, DIY Bluetooth Dongle, DIY iPod Setup, DIY Alarm System Install, Show Chrome front fender / rear saddle bag lights, 4th break light around the trunk, Vented Windshield, Baja Ron Sway Bar, DIY GPS setup, Smooth Spyder, BRP Chrome Mirrors, Adjustable deflectors, Triaxis handlebars, NVB Pegs, Bad Boy Airhorn... More to come 
-
Very Active Member

Step 5, page 124 of the 2015 operators guide, says to remove the oil sump drain plug first. Step 7, page 125, says to allow sufficient time for the oil to completely drain from the engine sump. Step 10, page 125, says to remove the clutch cover drain plug. When you drain in this sequence much less oil comes out of the clutch cover. One must also be aware that when the oil filter cannister cap is opened additional oil may drain out of the cannister into the clutch cover.
With my Spyder up on auto wheel ramps I had no problem with oil running anywhere it shouldn't because it appeared natural to me to strategically place some paper towel wads where oil might run onto the frame. I did have the benefit of a drain pan large enough to accommodate both plugs draining at same time--a smart investment on my son's part. It also serves as the container to tote the waste oil to the auto parts store dump tank.
FWIW, although the manuals say the Spyder should be on a level surface both drain plugs are at the aft edges of the engine and all the oil drained out with the rear wheel lower than the fronts. The proof of this draining was that when I refilled the engine with 5 qt of oil, ran it to operating temp and checked, the level on the dipstick was right where it was supposed to be--at the add mark. I have no need to enlarge any holes anywhere. YMMV.
Artillery lends dignity to what would
otherwise be a vulgar brawl.
******************************
Cognac 2014 RT-S
-
Very Active Member
Thanks for the hints! I did watch Shawns videos twice but still started on the wrong side of the engine, i guess! Clutch (short drain plug) is on the drivers right and engine (long drain plug with two o-rings) sump is on drivers left. Correct? Next time I will not use the lift and simply use ramps for front wheels and a jack for the rear. This way I will have plenty of room to work!
2015 an Am Spyder RT Limited
2013 Yamaha WR250R - Sold
2011 Can Am Spyder RT-S SE5 Limited - Sold
2011 Aspen Sentry Trailer
2003 BMW K1200LT - Sold
2007 Unigo Trailer - Sold
2001 BMW K1200LT - Sold
2001 Honda 750 NightHawk - sold
2015 RT Ltd , Canamspyderaccessories Brake pedal ext. Red
-
Very Active Member

 Originally Posted by bmwlarry

Thanks for the hints! I did watch Shawns videos twice but still started on the wrong side of the engine, i guess! Clutch (short drain plug) is on the drivers right and engine (long drain plug with two o-rings) sump is on drivers left. Correct? Next time I will not use the lift and simply use ramps for front wheels and a jack for the rear. This way I will have plenty of room to work!
Larry, I had oil dribbling all over on my first change from the motor sump (left side) and after that, I dremeled out the holes on both sides. I made three blocks out of 2 X 10 lumber and stick these under the wheels after I jack it up. Makes for easier changes. Still haven't found a good method to get the left side plug out without oil running down my hand/arm. Haven't actually tried just loosening it till oil starts
draining and then go away till it stops. Will try that next time.
BTW, I use a pan for each plug.
Two Wheelers from 1963-2011
Three Wheelers:
2011 RT(Red)
2014 RT(white)
2016 F3T(red)
2022 RT current ride(silver)
__________________
2016 Slingshot
2018 Vanderhall
2019 Slingshot
-
Very Active Member
Originally Posted by bmwlarry
Thanks for the hints! I did watch Shawns videos twice but still started on the wrong side of the engine, i guess! Clutch (short drain plug) is on the drivers right and engine (long drain plug with two o-rings) sump is on drivers left. Correct? Next time I will not use the lift and simply use ramps for front wheels and a jack for the rear. This way I will have plenty of room to work!
Yes, you are correct. Remember we always refer to the Left and Right of the Spyder as the rider would sitting on the vehicle.
FWIW, when I last changed my oil, I found before lunch was the perfect time to pull the plugs and crack the filter cannister cap. I let everything drain while eating and there was only one drop on each drain hole when I returned.
Relax now, you've 9,300 miles or a year before you have to do it again.
Artillery lends dignity to what would
otherwise be a vulgar brawl.
******************************
Cognac 2014 RT-S
-
Very Active Member
The hose idea guys would be much simpler 

Bob
2011 RT-S SM5 - Black
Bought June 2013 with 450 miles. 27K on 8-1-2017.
Farkles - DIY Trunk Break Light, HMT Break Light, DIY Mirror Turn Signal Lights, DIY Bluetooth Dongle, DIY iPod Setup, DIY Alarm System Install, Show Chrome front fender / rear saddle bag lights, 4th break light around the trunk, Vented Windshield, Baja Ron Sway Bar, DIY GPS setup, Smooth Spyder, BRP Chrome Mirrors, Adjustable deflectors, Triaxis handlebars, NVB Pegs, Bad Boy Airhorn... More to come
-
Originally Posted by finless
Watch Shawn's video. He specifically talks about the mess.
One thing I would do differently is get a 3" long hose you can stick up into the hole of the pan, OD diameter large enough to tightly fit the hole of the pan and ID large enough to get the drain plug socket up inside it. This will allow the oil to not run all over the pan but out the hose.
Bob
Nice! Thanks.
2014 RTL Platinum

-
Registered Users

Should have called Shawn FIRST..then do it.........?
Sent from my iPad using Tapatalk
-
I think I'm going to look at wedging 2 silicone hump hoses between the engine and the bottom cover for the oil to drain through...I have hex drain plugs...
You guys have some great ideas and that started me thinking...
I'll let everyone know how it works out and maybe some pictures...I'll be doing my end of the year service sometime in Nov...(If BRP get my DESS problem fixed)
larryd
-
Pragmatic Member

Compelling topic
I'm following this thread with interest as I will be doing my first Spyder oil change in about 2,300 miles (I just passed 10,000). I've performed oil changes on lots of bikes, but have never seen one with a setup like this one, where oil dribbles all over the place after you release the plug. I've also never had one with two plugs, so I'm ordering an elongated drain pan so I can capture both at once.
I'll have plenty of kitty litter on hand for this task 
Pam

- 2015 RT-S Special Series / Red & Black
- Baja Ron Sway Bar
- Utopia Backrest
- F4 Customs tall and wide vented windshield
- Stebel Super Loud Air Horn
- Baker Built Air Wings
- LaMonster Highway Pegs
- SpyderPops Exhaust Block Off Plate
- SpyderPops KOTT Grill
- SpyderPops Belt Guard
- Cat Bypass
- Laser Alignment by Squared Away
- TricLED Fender Lights
- General Altimax RT43 rear tire
- Dual flag holder
- Mud Flap
- A$$hole seeking missile system
-
Very Active Member

Originally Posted by Pampurrs
I'm following this thread with interest as I will be doing my first Spyder oil change in about 2,300 miles (I just passed 10,000). I've performed oil changes on lots of bikes, but have never seen one with a setup like this one, where oil dribbles all over the place after you release the plug. I've also never had one with two plugs, so I'm ordering an elongated drain pan so I can capture both at once.
I'll have plenty of kitty litter on hand for this task
Pam
Newspapers all around underneath works good too. 3 or 4 thicknesses will keep oil off the floor.

2014 Copper RTS
Tri-Axis bars, CB, BajaRon sway bar & shock adjusters, SpyderPop's Bumpskid, NBV peg brackets, LED headlights and modulator, Wolo trumpet air horns, trailer hitch, custom trailer harness, high mount turn signals, Custom Dynamics brake light, LED turn signal lights on mirrors, LED strip light for a dash light, garage door opener, LED lights in frunk, trunk, and saddlebags, RAM mounts and cradles for tablet (for GPS) and phone (for music), and Smooth Spyder belt tensioner.
-
Very Active Member

Loosen the dipstick when you take the drain plug out. Some air has to get in the top before the oil can drain out the bottom.
-
Very Active Member
Auto parts stores sell big bags of oil dry that have always been able to clean up any mess I have ever been able to make, and a few times that was a lot of mess.
-
1330...Put front on car ramps, get oil pan ready, crack open the left side drain plug until the oil is flowing out, remove right-hand mirror and panels, replace oil filter, replace panels and mirror, go for a cuppa while it finishes draining, replace and tighten the left drain plug, move oil pan to below right drain plug, remove plug and allow to drain, replace drain plug and remove oil pan from under Spyder.
Fill with correct quantity of engine oil.
Start engine and check all is OK.
Reverse off the ramps. Clear away.
Job done!
-
Very Active Member

I opened up both holes with the Dremel tool. Makes it all much easier.
Kaos----- Gone but not forgotten. 
2014 RTS in Circuit Yellow, farkle-ing addiction down to once every few months. ECU FLASH IS GREAT. 
-
Originally Posted by Lew L
I opened up both holes with the Dremel tool. Makes it all much easier.
What holes?
-
Very Active Member
The holes in the plastic where the torx/hex go into the drain plug. I have the aftermarket plugs and must use a metric socket. Enlarging the holes makes this MUCH easier.
Lew L
PS: bump skid??????
Kaos----- Gone but not forgotten.
2014 RTS in Circuit Yellow, farkle-ing addiction down to once every few months. ECU FLASH IS GREAT.
-
I got an overflow pan for a water heater from HD. It’s got low sides, and fits under perfect. Plenty of room to take plugs out, and no way oil will make a mess by missing it.
-
Very Active Member
-
-
Very Active Member
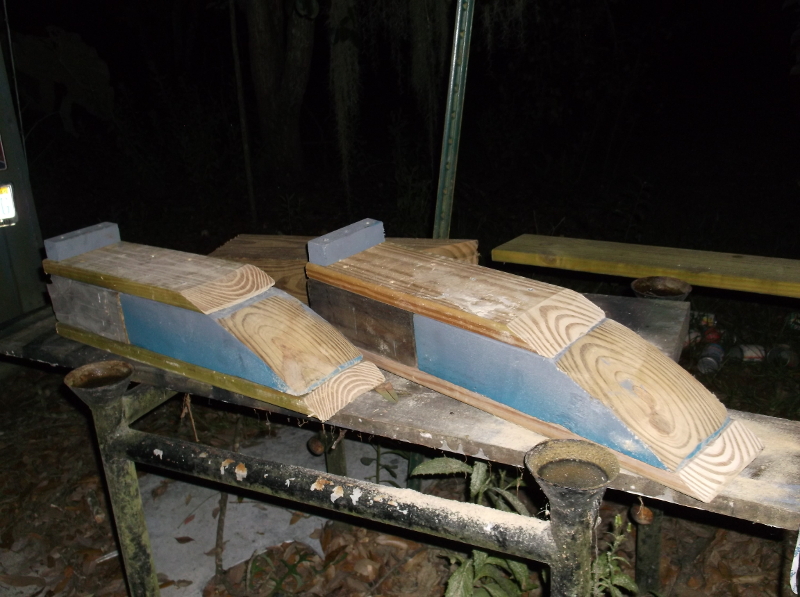
Originally Posted by Spyderlass
Blimey, that was a quick growing tree! Look at the size of the annual rings!
Slash Pine...... AKA Swamp Pine, Yellow Slash Pine, Florida Slash Pine............
 Posting Permissions
- You may not post new threads
- You may not post replies
- You may not post attachments
- You may not edit your posts
-
Forum Rules
|


 Reply With Quote