|
-
09-12-2014, 08:41 PM
#126

Congrats. I'm really glad to see you were sucessful. You are now the expert. You've been there and done that.
John
-
09-12-2014, 10:39 PM
#127
Very Active Member

-
09-13-2014, 05:48 AM
#128
Very Active Member


To pull up code press mode+set+turn signal cancel all at the same time info is on spydercodes app the best app on my phone
Last edited by jtoro1; 09-13-2014 at 06:12 AM.
-
09-13-2014, 09:33 AM
#129
Very Active Member


 Originally Posted by jtoro1

To pull up code press mode+set+turn signal cancel all at the same time info is on spydercodes app the best app on my phone
That is not the correct way to pull up codes on a GS/RS. That is for RT and ST.
Press mode button repeatedly to scroll to total engine hours on display.
Press and hold the Hold button. Repeatedly press the flash high beams button 5 times in less than 5 seconds.
2018 F3 LIMITED
-
09-13-2014, 09:42 AM
#130
Very Active Member


When an "E" is displayed instead of the gear and the "R", "N" are not flashing. That means there is a fault coming from the Gear Position Sensor. That does mean that the sensor is bad, but could be. Make sure it is not damaged. Screws are tight. Maybe take it off and clean it. Since it is only giving you an "E" in reverse it could be you put the shift lever back on, one or two spline teeth off.

2018 F3 LIMITED
-
11-29-2014, 07:01 PM
#131
-
11-29-2014, 07:13 PM
#132

Nice work! Its great to see someone take the time, educate themselves, and take the initiative to get it done vs. the standard "take it to your dealer" response.
As you found out these things are really not that complex once you dive into them.
-
11-29-2014, 08:13 PM
#133
-
12-03-2014, 01:39 AM
#134
Registered Users

 engine apart engine apart
You are one gutsy guy! A difficult undertaking and hats off to you. I took the engine out of my 1800 Gold Wing and just took off the back of the engine and the rental, not the purchase price was over $200 for the specialty tools and to split the case and reassembly would have required over $2500 in specialty tools.
Getting back on your topic, considering the time it took you, minus the time it would take an experienced BRP mechanic, are the prices quoted you really out of line? At $75 to $100 per hour of shop time it would have been the cheaper option to buy a used engine out of a wreck and have it installed rather than having your engine overhauled as you did.
My wife and I circumnavigated the globe on our trimaran sailboat, gone 8 years
Cushman Eagle, 1954 Corvette, 1964 Corvette with Duntov cam, 1996 Corvette, Chrysler 300 Hemi,
2003 1800 Gold Wing with Hannigan sidecar
2014 Spyder RT
IBA41956
DS446 
-
12-03-2014, 02:16 PM
#135
Very Active Member

While I like to work on stuff and have rebuilt many engines in my years, I think I would bite the bullet and just buy a new 998 engine for a little less than $2K. But this post is saved in my bookmarks if ever I need it and decide to tear down the engine anway...
Bob
2011 RT-S SM5 - Black
Bought June 2013 with 450 miles. 27K on 8-1-2017.
Farkles - DIY Trunk Break Light, HMT Break Light, DIY Mirror Turn Signal Lights, DIY Bluetooth Dongle, DIY iPod Setup, DIY Alarm System Install, Show Chrome front fender / rear saddle bag lights, 4th break light around the trunk, Vented Windshield, Baja Ron Sway Bar, DIY GPS setup, Smooth Spyder, BRP Chrome Mirrors, Adjustable deflectors, Triaxis handlebars, NVB Pegs, Bad Boy Airhorn... More to come 
-
12-03-2014, 02:45 PM
#136
-
12-06-2014, 11:39 PM
#137
-
12-07-2014, 12:26 AM
#138
Very Active Member

....and we're gonna ride, we're gonna ride.....
ride like the one-eyed Jack of Diamonds, with
the devil close behind,.....we're gonna ride....
2008 GS.....PE # 2888
-
12-07-2014, 10:53 AM
#139
Active Member

My hat off to you, quite the undertaking.
-
12-11-2014, 03:42 PM
#140
Very Active Member

 bearings pieces in oil bearings pieces in oil
I am saving this for it is my turn the rebuild my engine . Did you get all the problems resolved after you put it together. That was good work.

-
12-11-2014, 04:04 PM
#141
Very Active Member

 While assembling the engine: While assembling the engine:
Lubricate all the moving parts with assembly lube or a heavy oil. When you first start the engine you don't want dry parts rubbing.
Good luck. Sounds like a great adventure.
2011 RTS (Sold to a very nice lady)
1998 Honda Valkyrie
2006 Mustang GT. Varooooom!
US Navy Veteran
SC Law Enforcement Boat Captain
CNC Machine Service Technician
President: Rolling Thunder SC1
Member: Disabled American Veterans, Rock Hill, SC
Member: American Legion
Experience is recognizing the same mistake every time you make it!  
-
12-13-2014, 10:02 AM
#142
 Fixed Fixed
 Originally Posted by jtoro1

I am saving this for it is my turn the rebuild my engine . Did you get all the problems resolved after you put it together. That was good work.

Yes, problem solved. It started on the first crank and machine runs great. When and if you need to rebuilt your engine. You might consider marking your piston before removing it. It was suppose to be marked from factory but there was no marking on mine.
-
01-12-2015, 07:55 PM
#143
Active Member
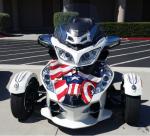
 Hat's off to you Caito! Hat's off to you Caito!
 Originally Posted by DrewNJ

Nice work! Its great to see someone take the time, educate themselves, and take the initiative to get it done vs. the standard "take it to your dealer" response.
As you found out these things are really not that complex once you dive into them.

Caito,
I just remembered following this thread several months ago but lost track of it until just today. I'm so glad you were able to get this project completed with your own 2 hands!!! What a sense of satisfaction you must have knowing what you have accomplished. I was really pulling for you the entire way...
I thank you for all the detail you provided during the process...This was like reading a good mystery novel. Thanks for taking us all along with you on the adventure.
Enjoy the Ryde!!!
~'12 RT Limited, Pearl White~
BajaRon Anti-sway Bar
Squared Away Laser Alignment
Custom Dynamics HMT Brake Light, Front Fender Tips & Kit, Front Mud Flap LEDs, Amber & Red Brightsides, Tri-color Magicflex Channelz
Lidlox Grip Tip Helmet Locks
TricLED Mirror Signals, RGB Multi-color Halo Underground Effects Kit, LED Headlights
Palmer Signs Custom "Captain America" frunk graphics
Twisted Chrome Pinstripes
Overland Australian Sheepskin Seat Cover
-
01-12-2015, 10:32 PM
#144
Very Active Member


I also followed this last year! Again, well done! I have bookmarked this for future reference. That is one of the reasons I do an oil analysis on my 1330. If something is failing, I want to know about it!
-
08-05-2023, 09:05 AM
#145
Active Member

This is a very good write up. Thank you to the OP for posting alll this good information. I am just starting to reassemble my engine and transmission and will use this for reference. Awesome work!
Last edited by Peter Aawen; 08-05-2023 at 05:46 PM.
Reason: Avery... ;-)
-
10-21-2023, 11:03 AM
#146
Active Member


In this post he mistakenly states that there is a bolt hole that will accept the crankshaft locking pin and lock the crank. It is actually on the clutch side of the engine. At least that's where it is on my 2012 RTS.
-
10-21-2023, 12:06 PM
#147
Very Active Member
-
10-21-2023, 12:50 PM
#148
Active Member


 Originally Posted by ARtraveler


This post dates back to July 2014. Most of the posters are no longer here.
I understand that. But I'm using this thread as a reference while re-assembling my engine. I just want to point out to anyone that ends up doing the same will at least double check that note.
 Posting Permissions
- You may not post new threads
- You may not post replies
- You may not post attachments
- You may not edit your posts
-
Forum Rules
|

