|
-
Registered Users
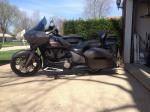
 2013 Spyder RS - ST Handlebar Swap 2013 Spyder RS - ST Handlebar Swap
This swap will require a moderate mechanical ability. If your handy and have worked on motorcycles and/or cars you can handle this mod. The follow are the tools that you will need.
1. 10mm socket
2. 8mm socket
3. 7mm allen wrench
4. 5mm allen wrench
5. 3mm allen wrench
6. T-27 torx bit
7. straight screwdriver
First use the T-27 torx bit to remove the upper plastic body panel that covers the "backbone" and the side panel (where your knees would be).
image.jpg
Next use the 3mm Allen wrench to remove the black plastic covers on the underside of the handlebars. This will allow access to the 5mm Allen bolts to remove the actual handlebars.
image.jpg
After you have unbolted the handlebars with grips, throttle and (sm5) clutch still attached you can now remove the (4) 7mm bolts that hold the center piece of the handlebars on.
image.jpg
After you have removed the 4 bolts now turn the center piece over. Unplug the ignition switch by removing the rubber boot. The plug has (3) spot to squeeze to pull it off. There are (2) 8mm bolts that hold the black plastic piece that surrounds the ignition switch, remove them now.
image.jpgimage.jpg
Now there are (2) 10mm bolts that bolt the ignition switch to the center handlebar piece, remove them. After the bolts are out push the ignition switch through the hole so that you can grab the black plastic trim ring for the ignition switch. once you grab the trim ring turn it counter clockwise and pull. Now the ignition switch will be separated from the center piece.
Tug on the wires to the throttle and controls to find the wire ties on the right side (above engine) that are holding the wiring harness down. Cut the (2) wire ties so that you have mor play in the wires. You are now ready to reassemble using the Spyder ST center piece.
Last edited by hchays; 02-26-2014 at 10:09 PM.
-
Very Active Member

 great write up great write up
great write up hubie. love the black bars. they look excellent. 
 it was fun while it lasted. 
-
Registered Users


 Originally Posted by coz

great write up hubie. love the black bars. they look excellent. 
Thanks, I like the look too. I finally got the pictures to upload to the thread. However it would only let me put up to 5 pictures on it. It's a pretty easy mod if you have much mechanical ability. There are only a couple of things that I stumbled across that would hold a person up from doing the mod. They both have to do with the ignition switch (I created a step for the ignition switch). I hope everyone enjoys the thread.
-
Very Active Member


I have sm5. Will there be a problem with clutch and the cable length
-
Registered Users


 Originally Posted by bmccaffrey

I have sm5. Will there be a problem with clutch and the cable length
I also have a SM5 and I had no issue with wires or clutch hydrolic line. Everything fits like it was designed to have the ST bars from the factory. The most difficult thing about the install was putting the left side plastic cover ( goes on the underside of the handlebar) back on. It wasn't bad just a tight fit, but that was the worst thing. From start to finish (even taking pictures) the whole job took me about 2 hours.
-
Very Active Member


[QUE=hchays;766783]info also have a SM5 and I had no issue with wires or clutch hydrolic line. Everything fits like it was designed to have the ST bars from the factory. The most difficult thing about the install was putting the left side plastic cover ( goes on the underside of the handlebar) back on. It wasn't bad just a tight fit, but that was the worst thing. From start to finish (even taking pictures) the whole job took me about 2 hours.[/QUOTE]
Have you driven yet? How is the comfort compared to regular bars.
Thanks for all the Info
-

Thank you so much for sharing this procedure. I was stumped by how to get the ignition switch out, but now I think that I can get it . Al in Wisconsin
-
 Ignition switch spring Ignition switch spring
 Originally Posted by Principalgrandpa

Thank you so much for sharing this procedure. I was stumped by how to get the ignition switch out, but now I think that I can get it . Al in Wisconsin
Hi, While getting the ignition switch off of my oem handlebars, I had to take the ignition switch partially apart (st onto my rs) . In doing so, a little spring fell out (3/4" or so in length, similar to the spring in a ballpoint pen) .It has to do with the key turning in the key cylinder.
The problem is that now I can't figure out how to get the spring back in.
I have checked my service manual, but it doesn't even show the spring.
If you can guide me on getting the spring in correctly, it would be greatly appreciated.
Thank you very much. Al Schroeder
Last edited by Peter Aawen; 07-17-2022 at 07:08 PM.
Reason: Removed extra [ ;-)
-

 Originally Posted by hchays

This swap will require a moderate mechanical ability. If your handy and have worked on motorcycles and/or cars you can handle this mod. The follow are the tools that you will need.
1. 10mm socket
2. 8mm socket
3. 7mm allen wrench
4. 5mm allen wrench
5. 3mm allen wrench
6. T-27 torx bit
7. straight screwdriver
First use the T-27 torx bit to remove the upper plastic body panel that covers the "backbone" and the side panel (where your knees would be).

Great write up, thanks. I'm getting ready to do this swap... one quick question - why do we need to remove the body panels? Also, is it three total panels to be removed?
Much appreciated,
Bodgerist
-
Very Active Member


Need to get to wires that are zipped tied to clip and lenghten
-
Very Active Member

-
Registered Users
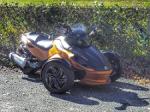
 So Much Better! So Much Better!
Thanks hchays for the write up! it was super easy to follow and execute. I did not, however need to disassemble the ignition to remove it from the original bars. And a big thanks to alwaysontwowheels for selling me his black ST handlebars to put onto my 2013 matte orange and black RSS. Couldnt have done it otherwise.
-
 Finally swapped RS for ST Handlebars - thanks for the excellent writeup! Finally swapped RS for ST Handlebars - thanks for the excellent writeup!
So, a year after buying the parts I finally made the handlebar swap. Thanks again for this excellent instruction set. A few comments:
- DO IT! If you have an RS, swap out the handlebars! It doesn't take away from cornering at all, and it causes you to sit in a much more comfortable, neutral position. Motored around for over an hour with the ST bars and felt nothing in my lower back. Zero fatigue, Zero discomfort.
- I agree with the earlier observation about the ignition pod. Once you remove the two 10mm bolts and remove the bar with threaded holes, you can lift the whole pod upward toward the direction of the ignition key and just rotate the top boss 1/6 turn counter-clockwise to unlock and remove it. Then the whole pod comes out.
- I recommend buying new bolts for the handlebars and the handle tube clamps - the manual recommends to do so, and they come with loc-tite pre-applied.
- The left hand side ST handlbar plastic cover was definitely a bit of a challenge to install. I finally got it by installing first the lower and back sides, then forcing the forward half around. The plastic is really bendy.
- Routing of the wires on the left hand side goes forward of the hollow. It will all tuck into the plastic cover, except the clutch cable which has it's own recess in the plastic.
- Handle tube clamps get 89 in-lbs of torque to install. Handlebar bolts get 28 foot-lbs. (P604 of the manual)
- You'll need a total of 8 of the small bolts that hold the plastic covers on - you'll only have 4 from the RS.
- My ST handlebar was used and didn't have the green metal cable retainer clips. I reused the ones from the RS, but found there was a clash when installing the left plastic cover, so i removed the clip and just tucked the cables in.
- This took me a total of about 4 hours, but I work extremely slowly.
- Did I mention to make the swap? Do it!
Best of luck,
Bodgerist
-
Very Active Member


Nice work thanks for sharing.
Live, Love, and Ride! God Bless!  
-
 rs-st handlebar swap rs-st handlebar swap
if you have an rs spyder, and the handle bars are just to low and unconfortable. then this swap is for you. i swapped out the bars on a sat. afternoon. the parts for an 2013 SE5 are 709400983, 709400987, 709400989. the st parts bolt right on with no trouble..
have nice ride
-
 2012 RS SM5 2012 RS SM5
I know someone posted on this once, but they also said 2013-14 wasn’t probably interchangeable, but what about the 2013 RSS/ST to a 2012 RS sm5 handlebar swap? It would be nice to use the center bolts on the newer year bars for a gps mount etc, but also for the comfort.
Last edited by The Ancients; 10-09-2018 at 12:02 PM.
-
Ozzie Ozzie Ozzie

Hi Al (principalgrandpa) I'm sorry that I can't help much with your problem, but you do really need to check the date on the other posts in this thread - the only person (so far, besides me now) who's posted in this thread since October 2018 is you with your last 3 posts, and from their profiles, I can see that the OP hasn't posted anything on the Forum since 2015 & most of the other main contributors who've done this swap & posted in this thread haven't even looked in on the Forum for over a year!! So there's a good chance that they won't respond no matter how many times you ask...... 
You could try sending a PM to any of the other regular posters who've done this who are still actively posting, or maybe check out the parts listings & diagrams from BRP, Cheapcycleparts, etc to see if you can get an idea from them as to where that spring goes.  There again, I'm pretty sure this isn't the only thread on dismantling/re-assembling the ignition switch (or the handlebar swap for that matter. There again, I'm pretty sure this isn't the only thread on dismantling/re-assembling the ignition switch (or the handlebar swap for that matter.  ) so maybe doing a bit more searching & checking for any other threads that might help & possibly sending a PM to anyone from those who has a more recent 'last activity' date showing in their profile - bmccaffery maybe?? ) so maybe doing a bit more searching & checking for any other threads that might help & possibly sending a PM to anyone from those who has a more recent 'last activity' date showing in their profile - bmccaffery maybe?? 
Worth a shot, isn't it? Gotta be better than repeatedly asking the same thing in the same old thread anyway! But I am truly sorry I can't help you any more - I'm not in the same State as my Spyder atm, so I can't even pull its ignition apart to see where that spring goes/how it should fit back to help explain it to you. I do hope you get the help you're after soon! Good Luck. 
Last edited by Peter Aawen; 01-25-2020 at 09:37 AM.
2013 RT Ltd Pearl White
Ryde More, Worry Less!
-
 Worked Great! Worked Great!
Thanks for the walkthrough, it helped a ton doing this on my 2013 RS! Rides much better now. I will say be careful tightening the bolts down on the rear handlebar trim and the handlebar clamps as they break easily. Also dropped an ignition bolt somewhere down in my plastics so watch that. Thanks!
 Posting Permissions
- You may not post new threads
- You may not post replies
- You may not post attachments
- You may not edit your posts
-
Forum Rules
|


 www.CincyBikesandTrikes.com
 Reply With Quote
 it was fun while it lasted.


 There again, I'm pretty sure this isn't the only thread on dismantling/re-assembling the ignition switch (or the handlebar swap for that matter.
