|
-
Very Active Member
 Precautions on installing a comfort seat Precautions on installing a comfort seat
I just ordered a new comfort seat for my 2012 RTS and I know a lot of folks have comfort seat on their bikes. So I'm asking all the owners that have changed out their seats to give me a few pointers of what not to do and what to do. A nice step by step detailed instruction would also be helpful. I hope this isn't a real hard thing to do on the  . I'd like this modification to go without a hitch. Thanks for everybody's input. . I'd like this modification to go without a hitch. Thanks for everybody's input.

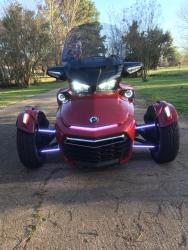
2017 F3 Limited in Intense Red Pearl
2008 Triumph Rocket (SOLD)
2002 Honda VTX 1800 C ( SOLD)
2014 Triumph Thunderbird Commander
-
Very Active Member

only help i can be is to tell you to plug up all the holes under the seat with rags or something because many, many folks lost screws into the dark deep hole under the seat.
Cruzr Joe
2018 F3 Limited, BRP Driver Backrest, Spyderpops Lighted Bump Skid, Dual Spyclops Light, Mirror Turn Signals, Laser Alignment, Engine LEDs, Fog Lights With Halo's, Cushion Handgrips, BRT LEDs, and Under Lighting, Lamonster IPS, (with Clock), F4 25" Vented Windshield with Wings, Airhawk "R" Cushions. Position 4 Brake setting, Short reach Handlebars, Dash Mounted Voltmeter and 12 Volt Plug. Set of 3rd pegs. Extended Passenger Seat. Exterior BRP Connect setup, Ultimate Trailer
-
Very Active Member

 Don't know..!! Don't know..!!
about the RT but the RS is quite simple. The seat sensor needs to be moved over and on thr RS/RSS with rear backrest some of that has to be removed to make the change. The only thing to watch for is lining up the seat latch pin. Those with RT's should chime in soon...
Gene and Ilana De Laney
Mt. Helix, California
 2012 RS sm5
2012 RS sm5 , 998cc V-Twin 106hp DIY brake and park brake Classic Black
-

It is easiest if you remove the passenger backrest (screws are inside the rear trunk) this allows the seat to raise higher so you can reach the stuff you need to. And like Joe said, first thing is to tape over any openings because if you don't you will certainly be searching for missing parts in the bowels of the Spyder.
2017 F3T-SM6 Squared Away Mirror Wedgies & Alignment
2014 RTS-SM6 123,600 miles Sold 11/2017
2014 RTL-SE6 8,600 miles
2011 RTS-SM5 5,000 miles
2013 RTS-SM5 burned up with 13,200 miles in 13 weeks
2010 RTS-SM5 59,148 miles
2010 RT- 622
-

Ultimate has a video on there web site. Didn't the seat come with instructions?
1) remove the back rest 1A) remove the lift cylinder 1C) unplug the seat switch 1D) remove the latch pin
2) plug the center hole with a rag (under the back rest)
3) 13mm (i think) socket (1/4" drive) to remove the 2 bolts (pay attention to the 2 nuts as they must go back the same way they come out)
4) Remove the seat
The lath pin should be the last thing after the new seat is aligned. use caution it must align up in the center of the latch. 
-
Registered Users


Here is a video from Ultimate Seats that will give you an idea of what to do.
I am sure this will help you!
** Loving my 5th Can-Am Spyder since 2007! **

-
Very Active Member


The only thing the video doesn't mention , is to put some duct tape over the opening for the bottom of the grove , so nut will nut come out . Other than that it is a great video! Took me 15 minuted to do mine on a 2013 rt . Good luck and enjoy !
-
Very Active Member

-
Very Active Member


Installed ultimate big boy on 2013 RT , no sore behind , can ride for ours ! Also looks great, two tone , with back rest ! There are a few suppliers , site sponsored , depends on your needs and budget you have many options to choose from! !
-

 Originally Posted by SNOOPY

Do these aftermarket seats make a "bit" of difference, or an "extreme" difference? 
Or do people just think they are cool? 
For long distance riding the aftermarket seats can make a difference. There are other factors including medical conditions and weight. I personally come under the weight issue, at 300 lb by the end of the day I could not wait to get off the thing. I chose a Russell Day Long with there Suspension system built in. It was built for our individual weights, heights and posture. We have not had a lot of road time due to weather, but it feels like it will do its job. Yea, it is snowing with the sun out.
-
Very Active Member


Thanks
I don't have the weight, but both the wife and I have our share of back problems.
-

Come to SpyderFest, and test-out some of them! 
-
Very Active Member


 Originally Posted by Bob Denman

Come to SpyderFest, and test-out some of them! 
Every event on this forum is too far for me.
-
Very Active Member


 Originally Posted by Frank G

Ultimate has a video on there web site. Didn't the seat come with instructions?
1) remove the back rest 1A) remove the lift cylinder 1C) unplug the seat switch 1D) remove the latch pin
2) plug the center hole with a rag (under the back rest)
3) 13mm (i think) socket (1/4" drive) to remove the 2 bolts (pay attention to the 2 nuts as they must go back the same way they come out)
4) Remove the seat
The lath pin should be the last thing after the new seat is aligned. use caution it must align up in the center of the latch. 
I haven't gotten the seat as yet. I was just getting prepared with all the information so when it does arrive it will be an easy, I HOPE, install. Thanks too all that responded.

2017 F3 Limited in Intense Red Pearl
2008 Triumph Rocket (SOLD)
2002 Honda VTX 1800 C ( SOLD)
2014 Triumph Thunderbird Commander
-
Very Active Member


All I did was stuff a face cloth in the hole under the bolt. Use care with removing the nut and don't forget to unplug the seat sensor. No need to remove back rest unless you are replacing it but it is easy enough. The shock cylinder has a metal clip that has to be pryed from the rear to release it from the ball like most auto shock cylinders.You do not have to take the shock off either just remove it from the seat and lay it on a rag forward Done  Once you swap out the parts and bolt the seat rest the seat on the latch. You will be able to see if the pin is centered, mine was not from the dealer and I had to move it back to center it and now it pops up as it should. Once you swap out the parts and bolt the seat rest the seat on the latch. You will be able to see if the pin is centered, mine was not from the dealer and I had to move it back to center it and now it pops up as it should.
Last edited by Magdave; 01-19-2014 at 01:14 PM.
2013 Mag Silver SE5 RT BahaRon Sway bar & Sway bar links, Grip Puppies, Kuryakyn Helmet locks , Ultimate Seat w/Utopia Backrest, Dash power outlet, Spyderpops BumpSkid, Swagman Cup holders, Full size Brake Pedal, Seal DLX Floorboards, Freeway Blaster horns, Sylvania Super Bright fender LEDs, Scotchlite 680 Rear & Fender Reflectors, BRP Fog Light Kit, LED Mirror turn signal strips, 2014 RT grille mod. Outlaw Laser Alignment

-
 Posting Permissions
- You may not post new threads
- You may not post replies
- You may not post attachments
- You may not edit your posts
-
Forum Rules
|
. I'd like this modification to go without a hitch. Thanks for everybody's input.


 Reply With Quote


