|
-
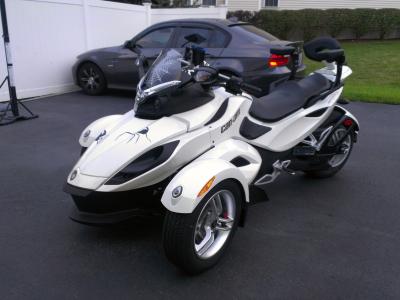
 Installing Rear Sport Rack and Backrest on RS-S Installing Rear Sport Rack and Backrest on RS-S
So today I installed the rear sport rack. I will start with the good news:
Once you get the sport rack installed, it takes 30 seconds to switch the cover outfor the backrest and visa versa.
Also, I called my local dealership and told them about the 21% off the hondaeastsuperstore.com was offering and asked them if they would price match and they said yes. Rode to Powersports of Greenville and bought the rear sport rack and backrest for $555 plus tax. Oh yeah, they wanted $200 for installation. Yeah Right!!
So this morning I decided to attempt the install by myself. One and a half hours start to finish after making mistakes. Many mistakes. I am now confident that I can do it in 45 minutes max. I used only the tools that came with the Spyder and needed a small Allen wrench that is not in the kit. If anyone is in the area and would like some help installing, ride over here and I will do it for free. And then we can go for a ride in the mountains.
-
Very Active Member


....and we're gonna ride, we're gonna ride.....
ride like the one-eyed Jack of Diamonds, with
the devil close behind,.....we're gonna ride....
2008 GS.....PE # 2888
-
Very Active Member

 Originally Posted by Spyder777

So today I installed the rear sport rack. I will start with the good news:
Once you get the sport rack installed, it takes 30 seconds to switch the cover outfor the backrest and visa versa.
Also, I called my local dealership and told them about the 21% off the hondaeastsuperstore.com was offering and asked them if they would price match and they said yes. Rode to Powersports of Greenville and bought the rear sport rack and backrest for $555 plus tax. Oh yeah, they wanted $200 for installation. Yeah Right!!
So this morning I decided to attempt the install by myself. One and a half hours start to finish after making mistakes. Many mistakes. I am now confident that I can do it in 45 minutes max. I used only the tools that came with the Spyder and needed a small Allen wrench that is not in the kit. If anyone is in the area and would like some help installing, ride over here and I will do it for free. And then we can go for a ride in the mountains.
Working on my 2011 RS-S SE5 is my favorite hobby. I put on the sports rack and backrest ($547.98), Saddlebag kit ($695.99),1" riser block ($35.99),cliper trim kit ($14.99), and the sport/touring windshield ($129.99) that was the BRP stuff. The best thing I put on was the BajaRon anti-sway bar, that made the handling so much better. I put on led strip stop lights on the back panel, strip lights on both sides, replaced the license plate reflector with one that lights up, the front marker light bulbs with amber led bulbs, and just ordered strip lights for the front fenders in amber/red. On the inside K&N air filter, BajaRon sparkplugs and plug wires, Titanium heat tape, Honda "Y" pipe gaskets, and made a filter to stop the oil from geeting in to the airbox.
Mike
-
I have a group of friend that I call the fantastic four , two of us are incapacitaded and two are retired. We purchase any part for any of the four spyder and it become an event any day of the week. After installation we have lunch and then for a ryde . We try to do this every week . By the way we have install 4 back rests already.
-
-
Registered Users

Originally Posted by MikeinGA
Working on my 2011 RS-S SE5 is my favorite hobby. I put on the sports rack and backrest ($547.98), Saddlebag kit ($695.99),1" riser block ($35.99),cliper trim kit ($14.99), and the sport/touring windshield ($129.99) that was the BRP stuff. The best thing I put on was the BajaRon anti-sway bar, that made the handling so much better. I put on led strip stop lights on the back panel, strip lights on both sides, replaced the license plate reflector with one that lights up, the front marker light bulbs with amber led bulbs, and just ordered strip lights for the front fenders in amber/red. On the inside K&N air filter, BajaRon sparkplugs and plug wires, Titanium heat tape, Honda "Y" pipe gaskets, and made a filter to stop the oil from geeting in to the airbox.
Mike
Wow you seem to be quite handy with these mods to the RSS. I just got mine and there's alot i want to add on but not sure i have the apptitude for it Ga is not that far maybe I'll take a road trip...LOL I've got the beer if you have the tools.
 MY RIDE MY RIDE - 2011 RSS SE5 Alloy Orange/Matte Black
MY MODS - Yoshimura Exhaust, BRP Comfort Seat, Fog Lights, Battery Tender, 4.5" Easy Risers, Kuryaken Iso Grips, Cal Sci XL Windshield, Cruise-mate Throttle Lock, Green Air Filter, O2 modifier, Weaver Floorboards, Baja Ron's Anti-Sway Bar, Smoothspyder Adjustable Backrest, Center LED Tail Light and Magic Brake Flasher.
-
Registered Users

Backrest parts storage
For all those that have installed the backrest you may want to cut off the plastic flange located under the tail lights. With the backrest installed you can not get to the brake lights to replace them without removing the backrest (at least older generation Spyders). I don't have the link to the instructions but will edit the post when I am to find it.
Also the cavity under the backrest works great to hold a small LED flashlight and replacement fuses and a relay. I was able to hold one of every size fuse wraped in a shop rag to keep them snug and protected.
RT-S: HMT brake light, mud flap lights/turn signals, Trailer hitch, Garmin 660 GPS, Ride-On, Travel cover, LED Mirror turn signals, LED trunk lighting, RGB ground effect lighting, BajRon anti-sway bar, to be continued ......
Member of the WSR (Woodstock Spyder Riders)

-
Originally Posted by JJW SpyderRider
For all those that have installed the backrest you may want to cut off the plastic flange located under the tail lights. With the backrest installed you can not get to the brake lights to replace them without removing the backrest (at least older generation Spyders). I don't have the link to the instructions but will edit the post when I am to find it.
Also the cavity under the backrest works great to hold a small LED flashlight and replacement fuses and a relay. I was able to hold one of every size fuse wraped in a shop rag to keep them snug and protected.
Agreed!  When I did my rack I cut the tabs off the lights while I had it all apart. This is on a 2012. The design hasn't changed at all. When I did my rack I cut the tabs off the lights while I had it all apart. This is on a 2012. The design hasn't changed at all.
I use the little cubby space for a small first aid kit, small bike lock I use for the helmets, and a small tie down net. Fits in the space pretty good!
-
Active Member

Re: Installing Rear Sport Rack and Backrest on RS-S
I installed my backrest/sport rack, and had no idea about the tabs. I'm not quite sure what tabs you are talking about. Pics?
Sent from my SPH-D710 using Tapatalk 2
---------
Jive
Beckley, WV
2012 Pure Magnesium Metallic Spyder RTS SM5, SpyderPops Belt Guard 

-
PhotoShop Master

i still remember when i bought my 2008 gs and the backrests and sport rack were on national backorder ....arrrr the memories ....
and spyders only came in 2 colors ...silver and yellow ...and bread was a nickel..... and i used to walk to school in snow ....this high ....
those were the days ....
THOSE WHO LIVE BY THE SWORD DIE BY THE SWORD... BUT...THOSE WHO MASTER THE SWORD SURVIVE BY THE SWORD....
Rev. J. Proctor
 reverendproctor.com
HAPPY SPYDER OWNER 
-
Registered Users
Here is the link for removing the flange. I removed my plastic flange while it was on the bike.
http://www.spyderlovers.com/forums/s...+light+removal
RT-S: HMT brake light, mud flap lights/turn signals, Trailer hitch, Garmin 660 GPS, Ride-On, Travel cover, LED Mirror turn signals, LED trunk lighting, RGB ground effect lighting, BajRon anti-sway bar, to be continued ......
Member of the WSR (Woodstock Spyder Riders)
-
Active Member

Just finished installing mine and seen this post. I bought a used red one off a member here and needed to paint it black. Below is a picture and list of the products I used. I could of powder coated it but decided to "test" rattle can to see if it would turn out OK for other parts to come later  ...and I was bored and a cheap a$$. Results came out great...although a bug or two in the finish. ...and I was bored and a cheap a$$. Results came out great...although a bug or two in the finish.
photo1.JPG
Step one...Clean parts with wax/tar remover. Prep-all or similar product. Cleans fingerprints as well. I used papertowels but microfiber towel would be better.
Step two...sand gloss off parts, I use 3M red pad for this, but fine sandpaper will also work, do not get fingerprints on part or you will embed them in finish. Use wax remover after sanding.
Step three...use cheese cloth before priming paint. Wipe only in one direction. This stuff is sticky and can be left behind if not careful
Step four...Prime in three coats. First coat 50%, Second coat 75-90% and last coat to full coverage. Remember "thin to win" Do not use wax remover during priming. I used etching primer for metal/chrome, not good for plastic.
Step five...paint two coats of final paint color. Read label for time between coats. I think for primer I waited an hour. For final color it was more like 30 minutes.
Step six...wait 3-4 days for air dry before installing.

"Tigger" 2011 RS-S Alloy Orange/Matte Black (hers)
"Hammer Head" 2012 RoadGlide Custom (his)
-
Active Member

I installed mine the 2nd week I bought the bike and it was OK. I read somewhere on here before getting into it, that the key thing during the install is patience. Unfortunately, I lack that, so I tried really hard not to lose my cool and yank the whole thing out when I couldn't figure out the proper way to feed the release wire. At the end it all worked out and only took couple of hours. Looks good and functions even better.
2012 RS SE - White. Sport rack with Backrest, ISCI Armrests, Two Brothers Exhaust
 Posting Permissions
- You may not post new threads
- You may not post replies
- You may not post attachments
- You may not edit your posts
-
Forum Rules
|


 Reply With Quote
 on the install