|
-
 LED Accent Light Installation (Raw Design Power Puc system) and Review Part 1 LED Accent Light Installation (Raw Design Power Puc system) and Review Part 1
First for the review of the kit I ordered from Raw Designs (aka Metricfats) First, I was totally not impressed. The kit came with no written instructions, no wire, no terminals, no shrink wrap, etc. Even funnier it came with only 1 packet of adhesion promoter, which is basically good for a single application since you need to use it on all surfaces that your two sided tape adheres to. I ended up using 15 packs of it, which I picked up from my local paint shop. All in all you should plan on spending at least another $50 for the above mentioned supplies to properly install your kit which is rather crappy considering what I paid for it to start with.
As far as installation, sure they have some Youtube videos, but they really gloss over the install and do go into any depth on the wiring, or one of the most challenging parts which is drilling out your front axles to install the power pucs. Which I add is a bit of a pain, since the axles are around 7'' long and you need to drill a hole though the enter center of the axle and need a very sharp, very long bit to do this. You also need to be very careful and make sure you drill them precisely. Ultimately the best way is to remove the entire axle and have it drilled out with a drill press for precision, but of course they totally downplay this in the video.
So for part 1, I installed the basic kit (not the power pucs) and here is my step by step.
First, here is the kit I received:

You will have to buy the following to install this:
1 box of adhesion promoter wipes
1 pack assorted push on terminals
1 pack assorted wire ties
1 roll 16ga 2 conductor wire
1 pack crimp connectors
1 terminal strip (optional)
1 roll double sided tape
1 tube of Locktite
1 pack of wire tie mounts
For tools, plan on having:
Wire cutters
Wire crimpers
Allen wrenches
10mm socket/ratchet with extention
10mm wrench
Small flathead screwdriver
First step was to remove the body panels which was pretty straightforward. Make sure to have a small container handy to keep all your bolts in!

I started by removing the rear fender first, which consists of 6 allen bolts w/ 10mm nuts. The right side was pretty easy, the left side was a real paint because of the plastic belt guard, but with some persistence you can get it.

There is plenty of clearance to install the lights, just make sure to use adhesion promoter so that your two sided tape sticks. You can use the factory wiring for the tail lamp as a guide to wire tie your connectors to and route your wire along the swing arm under the cover which contains the brake line and tail lamp wiring.


For the side and rear panels, I used quick connects that would allow the wiring to be unplugged whenever removing the panels for servicing in the future.


The best place it seemed to me to make all my connections and mount my terminal strip and remote control receiver was on the right rear of the bike next to the fuse-box. It was easy to access, had plenty of room and there is an unused accessory fuse on my RS that made for an easy power connection. I just replaced the 40 amp fuse with a 10 amp.


Here you can see where I located my quick disconnects for the side panel LED's

Take caution on the left side of the bike with your wiring, as the exhaust is in very close proximity. Keep all your wiring as far away as possible!

Here you can see where I used my terminal strip as a distribution block to tie all my wiring in. Make sure to crimp all connections tightly and use heat shrink wrap when possible.
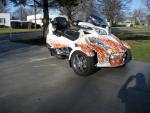
And here is what the finished (almost, I will do the wheel installation in part two) product looks like.


In conclusion, the install was a bit time consuming, but in the end I was very happy with the look. I would strongly discourage buying from Raw Designs though, as overall I was very dissatisfied with the quality of the kit, high price and lack of instruction. Since I already blew the cash for it though I will be installing the PowerPuc's on the front wheels next week and will post more pics when I do. Happy riding!
-
Blazing Member

Looks good . With the remote does it change colors ? With the remote does it change colors ?
-

This kit is single color LED's (another reason in retrospect that I should of went with the tri color led kits from another manufacturer) But the remote I got from them does allow for on/off, strobe or fade on/off effect. The LED's themselves are red and amber strips that together glow orange.
-

I really like the way the rear light's up . .
-
Registered Users


I was afraid your experience would be like this, based on how things went with Doc. The lack of decent instructions is totally unacceptable to me when you are charging that much money for your product. You obviously have the patience, and skill, to attempt to work through these issues and I am looking forward to seeing your finished results. It is looking good so far.
-
Very Active Member
 nice job nice job
great work biker bob. good pics, good explanations. i've watched those videos, and they do make it look not to hard to do.
 it was fun while it lasted. 
-
SpyderLovers Founder


Nice job Bro 
-
Mod Monster

Hey Bob--- GREAT work!! Well thought out and great execution!
____________________________
Phil - Tyler Texas
2010 RT-Premiere Edition (Named DARTH) | Timeless Black | All My Mods--- ARE HERE | Phil. 4:4
-
Very Active Member
-
Active Member
 Posting Permissions
- You may not post new threads
- You may not post replies
- You may not post attachments
- You may not edit your posts
-
Forum Rules
|


 Reply With Quote
 With the remote does it change colors ?
 Happy
Happy  Owner
Owner

 it was fun while it lasted.
