|
-
-
RT-S PE#0031

Mark & Mary Lou Lawson
Snellville, GA USA
'10 RT-S PE #0031
'10 RT-622 Trailer
'08 Yellow SM5 #2332
'01 Black GL1800A Goldwing #0930
"Remember in the darkness what you have learned in the light." - Joe Bayly
 
-
Registered Users


I agree with Rhino79, it can be done from the LH side for both plugs.
Caveat, the smaller you arms the better.
You only have to remove the LH middle side panel, LH mirror, LH top side panel, and the plastic sheild under the top side panel.
At this point you can get to the rear plug, after changing that plug if you take a flashlight and shine it over the front cylinder you can see the plug wire for the front plug.
Before reaching in you may need to tuck some connectors that reside over the front cylinder up out of the way, this will make it easier to get your arm in.
Reaching across the front cylinder you can pull the plug wire for the front plug (hopefully grease was used so that it is not overly difficult to pull off), next using a STUBBED rachet you can then remove the plug.
From this side you also have access to the distributer and you can fish the front plug wire out for inspection (I used a 18 gauge wire fed through to fish the wire back after inspection, there is a tie rap that the plug wire goes through on the far side, but it is loose and easy (within reason) to guide the plug wire back through using the guide line wire.
Like a said, the smaller the arms the better and use of a stubbed rachet is almost needed. I didn't have one, but wish I did, the job was still not that bad and after the first one I feel that I can changed both plugs within an hour.
One other thing that will help someone who does it, is to keep in mind that when reaching across to put the plug back in the socket you need to angle it back in toward the cylinder so that you hit the hole. It took me a couple of attempts, but finally got it in.
One note on taking my front plug out, I have been noticing a miss under heavy load. When I went to remove the front plug with the rachet I was expecting to give it a reasonable wrenching for it to come loose, well it was already loose! It wasn't rattling loose, but I did not have to use any force to get it to start turning. The plugs them shelves actually looked pretty good (I had about 10,000 miles on them and they are the second set, first replaced at approx. 12,000 miles) they are whitish to grayish in color and no visible signs of blackening or improper burn.
-
Motorbike Professor


 Originally Posted by Hobstopper

I agree with Rhino79, it can be done from the LH side for both plugs.
Caveat, the smaller you arms the better.
You only have to remove the LH middle side panel, LH mirror, LH top side panel, and the plastic sheild under the top side panel.
At this point you can get to the rear plug, after changing that plug if you take a flashlight and shine it over the front cylinder you can see the plug wire for the front plug.
Before reaching in you may need to tuck some connectors that reside over the front cylinder up out of the way, this will make it easier to get your arm in.
Reaching across the front cylinder you can pull the plug wire for the front plug (hopefully grease was used so that it is not overly difficult to pull off), next using a STUBBED rachet you can then remove the plug.
From this side you also have access to the distributer and you can fish the front plug wire out for inspection (I used a 18 gauge wire fed through to fish the wire back after inspection, there is a tie rap that the plug wire goes through on the far side, but it is loose and easy (within reason) to guide the plug wire back through using the guide line wire.
Like a said, the smaller the arms the better and use of a stubbed rachet is almost needed. I didn't have one, but wish I did, the job was still not that bad and after the first one I feel that I can changed both plugs within an hour.
One other thing that will help someone who does it, is to keep in mind that when reaching across to put the plug back in the socket you need to angle it back in toward the cylinder so that you hit the hole. It took me a couple of attempts, but finally got it in.
One note on taking my front plug out, I have been noticing a miss under heavy load. When I went to remove the front plug with the rachet I was expecting to give it a reasonable wrenching for it to come loose, well it was already loose! It wasn't rattling loose, but I did not have to use any force to get it to start turning. The plugs them shelves actually looked pretty good (I had about 10,000 miles on them and they are the second set, first replaced at approx. 12,000 miles) they are whitish to grayish in color and no visible signs of blackening or improper burn.
Well, I am plenty skeptical, but I will give your method a try, for the sake of comparison. I do have concerns as to whether a stubby ratchet will have enough leverage to loosen the plug. Anyway, you have convinced me that this is worth a try. Every time I remove the airbox, it makes me crazy.
-Scotty
2011 Spyder RTS-SM5 (mine)
2000 BMW R1100RTP, motorized tricycle & 23 vintage bikes
2011 RT-622 trailer, Aspen Sentry popup camper, custom motorcycle trailer to pull behind the Spyder

Mutant Trikes Forever!
-
Registered Users

-
Very Active Member
 I hate to ask but.. I hate to ask but..
 Originally Posted by NancysToy

Well, I am plenty skeptical, but I will give your method a try, for the sake of comparison. I do have concerns as to whether a stubby ratchet will have enough leverage to loosen the plug. Anyway, you have convinced me that this is worth a try. Every time I remove the airbox, it makes me crazy.
I just got BajaRon's wires and plugs to install. I have done many spark plug and wire changes but after reading these trends I just have to
ask, How hard is it? How much do I need to remove just to get it done right. Just would like to know before going in if I'm coming back out alive. I know your the man that can tell me what to expect.
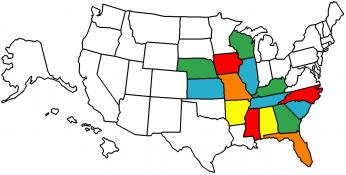
States Judy and I have visited so far on the 

-
Motorbike Professor


 Originally Posted by rcdurango

I just got BajaRon's wires and plugs to install. I have done many spark plug and wire changes but after reading these trends I just have to
ask, How hard is it? How much do I need to remove just to get it done right. Just would like to know before going in if I'm coming back out alive. I know your the man that can tell me what to expect.
Changing plugs the conventional way on an RT is a time-consuming chore. It requires removal of the body panels on both sides, and both halves of the airbox. The first time I did it it took hours, although I got better in time. I have not needed to change the plugs on my 2011, so I have not tried Lamont's "back door" method, but if you could alleviate having to remove the airbox bottom and the right side panels, it would be a great time savings. This is not something that is easy to describe, since everyone's mechanical difficulties and toolbox contents vary. The only way you will know the answer is to try. Your alternative is to pay your dealer several hours of labor to do the work...if they will even install any aftermarket goodies for you.
-Scotty
2011 Spyder RTS-SM5 (mine)
2000 BMW R1100RTP, motorized tricycle & 23 vintage bikes
2011 RT-622 trailer, Aspen Sentry popup camper, custom motorcycle trailer to pull behind the Spyder

Mutant Trikes Forever!
-
Very Active Member

NGK Iridiums Have Not proved any real benefit in my Jet Ski Forums over several years in the Rotax engines.
My 09 RS has 16,000 miles and I do not expect to change the Plugs until they need it Or 20,000. 
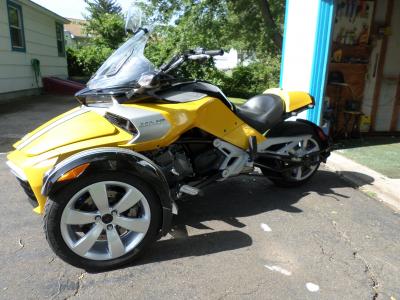 2015 F3 sm6, Custom Dynamics fender lights.
Sea Doo GTI-SE 90 Jet Ski!!
-
Very Active Member

Kinggeek
Mandeville,LA
VERY HAPPY Spyder Ryder!
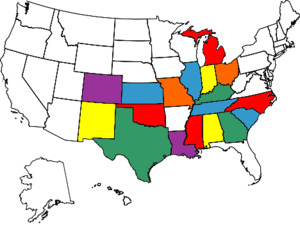
Where have we been on the Spyder? See below:
Can-Am Spyder ST-S SE5 in Congac

-

 Originally Posted by Sarge707

NGK Iridiums Have Not proved any real benefit in my Jet Ski Forums over several years in the Rotax engines.
My 09 RS has 16,000 miles and I do not expect to change the Plugs until they need it Or 20,000. 
I tried the Iridiums on my GS 08, After 15 hundred miles i went back to stock, I found that at WOT there was a slight hesitation, I know this go's against the grain, but as an old drag racer i'm not fooled by the placebo effect.
-
SpyderLovers Founder


This is what my dealer used to get the front plug out from the left side.

-
Very Active Member

 I can say, I did it now. I can say, I did it now.
Ok here's what I got to say about front plug, Oh ya I cant talk like that on here. Anyway to all that say you can get that plug by going
in from the back door they're right. Here's what it's like. Getting the wire off is a pain but when you hold your mouth just right it will just
pop off. Then taking it out to replace is another trick but it will come out. I rerouted my new wire over the head to make getting off easier
the next time. Hopefully this will not cause any issues but seemed to be alot of room for it and added a few ties to keep it up and out of the way. No way I was going back between the heads with that wire unless the breather box comes out. Next getting a socket on the plug takes alittle effort but not near as much as getting new plug started back in. Hopefully I got it tighten enough. I was thinking of the head and didn't want to get real rough with it. Changed the oil while I was there and installed BajaRon's filters and Amsoil oil. Now just waiting for the Green air filter to install.
I would say if your going to do this take your time and don't get in a hurry.
States Judy and I have visited so far on the 

-
Very Active Member


With reference to rcdurangos post :-
I agree about moving the Ign lead from between the Heads I also rerouted mine see my earlier post :-
I changed my out with the help of a friend (An experienced Mechanic)
The shorter wire was easy as the Cyclinder was closest
The far cyclinder was more difficult and we did consider having to remove the Airbox to get access - Could not see where the lgn wire
went as mine was threaded between the Cyclinders and back into the cyclinder head
I kept moving the lead and we could see it above the cyclinder and realised it could be done from the same side - a little tight but with
the correct Plug socket and small extensions it was removed and the new plug and lead installed
Getting the old wire out was difficult although it was not zipped tied the protective sleeving kept jamming against the 2 cyclinders
We cut some of this sleeving off and managed to get the old ign wire out
With the new lead it goes from the Coil direct to the far cyclinder - It is zipped tied away from the cyclinder head and because of this
it will be easier next time to get the boot off and replace the Spark Plugs on both cyclinders
Eddie Sheppard
Reading UK
-
Very Active Member

 This just in... This just in...
I just did the iridium plug and Accel wire (BajaRon) replacement on my RTS. Thanks to all on this topic,loosening the airbox and shoving to and fro was the answer. What a super PITA, but, I'll be leaving those plugs in there a long time.Oh, in case anyone was curious, RadioShack stocks the heat sink grease. Only a coupla bucks but probably enough for a number of plug changes. Only bad moment was a brief limp home mode message upon startup, and I attribute that to general messing about with connectors and such, or weak/low battery. Quitting for now, will reassemble and roadtest tomorrow.
Patrick
 2011 RTS 2006 Yamaha Morphous
2017 F150 2015 MINI Cooper S IBA 56167
-
 RT Front plug removal RT Front plug removal
remove the front trunk and slpit the air box from the air intake and you can reach the plug if you have small hands
Good luck
Dirty Harry
-
 plugs removed plugs removed
take front end off less time to do the front air box and done 40mins in all ..off and on that works good for me
-
Very Active Member

 Egad what an ordeal Egad what an ordeal
Don't know what I did wrong, but my machine absolutely hates my new sparkplug/wire setup. Tomorrow, after I've modified a ratchet to get to the front plug from the left side (thank you very much) I'm going to reverse all I did, hopefully. From the start, it has spit, jumped ,flashed then died. Misfires for days. Either I bumped, disconnected or damaged something else in the process or??? I have never seen the likes of this machine. But, I'm going to get to know this one as well as I have my other bikes if it's the last thing I do. End of rant, back to thread.
Patrick, aggrivated Spyderlover
 2011 RTS 2006 Yamaha Morphous
2017 F150 2015 MINI Cooper S IBA 56167
-
Very Active Member

 Wow Dude! Wow Dude!
 Originally Posted by Pandy

Don't know what I did wrong, but my machine absolutely hates my new sparkplug/wire setup. Tomorrow, after I've modified a ratchet to get to the front plug from the left side (thank you very much) I'm going to reverse all I did, hopefully. From the start, it has spit, jumped ,flashed then died. Misfires for days. Either I bumped, disconnected or damaged something else in the process or??? I have never seen the likes of this machine. But, I'm going to get to know this one as well as I have my other bikes if it's the last thing I do. End of rant, back to thread.
Patrick, aggrivated Spyderlover
Man I just hate thinking about that happening. Was a concern that I had also, (what if). I wonder, did you get the wires crossed or damage the gap on the plug? Mine, and this might just be in my mind. Seems a little more responsive to throttle with new plugs and wires. Not a hole lot of things can go wrong with this other than gap or damaged wire or eve crossed wire. On mine the inside wire on the coil went to front plug. Hope you get it worked out. Let us know
States Judy and I have visited so far on the 

-

 Originally Posted by Pandy

Don't know what I did wrong, but my machine absolutely hates my new spark plug/wire setup. Tomorrow, after I've modified a ratchet to get to the front plug from the left side (thank you very much) I'm going to reverse all I did, hopefully. From the start, it has spit, jumped ,flashed then died. Misfires for days. Either I bumped, disconnected or damaged something else in the process or??? I have never seen the likes of this machine. But, I'm going to get to know this one as well as I have my other bikes if it's the last thing I do. End of rant, back to thread.
Patrick, aggravated Spyderlover
Just a guess here, But it sounds like you might have damaged a spark plug wire, or you didn't tighten a plug, Easy enough to do, some times the socket jams against he head and then it feels tight.
-
Very Active Member

 Last of this Last of this
Well here's the last of this for a while. Wires weren't crossed, in spec resistance wise per the shop manual, torqued ~1/4 turn and greased up. Went back to the original configuration and all is now well. Went in from the left side with this rigthe rig.jpg and here is what I took outplug3.jpg
what I noticed this go round was the plug# ended in 9 vice 8, but still with the IX. I will have to research further to see what this means. For now, disaster averted,now to ride it sufficiently to warm it up and blow the cobwebs out before reassembly. Oh, and I'll probably leave the front wire routed around the head vice through them, wrapping them up out of harm's way as before. Conclusion? I dunno, will check the resistance of the "new" wires to see how they measure up.Sheesh, the most painful wounds seem to be self inflicted. And if it works don't **** with it.
Healing nicely, Patrick
 2011 RTS 2006 Yamaha Morphous
2017 F150 2015 MINI Cooper S IBA 56167
-
 Heat Range Heat Range
If you're using NGK plugs, the "9" is a colder plug than the "8". The 2010 RT's came with 9's. The 2011's came with 8's and 8's are suitable for replacement plugs in the 2010's. Apparently BRP found that the RT's were being run "easier" due to their better low end torque and overall style of riding and thus the plugs were fouling easier than on the RS's. So they went to a hotter plug to minimize fouling. Unless you run the daylights out of yours, the "8" would be the better choice. If your new plugs are iridium, they will resist fouling better than regular plugs so you might be better able to get away with a "9". Personally I'll go with iridium's in a "#8" when the time comes. I've got a 2011 that came with the "8's".

RT and Gold Wing States & Provinces
-
Very Active Member

 Is it just my imagination Is it just my imagination
Took spyder for a ride today for the first time since installing plugs, wires and green air filter. Might just be my imagination but seems that
she likes what I have done. First thing I noticed was she wasn't cold natured at all like before and had a little more pep in her step. Anyway was very pleased with performance so far.
States Judy and I have visited so far on the 

-
 front plug front plug
 Originally Posted by 1551retired

Does anyone have any tips on getting to and removing the front spark plug on a RT short of removing the entire airbox?  Back plug was easy. Looks like the air box is pretty difficult to remove itself (wire ties, 6 screws, hoses, and removal of frame brace). Surely there must be an easier way. 
Any advice would be appreciated!
I had some luck by removing the top of the air box and went in front of the radiator on right side which gave me enough room to allow me to use socket 3/8 to1/4 reducer and 1/4 ratchet and 1/4 knuckle. i removed the shroud in front of the radiator except for like 1 bolt enough to get your hand in and work the ratchet it was still hell but doable 
-
SpyderLovers Sponsor

 Originally Posted by Pandy

Well here's the last of this for a while. Wires weren't crossed, in spec resistance wise per the shop manual, torqued ~1/4 turn and greased up. Went back to the original configuration and all is now well. Went in from the left side with this rig the rig.jpg and here is what I took out plug3.jpg
what I noticed this go round was the plug# ended in 9 vice 8, but still with the IX. I will have to research further to see what this means. For now, disaster averted,now to ride it sufficiently to warm it up and blow the cobwebs out before reassembly. Oh, and I'll probably leave the front wire routed around the head vice through them, wrapping them up out of harm's way as before. Conclusion? I dunno, will check the resistance of the "new" wires to see how they measure up.Sheesh, the most painful wounds seem to be self inflicted. And if it works don't **** with it.
Healing nicely, Patrick
I don't spend much time here on the RT boards because I have an RS so I was not aware of your problems with my products. Lamont mentioned this post to me today and I would very much like to find out what is causing this problem and help in any way I can.
1- From the looks of your pictures you're running way to rich. Idling for long periods of time, lugging the engine, or a lot of misfiring can also give you this condition. These plugs are probably fouled.
2- You are using too much thermal paste. You need just enough thermal paste on the threads to fill the voids between the mating surfaces. Using too much you end up with a lot of paste at the top of the threads. It won't hurt anything and will not cause issues, just makes a mess.
3- You should be using the hotter '8' heat range NGK's. If I sent you 9's it was either my error or I did not know you had an RT.
4- If the new wire/spark plug setup had issues it is most likely that they were not installed correctly. It is very important to be sure you have the terminal ends shapped onto their respective connection points. On the Spyder it does take some care as it is not always easy to tell if you have proper connection. If the terminals are not properly attached to the spark plugs and coils you will definitely get issues right away because the spark cannot get to the spark plugs.
5- It is unlikely, but possible, that one of my wires is defective. I have not experienced this to date but anything is possible. Have you checked resistance/continuity yet?
6- It is even more unlikely that you got a defective spark plug and I highly doubt that this is the cause of your problem. I have heard that a few have had issues with the Iridium spark plugs but this is almost certainly something other than the spark plugs themselves.
Iridium spark plugs are not a gimmic or market hype. Iridium is definitely an upgrade to standard spark plugs. They are widely used by both the consumer and racing industry and have performed as advertised. It takes less spark energy to jump the gap between electrodes so Iridium plugs have a stronger, more consistant spark, and are less likely to misfire. Not to mention about 3 times the service life. This is probably why BRP is now putting Iridium spark plugs in all new Spyders. They are worth the additional expense.
One last comment, if I may. If anyone experiences a problem with my products, or any Spyderlovers supporting vendor, please let us know. We put quite a bit of effort into our products and we want them to perform for you. I think you'll find all of us want to be as helpful as we can to reslove any issues you might have.
Last edited by BajaRon; 02-25-2012 at 02:51 PM.
Shop Ph: 423-609-7588 (M-F, 8-5, Eastern Time)
Only SLOW people have to leave on time...


-

haven't been able to locate Lamont's video on spark plug removal for an RT. anyone know what it's listed under...?
 Posting Permissions
- You may not post new threads
- You may not post replies
- You may not post attachments
- You may not edit your posts
-
Forum Rules
|

