|
-
Very Active Member

 Mounting a Zumo up High - Job done. Mounting a Zumo up High - Job done.
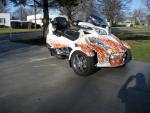
My Zumo mounting project is now complete and my Spyder is reassembled and ready for the road. I thought it would be nice to celebrate with a few final pictures. 
-
Blazing Member
-
Very Active Member


Nice job-- 

Spyder #1 - 2008 GS SM5 Premier Edition #1977. RIP after 80,000 miles.
Spyder #2 - 2012 RT SM5. Traded in after 24,000 miles.
Spyder #3 - 2015 F3 SM6. Put 13,000 miles on and sold it.
Spyder #4 - 2017 F3 SM6. Too good of a deal to pass up!
-
Registered Users


Beautifully done! Very nice & clean work there! 
2011 Alloy Orange Metallic/Matte Black RSS SE5
-

Nice job, now program in Cuba, Missouri, USA and come on over for Spyderfest!
2017 F3T-SM6 Squared Away Mirror Wedgies & Alignment
2014 RTS-SM6 123,600 miles Sold 11/2017
2014 RTL-SE6 8,600 miles
2011 RTS-SM5 5,000 miles
2013 RTS-SM5 burned up with 13,200 miles in 13 weeks
2010 RTS-SM5 59,148 miles
2010 RT- 622
-
Active Member

Nice job GeoffCee! I really like your setup. Your eyes certainly don't have to wander far from the "main screen" (road that is). I think this is much safer than the BRP setup. Just my opinion.
SilverFox 
If you don't change anything,,,
nothing is going to change!
-
-
-
Active Member
-
Turkey Slayer

 Nice, have a question Nice, have a question
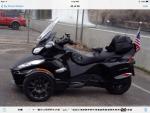
Nice job, I have a question how did you attach it to the "dash." Is it screwed into it or is that an adhesive mount. If it's adhesive is that a Ram Mount kit?
The Girlz,
2015 Red RT-S SE5
2015 Denim Blue ST-Limited SE5
Black 2010 RT-622
-
-
Very Active Member


 Originally Posted by Bob Denman

I too would like a little more info on how things mount up..
Regret you've had to wait for this, Bob, I thought folks had done commentating on this thread, so I haven't taken a look for a spell.
There is an earlier post of mine, 13th April, "Mounting a Zumo up high", on this same board with some captioned photos I took as I was finding my way through the installation. It should tell you what you want to know but if you have any q's please come back to me.
Now that the job is done and I've done some miles with it I am pleased to say that the installation works even better than I'd hoped. I had been concerned that the Zumo would pick up some vertical vibration, but no, it's as solid as a rock due to the stiffness of the double-skinned bulkhead the Zumo is mounted on, plus the large washers I used on both sides of the plastic to spread the load and stiffen things up.
So far as visibility is concerned, when I'm riding I am not concious of the Zumo being there, that is until I want to check the map info on its screen, and it takes only the briefest glance away from the road to do that. 
Last edited by GeoffCee; 05-05-2011 at 05:38 AM.
Reason: Additional info.
-
Very Active Member


 Originally Posted by DaGrlz

Nice job, I have a question how did you attach it to the "dash." Is it screwed into it or is that an adhesive mount. If it's adhesive is that a Ram Mount kit?
Please see my earlier post with photos on this board, 13 April. No adhesive used, just a RAM mount bolted in place. The photos tell the installation story but come back to me if you have any q's, DaGrlz. 
Last edited by GeoffCee; 05-05-2011 at 06:09 AM.
Reason: Correction
 Posting Permissions
- You may not post new threads
- You may not post replies
- You may not post attachments
- You may not edit your posts
-
Forum Rules
|


