|
-
 Soft Oil Plug Soft Oil Plug
Screwed up my oil drain plug (oil tank, not engine) tonight because I didn't fully insert the 6mm hex wrench before I tried to remove it. It was half way in, which is pretty deep, but the wrench just turned in the bolt while the bolt didn't budge. This is the 2nd oil change on the RT & the first by me. I guess the dealer really tightened it down when they did the first oil change. Anyway, I then pounded the wrench all the way in and found that it just twisted again without moving the bolt. Dang.
I bought a cheap hand pump from Harbor Freight & was able to pump the oil out of the tank without much trouble.
Fortunately, the engine oil drain plug had no problems, so I was able to complete the oil change.
I have now ordered a set of the Gold Plug drain plugs mentioned in a thread sometime back. ( http://www.spyderlovers.com/forums/s...oil+drain+plug ) In fact, I ordered two sets so I can replace the OEM on my wife's '08 GS too.
Just be aware that the drain plug is pretty soft material & should be handled with care.
Now I have to figure out how to get that stupid drain plug out when it comes time to change the oil again. Any suggestions?
Thanks,
-
you will probably have to drill it out...
small drill bit smaller then the width of the plug (not the threads)... then use a bit kit from Home Depot like this
[ame]http://www.amazon.com/Alden-4507P-Grabit-Broken-Extractor/dp/B000Q60UOO/ref=pd_cp_hi_3[/ame]
-
 Originally Posted by MarkLawson

Any suggestions?
Thanks,
I JB Welded the wrench to the plug, came right out the next day.
-
I like both suggestions & may give them a try - probably the JB Weld suggestion first. I'd rather not take a drill to it if I can avoid it for fear of getting some metal filings in the oil tank. If the JB Weld doesn't work out, I can try the drilling next...
Thanks for your responses!
-
SpyderLovers Founder

You can take a chisel to the outside edge and break it loose too.
-
Very Active Member

A suggestion for future plug removals. I have a 3/8 ratchet and Allen socket and an 8" cheater pipe extension. The effort to "break" the plug is minimal. Use the pipe only to break the plug, not tighten it!
2008 GS SE5 in 2008
Traded at 43,000 miles for a left over
2010 RT SM5 in 2011
Traded at 57,000 for a left over
2014 RTS SE6 in 2015, which has 35,000 miles
Oct 19th, 2017, totaled 2014 RT while killing a Javaline
Dec 12th, 2017 drove a 2017 F3L home. What an awesome machine!
Never had any breakdown stranded issues.
-
-
Originally Posted by MarkLawson
I like both suggestions & may give them a try - probably the JB Weld suggestion first. I'd rather not take a drill to it if I can avoid it for fear of getting some metal filings in the oil tank. If the JB Weld doesn't work out, I can try the drilling next...
Thanks for your responses!
you actually dont have to fully drill it out just to start the removal bit... and then you use the removal drill bit which is reverse threaded so it tightens in as you are unscrewing the bolt...
-
-
I think that I need a drink after reading about all of this carnage... 
(Note to self: order replacement drain plugs P.D.Q.!)
-
Senile Member

Originally Posted by MarkLawson
I like both suggestions & may give them a try - probably the JB Weld suggestion first. I'd rather not take a drill to it if I can avoid it for fear of getting some metal filings in the oil tank. If the JB Weld doesn't work out, I can try the drilling next...
Thanks for your responses!
I wonder if you have enough space to latch a vise-grip onto the skirt of the spent plug. I bet that will let you twist it right off.
Dealer looooves to crank those parts on tight just to make sure if you ever decide to do it yourself, you are gonna have a heck of a time trying to get it loose.
Last edited by M2Wild; 03-16-2011 at 01:51 PM.
Silver SM5 PE# 1274, Hindle Exhaust, Touring Windshield, Caliper Trim, B.E.S.T. 3 Year Ext, Nuvi 255 GPS, Fog Lights, Sport Rack, Back Rest, 12V Outlet, Talon 3300p Alarm, NMN Mud Flap and TipZ LEDs, SpyderLovers Emblems, Kuryakyn Widow Pegs and Axel Trim, Luimoto seat skin, Evo Air Filter and O2 Mod, Cranker Tank Bag, Blue Sea fuse block, MAD/AMS/MBG, Oddyssey battery, IPS.
Service Bulletin Applied: Gen II parking brake, 2nd SW patch, evap can/hose update, Gen II DPS
-
Originally Posted by M2Wild
Dealer looooves to crank those parts on tight just to make sure if you ever decide to do it yourself, you are gonna have a heck of a time trying to get it loose.
Maybe yes, maybe no. It is the nature of copper washers that they compress when torqued, increasing the amount of torque needed to remove them...much like Loctite. It is also the nature of steel fasteners (and plugs) installed into alloy threads (like crankcases), that they become locked in by differential thermal expansion, and become harder to remove. That is why case screws need impact drivers or T-handles for removal. They go in easily and come out with more difficulty.
-
-
Senile Member
Originally Posted by NancysToy
Maybe yes, maybe no. It is the nature of copper washers that they compress when torqued, increasing the amount of torque needed to remove them...much like Loctite.
All I know is whenever I bring my vehicles in for a complete / major service, the oil filter and plugs are twice as tight when I try to remove them the following time.
Silver SM5 PE# 1274, Hindle Exhaust, Touring Windshield, Caliper Trim, B.E.S.T. 3 Year Ext, Nuvi 255 GPS, Fog Lights, Sport Rack, Back Rest, 12V Outlet, Talon 3300p Alarm, NMN Mud Flap and TipZ LEDs, SpyderLovers Emblems, Kuryakyn Widow Pegs and Axel Trim, Luimoto seat skin, Evo Air Filter and O2 Mod, Cranker Tank Bag, Blue Sea fuse block, MAD/AMS/MBG, Oddyssey battery, IPS.
Service Bulletin Applied: Gen II parking brake, 2nd SW patch, evap can/hose update, Gen II DPS
-
I figured the plug is a softer material so that if something gets cross-threaded, the damage is to the cheap plug rather than the expensive oil tank or engine case.
Just seems a little too soft in my opinion. But, I am the guy with the wrench only half way in before I began trying to loosen the plug, so I am the one who did the damage.
-
 I hear your pain I hear your pain
I agree, the RT's oil tank and engine oil drain plug heads were a tad soft, and I fought with them on my first oil change. There definitely was a bit of slippage during the fight and I decided to place an order for the Gold Plugs before my next oil change. I have found these new plugs much easier to work with than the OEM plugs. 
-
Before you try any of these things go buy your self a torq wrench with the correct lbs so when you reinstall the plugs. then next time it should not be so hard?
-
Very Active Member

Corrosion
I agree with the cathodic corrosion scenario. Seen that any number of times. A tad bit of moly 60 or anti-seize seems to prevent this. Any screw that I torque gets a dab of moly. Saved me more than once. But nothing can save you from a monkey fisted tech.
Patrick
 2011 RTS 2006 Yamaha Morphous
2017 F150 2015 MINI Cooper S IBA 56167
-
Originally Posted by Pandy
I agree with the cathodic corrosion scenario. Seen that any number of times. A tad bit of moly 60 or anti-seize seems to prevent this. Any screw that I torque gets a dab of moly. Saved me more than once. But nothing can save you from a monkey fisted tech.
Patrick
Anti-seeize will damage aluminum, I ruined a set of rim's with it.
-
-
Is there anything else available that'll keep things from freezing up?
I've seen some shows on TV that show how to get around a problem with a simple and CHEAP alternative... Does one exist for this application??
-
SpyderLovers Founder
Originally Posted by Bob Denman
Is there anything else available that'll keep things from freezing up?
I've seen some shows on TV that show how to get around a problem with a simple and CHEAP alternative... Does one exist for this application??
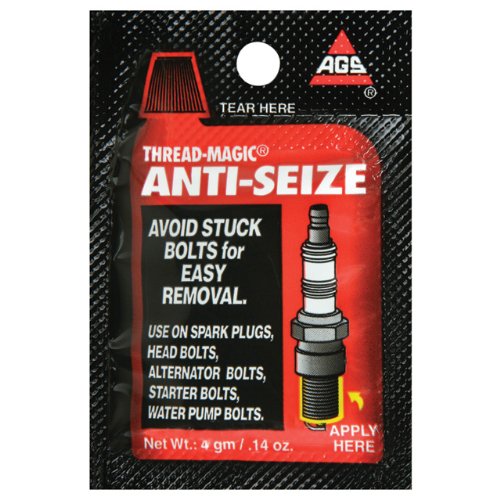
[ame]http://www.amazon.com/American-Grease-Stick-Spark-Anti-Seize/dp/B0013WF4F0[/ame]
-
Soft Plug
Had the same thing happen on another bike. We drilled a small hole all the way through and then drilled a larger diameter to allow me to use an easy out which threads into the larger hole and you can attach it to a wrench and turn it out.
A friend tried this didn't get the easy out in deep enough and made the situation worse so we drilled out a really large hole, threaded it, put in bolt with thread lock and let it dry overnight and and then turned the bolt with the remainder of the plug out the next morning.
Lonnie
-
Originally Posted by Roger
Before you try any of these things go buy your self a torq wrench with the correct lbs so when you reinstall the plugs. then next time it should not be so hard?
I have and use torque wrenches. Unfortunately, I am not certain my dealer did on the previous (first) oil change... 
-
Originally Posted by lawrenc454
Had the same thing happen on another bike. We drilled a small hole all the way through and then drilled a larger diameter to allow me to use an easy out which threads into the larger hole and you can attach it to a wrench and turn it out.
A friend tried this didn't get the easy out in deep enough and made the situation worse so we drilled out a really large hole, threaded it, put in bolt with thread lock and let it dry overnight and and then turned the bolt with the remainder of the plug out the next morning.
Lonnie
no need to drill all out with the removal drill bit 
dont ask me how I know but the proper tools makes the job easier. have the bit kit from HomeDepot ... cheap and easy to find... its reverse bit that bites into the stripped out screw and as you drill into the screw it is actually unscrewing it as you have the drill in reverse...
 Posting Permissions
- You may not post new threads
- You may not post replies
- You may not post attachments
- You may not edit your posts
-
Forum Rules
|


 Reply With Quote

