|
-
Very Active Member

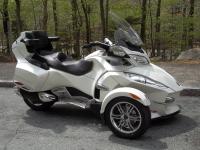
 How involved is changing 2012 RTL Valve cover gaskets? How involved is changing 2012 RTL Valve cover gaskets?
So, like the title said, I did an oil change on a friends RTL 2012. For the last couple years I've been seeing a lot of oil drippage under his bike, this year I got under it, and trust me, it will never rust!  So, this year, I got nosey and gave it a good look over, and to me it looks like he's ready for a set of valve cover gaskets in his near future. So, this year, I got nosey and gave it a good look over, and to me it looks like he's ready for a set of valve cover gaskets in his near future.
My question to you guys is, how involved is that job and how much of a deep dive am I looking at?
I looked at my online shop manual it wasn't very informational, basically told me in chaise it's got to go out of the right side and put the gasket on the cover before install! To get to the front I would assume the air box needs ejecting, and right-hand removal also! Any and all idea's will be very welcome!!  THANKS!!! THANKS!!!
Last edited by Peter Aawen; 04-28-2024 at 07:22 PM.
Reason: Expanded title to briefly ask the question... ;-)
-
Very Active Member


Just how much longer is he going to keep it? There's always a wash down with Gunk Engine Degreaser.
Anyway, Have never done the gaskets but have removed the intake system. The biggest issue with that is removing interference to get that stuff out of there. Airbox and Resonator. Just bite the bullet and remove the right side lateral support, cut as many wire ties as you can find and get all of that harness out of the way. I found that removing the frunk made removing the resonator easier. Manual also suggests throttle body loosening and lifting out of the way. But, I assume that you saw that already.
VALVE COVER
Valve Cover Removal (Engine in Vehicle)
Remove RH lateral support, refer to the FRAME subsection.
Remove air filter housing and resonator. Refer to the AIR INTAKE SYSTEM subsection.
Remove fuel tank protectors. Refer to the FUEL TANK AND FUEL PUMP subsection.
Loosen throttle body clamps and lift throttle body in order to make room.
Support throttle body using locking ties.
You'll also be removing the Cam Sensor and moving the charcoal canister.
Also a great opportunity to do plugs and wires now that you can get to the front plug easy enough. Have fun.

Doug
2023 RT Limited, RT 622, BUDS/BUD2 Megatech/Megatronic
”Freedom is not a loophole”
F4 Customs SWCV, Ultimate, Lidlox, Adjustable Side Vents, Leather Like Grips, SS Grills, Centramatic, Garmin XT2, BajaRon Original Sway Bar w/ Lamonster links, P238
-
Very Active Member


I just finished an air box mod and plug wires on my bike so you may say I have the dance already down. With out the whole air box assembly you have quite a lot of room in there to dance around! Thank you for the reply!
 Posting Permissions
- You may not post new threads
- You may not post replies
- You may not post attachments
- You may not edit your posts
-
Forum Rules
|
So, this year, I got nosey and gave it a good look over, and to me it looks like he's ready for a set of valve cover gaskets in his near future.
THANKS!!!


 Reply With Quote

