|
-
Active Member

 Raising the front end for sway bar Remove & Refit - how exactly? Raising the front end for sway bar Remove & Refit - how exactly?
I bought the BR swaybar kit and, in looking at the installations online so far, the consensus is to lift the Spyder to a length comprarble with the length of the swaybar. This measurement appears to be 24". I have not found a lift, ramp, or jack (save one or two in the $1500USD+ range) that can do this. I have found a number of other lifts and ramps with jacks, but the maximum lift height I've seen for these is 15". How exactly are you getting the spyder front end 2 feet off the ground to replace this unit? Thanks for the input.
 
2021 F3 L , Stock Plugs (COILS, NOT WIRES!) Stock Brake Pedal Magma Red
-
Very Active Member


 Originally Posted by chunkmonk

I bought the BR swaybar kit and, in looking at the installations online so far, the consensus is to lift the Spyder to a length comprarble with the length of the swaybar. This measurement appears to be 24". I have not found a lift, ramp, or jack (save one or two in the $1500USD+ range) that can do this. I have found a number of other lifts and ramps with jacks, but the maximum lift height I've seen for these is 15". How exactly are you getting the spyder front end 2 feet off the ground to replace this unit? Thanks for the input.
It's somewhat difficult to raise it that high ...... consider ...CUTTING it .... in half or three pieces .... if it's an OEM sway it isn't really worth much if anything ..... good luck .... Mike 
-
Very Active Member

Many riders lift the front using their stock lift, put axle supports under the front a arms, lower the lift and put a piece of 4x2 timber on the lift, lift it again, raise the axle stands etc etc, Chunk. Just make sure the axle stands are under it at all times, as it can be a little unstable.
Others undo the bolts, drive over a drain, drop the bar out and install the new one, then back into the garage to tighten everything down.
Others, with ramps, fasten them to the rear of a pickup, and drive up on them to do the work.
Some have even done it over grass where they have dug a hole. If you have car ramps each side of the hole, it does not have to be too deep
Pete
Last edited by Peter Aawen; 05-28-2022 at 06:50 PM.
Reason: rams = ramps
Harrington, Australia
2021 RT Limited
Setup for Tall & Big.... 200cm/6'7", 140kg/300lbs, 37"inleg.
HeliBars Handlebars
Brake rubber removed to lower pedal for easier long leg/Size 15 EEEEW boot access.
Ikon (Aussie) shocks all round.
Russell Daylong seat 2” taller than stock (in Sunbrella for Aussie heat & water resistance)
Goodyear Duragrip 165/60 fronts (18psi) - provides extra 1/2” ground clearance.
Kenda Kanine rear.
2021 RT Limited , Brake pedal rubber removed for ease of accessing pedal with size 15 boots. Red
-
Very Active Member

Harrington, Australia
2021 RT Limited
Setup for Tall & Big.... 200cm/6'7", 140kg/300lbs, 37"inleg.
HeliBars Handlebars
Brake rubber removed to lower pedal for easier long leg/Size 15 EEEEW boot access.
Ikon (Aussie) shocks all round.
Russell Daylong seat 2” taller than stock (in Sunbrella for Aussie heat & water resistance)
Goodyear Duragrip 165/60 fronts (18psi) - provides extra 1/2” ground clearance.
Kenda Kanine rear.
2021 RT Limited , Brake pedal rubber removed for ease of accessing pedal with size 15 boots. Red
-
SpyderLovers Sponsor

The bar is 23.25 inches long. The frame tube it sits in is at least 4" off the ground so now you are at less than 20" lift. If you lift just the front end (recommended) the angle will give you at least 2" more clearance to the ground so now you are at a total of 18" of lift. Still more than most lifts will give you. Most lifts will give you 14-15". Use jack stands to hold the Spyder at that height. Let the lift down and use cribbing to get the last 3 or 4" needed. Swap the bars (takes about 3 minutes) and let the Spyder back down to a more workable height.
Motorcycle or ATV ramps to the tailgate of a truck bed also work very well.
Be safe, take your time and you'll find it's not that difficult.
Last edited by BajaRon; 05-28-2022 at 07:00 PM.
Shop Ph: 423-609-7588 (M-F, 8-5, Eastern Time)
Only SLOW people have to leave on time...


-
Active Member


 Originally Posted by BLUEKNIGHT911

It's somewhat difficult to raise it that high ...... consider ...CUTTING it .... in half or three pieces .... if it's an OEM sway it isn't really worth much if anything ..... good luck .... Mike 
Mike - That's fine for the stock bar; I'm not sure it's even worth re-selling. But what about the new bar? Doesn't that also need at least the same height in order to put it in?
 
2021 F3 L , Stock Plugs (COILS, NOT WIRES!) Stock Brake Pedal Magma Red
-
Ozzie Ozzie Ozzie

 Originally Posted by chunkmonk

Mike - That's fine for the stock bar; I'm not sure it's even worth re-selling. But what about the new bar? Doesn't that also need at least the same height in order to put it in?
If you're talking about the 'New 3-piece Sway Bar' from BajaRon, whatever makes you think it needs that much space underneath it?? 
The reason the earlier style bars needed that much room is because there's a 90° bend in each end, and about 5-6 inches of bar protruding that the Heim Links attach to.... so to get that bar in/out, you need the height so you can thread the bent end bits thru the channel in the middle of the frame under the Spyder. With the New 3-piece bar, the spring steel section (that equates to the middle un-bent bit of the older style bar) simply slides straight in, cos it's a straight bar! Then, and only then, do you fit the solid End Links, the bits that equate to the cranked/bent section on the old style bar which connect to the Heim Links - from what I can see, while you might want to raise your Spyder a little in order to make reaching/working underneath it a bit easier, there is absolutely NO NEED to raise your Spyder 24" off the ground to fit the New 3-piece Sway Bar that has a STRAIGHT centre section! 
Altho it is true that if you don't want to cut the old/original bar off, then you'll need to raise your Spyder that high or there-abouts in order to 'un-thread' the bent bar 
Last edited by Peter Aawen; 05-28-2022 at 08:00 PM.
2013 RT Ltd Pearl White
Ryde More, Worry Less!
-
Very Active Member


 Originally Posted by Peter Aawen

If you're talking about the ' New 3-piece Sway Bar' from BajaRon, whatever makes you think it needs that much space underneath it?? 
The reason the earlier style bars needed that much room is because there's a 90° bend in each end, and about 5-6 inches of bar protruding that the Heim Links attach to.... so to get that bar in/out, you need the height so you can thread the bent end bits thru the channel in the middle of the frame under the Spyder. With the New 3-piece bar, the spring steel section (that equates to the middle un-bent bit of the older style bar) simply slides straight in, cos it's a straight bar! Then, and only then, do you fit the solid End Links, the bits that equate to the cranked/bent section on the old style bar which connect to the Heim Links - from what I can see, while you might want to raise your Spyder a little in order to make reaching/working underneath it a bit easier, there is absolutely NO NEED to raise your Spyder 24" off the ground to fit the New 3-piece Sway Bar that has a STRAIGHT centre section! 
Altho it is true that if you don't want to cut the old/original bar off, then you'll need to raise your Spyder that high or there-abouts in order to 'un-thread' the bent bar 
Thank you Peter for Explaining to the Confused, what to me was obvious.... and that's all I will say about this subject ..... Mike 
-
Very Active Member

I found just raising the front end is way easier than trying to cut that bar off. But to each his own. Ramps and safety chains on back of the truck... Bada Boom Bada Bing and it's out/in in no time.
Why take a saw blade near the tender skin of your baby?
  
2020 F3 SE6
Safety and Lighting: LED Headlight upgrade, IPS LED Fog lights, Show Chrome LED Fender Signals, LED Signature Light, Tric LED Afterburnerz, MotoHorn 2.0
Suspension: Wilbers Front and Rear Shocks, BajaRon Sway Bar, Vredestein Quatrac Front and Rear Tires
Comfort: Blue Ridge Windshield, Corbin Dual Touring Saddle, Ultimate Floorboards, OEM Passenger Backrest with Rear Shelf, OEM Passenger Floorboards Modified with High Risers from Pierre
Tackform Center Mount Phone Holder w/ rapid charging USB-C.
-

My process on my 2020 RT: I used car ramps that got it about 8-10" initially up in the air, then I used 2x10 boards with a floor jack sitting on top of the boards in the middle between the ramps. Once I got the front tires clear of the ramps, I used more boards between the front tires and the ramps to stabilize because it will be VERY unstable lifting it in the center with the floor jack.
I found that it took a little more than 24" height to get the old bar out - IIRC, it was 26-27".
Make sure the emergency brake is on and that you have the rear wheel chocked, in front and behind, for extra security.
Sold: 2020RT base with numerous improvements and farkles
Previous 2 wheels: 3 BMWs, 1 Honda, 1 Yamaha and 1 Husqvarna
-
Active Member


 Originally Posted by BajaRon

The bar is 23.25 inches long. The frame tube it sits in is at least 4" off the ground so now you are at less than 20" lift. If you lift just the front end (recommended) the angle will give you at least 2" more clearance to the ground so now you are at a total of 18" of lift. Still more than most lifts will give you. Most lifts will give you 14-15". Use jack stands to hold the Spyder at that height. Let the lift down and use cribbing to get the last 3 or 4" needed. Swap the bars (takes about 3 minutes) and let the Spyder back down to a more workable height.
Motorcycle or ATV ramps to the tailgate of a truck bed also work very well.
Be safe, take your time and you'll find it's not that difficult.
Thank you sir! This should get me where I need to go. Really appreciate the input. 
 
2021 F3 L , Stock Plugs (COILS, NOT WIRES!) Stock Brake Pedal Magma Red
-
Very Active Member


 Originally Posted by CloverHillCrawler

I found just raising the front end is way easier than trying to cut that bar off. But to each his own. Ramps and safety chains on back of the truck... Bada Boom Bada Bing and it's out/in in no time.
Why take a saw blade near the tender skin of your baby? 
Dear CHC, I don't have ( what I consider a LOT of tools ). Just what I consider to be essential. like sockets, wrenches, hammer,. screw bits, etc. and a Dremel and a 4 1/2in angle grinder w/ cutting blades and grinding stones also a decent welder ..... So with my angle grinder I have the OEM sway bar cut off in two min. ...... good luck .... Mike 
-
Active Member
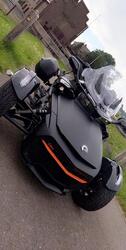

I used a forklift, and that worked like a charm, but if you don't have acces to that, I would jack it up, as high as you can, then put wooden blocks under the wheels, then more wooden blocks under the jacks, that would suffice you with enough hight..
the funniest thing about this particular signature is that by the time you realise it doesn't say anything it's to late to stop reading it........
Spyder F3s 2019 All Black ( Named it: Brutus)
Carbon Items added, just for looks
Upgraded Shocks Trac-Tive, Rear hi/lo and rebound adjustable, with Hydraulic Pre-Load adjuster
fronts hi/lo and rebound adjustable, custom made by the Trac-Tive Guru's
Swaybar (Ron's)
Tyres Front Michelin Cross Climate+ 175/60-15
Rear, for 2022 still a Kenda, next Yokohama Advan Fleva 205/55R15
Exhaust Bone stock, with a RLS Cat- Delete
Custom ECU-Mapping, rewritten/adapted to my Ridingstyle
Pedalbox, Awesome Upgrade...
-
Very Active Member

Harrington, Australia
2021 RT Limited
Setup for Tall & Big.... 200cm/6'7", 140kg/300lbs, 37"inleg.
HeliBars Handlebars
Brake rubber removed to lower pedal for easier long leg/Size 15 EEEEW boot access.
Ikon (Aussie) shocks all round.
Russell Daylong seat 2” taller than stock (in Sunbrella for Aussie heat & water resistance)
Goodyear Duragrip 165/60 fronts (18psi) - provides extra 1/2” ground clearance.
Kenda Kanine rear.
2021 RT Limited , Brake pedal rubber removed for ease of accessing pedal with size 15 boots. Red
-
Very Active Member


 Originally Posted by Peteoz

Mike, no confusion involved…….it all depends on whether Chunkmonk has bought the brand new 3 piece bar or is installing the older 1 piece bar. He hasn’t said, and Peter A has based his reply on the assumption that Chunkmonk, is replacing his old bar with a 3 piece bar. If that is the case, then Peter’s answer is indeed correct. However, that may, or may not, be the case depending on the new bar. That was why I wrote “if he hasn’t bought the new 3 piece bar”, when I made my humorous comment about having to cut and weld the new bar. Hopefully that removes any confusion for you 
Pete
Pete, that last thing about this issue has nothing to do with being confused ..... Since Ron has designed a New Sway Bar and it's a THREE piece model ..... Is He still marketing the ONE piece Model ????? .......... My input here was to figure out the SIMPLEST way to do this .... How many folks here have a FORK-LIFT ???? ... The method's some folks here are using .... frankly makes my Sphincter very, very tight ..... Take a guess at how many Spyders are going and people are going to get damaged with these very dangerous lifting idea's ...... I'm done on this one ..... Mike 
Last edited by BLUEKNIGHT911; 05-29-2022 at 08:00 PM.
-
Active Member

I have done 3 of Rons bars on an ATV lift. put the brake on, lift in from the side not the front, lift to max height, If your at the balance point of the main frame you can lift the front end up till the rear tire is on the ground.
T.P.
-
Very Active Member


 Originally Posted by BLUEKNIGHT911

Pete, that last thing about this issue has nothing to do with being confused ..... Since Ron has designed a New Sway Bar and it a THREE piece model ..... Is He still marketing the ONE piece Model ????? .......... My input here has to figure out the SIMPLEST way to do this .... How many folks here have a FORK-LIFT ???? ... The method's some folks here are using .... frankly makes my Sphincter very, very tight ..... Take a guess at how many Spyders are going and people are going to get damaged with these very dangerous lifting idea's ...... I'm done on this one ..... Mike 
The 3 piece has “just” been released, Mike, so there are bound to be a serious number of 1 pieces still awaiting install
……..and yeah, I agree completely that even the common method of adding 2X4 is not the safest. I don’t know if it happens on all models, but my ‘21 RT gets a serious lean to the left during the time that it is being raised to the next level above the jack stands…..and of course, you can’t have the straps applied to the lift at that time, so you wonder if the RT will completely miss the jack stands if it tips off the lift.
Removing a one piece bar is always going to be required as I’m sure BRP won’t be changing, and I agree that leaving the Spyder lower and cutting off one of the legs is far safer, especially when installing Ron’s 3 piece bar.
The only option I am really comfortable with is digging a 12” hole, driving up on 12” ramps and removing the old bar that way.
Pete
Harrington, Australia
2021 RT Limited
Setup for Tall & Big.... 200cm/6'7", 140kg/300lbs, 37"inleg.
HeliBars Handlebars
Brake rubber removed to lower pedal for easier long leg/Size 15 EEEEW boot access.
Ikon (Aussie) shocks all round.
Russell Daylong seat 2” taller than stock (in Sunbrella for Aussie heat & water resistance)
Goodyear Duragrip 165/60 fronts (18psi) - provides extra 1/2” ground clearance.
Kenda Kanine rear.
2021 RT Limited , Brake pedal rubber removed for ease of accessing pedal with size 15 boots. Red
-
Ozzie Ozzie Ozzie


Post #6
 Originally Posted by chunkmonk

Mike - That's fine for the stock bar; I'm not sure it's even worth re-selling. But what about the new bar? Doesn't that also need at least the same height in order to put it in?
 Originally Posted by Peteoz

Mike, no confusion involved…… .it all depends on whether Chunkmonk has bought the brand new 3 piece bar or is installing the older 1 piece bar. He hasn’t said, and Peter A has based his reply on the assumption that Chunkmonk, is replacing his old bar with a 3 piece bar. If that is the case, then Peter’s answer is indeed correct. However, that may, or may not, be the case depending on the new bar. That was why I wrote “if he hasn’t bought the new 3 piece bar”, when I made my humorous comment about having to cut and weld the new bar. Hopefully that removes any confusion for you 
Pete
No assumption involved either, Pete, and he actually DID say...  . My post #7 with New 3-piece Sway Bar bolded in it's first sentence was in reply to the bit I bolded (& quoted) in chunks post #6 - see above. . My post #7 with New 3-piece Sway Bar bolded in it's first sentence was in reply to the bit I bolded (& quoted) in chunks post #6 - see above. 
 Originally Posted by Peteoz

.......
The only option I am really comfortable with is digging a 12” hole, driving up on 12” ramps and removing the old bar that way.
Pete
Or you could find an already dug hole & use that.... or an open drain of an appropriate width/depth/size; a sump of some sort; or even a bank that'll let you ride one wheel up it to give you the required angle necessary to leave the length to swing that OE Bar out on the raised side.... or maybe any combination of these &/or ramps & axle stands, etc. In fact, a little 'outside the box' thinking will usually come up with a way, it's then up to the person involved to make sure it's fairly safe, given their particular needs/requirements at the time, isn't it?!  In the interests of clarity, maybe I should admit that I have used a big rope over a tree branch to haul an engine out of a trucked parked under said tree in my day; and despite the warnings, I've also used some highly explosive material to properly seat the bead on a biiig heavy tire too! And, juuust possibly there might also be a few other dodgy things that I really don't want to discuss here... but isn't it amazing what you can achieve with a bit of det cord?! In the interests of clarity, maybe I should admit that I have used a big rope over a tree branch to haul an engine out of a trucked parked under said tree in my day; and despite the warnings, I've also used some highly explosive material to properly seat the bead on a biiig heavy tire too! And, juuust possibly there might also be a few other dodgy things that I really don't want to discuss here... but isn't it amazing what you can achieve with a bit of det cord?!  
As for getting the OE Bar off a Spyder, I do just happen to have a Stormwater Sump alongside the driveway right outside the workshop that looks as tho it was designed for working under a Spyder like this - it's long enough that the front wheels can straddle it with just a little clearance each side; it's wide enough that it's easy to reach into & work on the underside of the Spyder; and it's deep enough to get this sorta job done without being so deep that I can't easily reach anything I might drop! Almost like it was designed with this in mind?!?  ...... altho I guess I should admit that there juuust might have been a little Spyder biased thought put into the planning of this Stormwater sump before its construction. ...... altho I guess I should admit that there juuust might have been a little Spyder biased thought put into the planning of this Stormwater sump before its construction.  
Up there for thinkin'..... 
Last edited by Peter Aawen; 05-29-2022 at 09:00 PM.
2013 RT Ltd Pearl White
Ryde More, Worry Less!
-
 Help with swaybar Help with swaybar
 Originally Posted by chunkmonk

I bought the BR swaybar kit and, in looking at the installations online so far, the consensus is to lift the Spyder to a length comprarble with the length of the swaybar. This measurement appears to be 24". I have not found a lift, ramp, or jack (save one or two in the $1500USD+ range) that can do this. I have found a number of other lifts and ramps with jacks, but the maximum lift height I've seen for these is 15". How exactly are you getting the spyder front end 2 feet off the ground to replace this unit? Thanks for the input.
If you ride to central Ohio I can help you with the swaybar install
-
Active Member


Cheeseologist - I absolutely appreciate that offer! it's a 6+hour trip in each direction. If I had enough moto to make that trip, I would. There have been a few really good suggestions here about how to get this installed; it doesn't seem difficult - it's just a matter of planning it. I'm pretty sure I'll get it worked out. Thank you very much for the offer, though! We need more of this in the community!
 
2021 F3 L , Stock Plugs (COILS, NOT WIRES!) Stock Brake Pedal Magma Red
-
Very Active Member


Peter, “but what about the new bar” was indeed the comment. That can be interpreted many ways. You have chosen to interpret it as Chunk buying a brand new, 3 piece bar. I have not interpreted it one way or the other  He may simply be referring to the “new” bar he is putting in. It does not mean it is a 1 piece or 3 piece bar. He may simply be referring to the “new” bar he is putting in. It does not mean it is a 1 piece or 3 piece bar.  My comment was simply a bit of humour IF someone was using a one piece bar…….and it has been blown out of all proportion My comment was simply a bit of humour IF someone was using a one piece bar…….and it has been blown out of all proportion
Pete
Harrington, Australia
2021 RT Limited
Setup for Tall & Big.... 200cm/6'7", 140kg/300lbs, 37"inleg.
HeliBars Handlebars
Brake rubber removed to lower pedal for easier long leg/Size 15 EEEEW boot access.
Ikon (Aussie) shocks all round.
Russell Daylong seat 2” taller than stock (in Sunbrella for Aussie heat & water resistance)
Goodyear Duragrip 165/60 fronts (18psi) - provides extra 1/2” ground clearance.
Kenda Kanine rear.
2021 RT Limited , Brake pedal rubber removed for ease of accessing pedal with size 15 boots. Red
-

I just got the new 3 piece bar.
This thread has convinced me to cut the old one off at both ends before loosening any bolts so it stays put.
I am going to try my Sawzall first. If there is excess shaking, then the angle grinder.
Then slide it out thru the wheel spokes, like Ron's instructions say to install the new straight bar.
-
Very Active Member


 Originally Posted by adipaola

I just got the new 3 piece bar.
This thread has convinced me to cut the old one off at both ends before loosening any bolts so it stays put.
I am going to try my Sawzall first. If there is excess shaking, then the angle grinder.
Then slide it out thru the wheel spokes, like Ron's instructions say to install the new straight bar.
I have both tools..... Years ago I discovered " Diablo " brand cutting disc's ( Home Depot sells them ) they are only 1mm thick and cut thru metal like a hot knife thru butter. I found that NOT using much pressure works best, ... yes you need some clearance to use but I think it's very doable ...... Mike 
-
Very Active Member


 Originally Posted by chunkmonk

Cheeseologist - I absolutely appreciate that offer! it's a 6+hour trip in each direction. If I had enough moto to make that trip, I would. There have been a few really good suggestions here about how to get this installed; it doesn't seem difficult - it's just a matter of planning it. I'm pretty sure I'll get it worked out. Thank you very much for the offer, though! We need more of this in the community!
I am just a stones throw away from you Chunk in Frederick, We can use my truck and my ramps and I will show you how to do it. 1 piece or 3 piece.
If you have all of the tools and truck and ramps I can come to you. If not you can bring it here and we can take it up Hamburg to Gambrill park road up to 77 at Cunningham falls to test it out on the twisties on the mountain when we are done.
Just PM me if you want to take me up on the offer.
Last edited by CloverHillCrawler; 06-02-2022 at 06:57 PM.
  
2020 F3 SE6
Safety and Lighting: LED Headlight upgrade, IPS LED Fog lights, Show Chrome LED Fender Signals, LED Signature Light, Tric LED Afterburnerz, MotoHorn 2.0
Suspension: Wilbers Front and Rear Shocks, BajaRon Sway Bar, Vredestein Quatrac Front and Rear Tires
Comfort: Blue Ridge Windshield, Corbin Dual Touring Saddle, Ultimate Floorboards, OEM Passenger Backrest with Rear Shelf, OEM Passenger Floorboards Modified with High Risers from Pierre
Tackform Center Mount Phone Holder w/ rapid charging USB-C.
 Posting Permissions
- You may not post new threads
- You may not post replies
- You may not post attachments
- You may not edit your posts
-
Forum Rules
|


 Reply With Quote


