|
-
Very Active Member

-
Very Active Member


Haven't removed the dash cluster, but you might be able to do what you want by removing the front fascia and the headlight assemblies.
2020 RT Limited Deep Marsala Chrome

-
Very Active Member


That's what I want to do. Any hints on the sequence to get there?
'20 Spyder RT: Bajaron swaybar. Vredestein tires, Pedal Commander, Elka front shocks, GPS/USB/12V handlebar mount, Heli-Bars, Radar Detector, KOTT grills & vents, Shad top case, chin & DRL LEDs.
 
-

I have a noboot screen lifting arm ready to fit to my S2S, so I would be interested in any tips on removing what jetfixer mentioned. Watching for any information.
-

I have done it. Not too difficult. I found the hardest part was removing the windshield plate. Once you get that off, there is a screw behind each mirror and one pushpin behind the plate below the headlights. But, I have also had no problem running wires in that area without removing it. You can get some access with the mirrors removed, and the front side panels removed. I used a coat hanger for some of the fishing. I would try that first before digging deeper.
Last edited by Joel The Biker; 12-19-2021 at 12:55 PM.
-
Active Member


 Originally Posted by Jetfixer

Haven't removed the dash cluster, but you might be able to do what you want by removing the front fascia and the headlight assemblies.
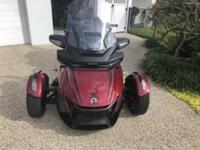
I have a 2020 that the fairing is so sun damaged that it is an embarrassment. I can buy the OEM replacement parts from BRP for about $260, but would love some instructions (as well as others here it seems) on removing the fairing parts, especially the Upper Console Fairing. Local dealer wants about $250-$375 to do it. Doesn't look too difficult, but would love some pointers (a DIY video would be ideal)
faded 2020.jpg
Screen Shot 2023-05-22 at 6.46.52 PM.jpg
Paul "Wingman" Metheney
2020 Can-Am Spyder RT Limited

-

I have taken mine off, ...it's a pain! If I remember correctly, the early 2020's (like mine) have a single piece that goes from the lower edge of the windshield to the handlebar support; the newer models have a two-piece console. It will make a big difference in how it comes apart. The most difficult part on mine was unplugging the instrument cluster, I had to slide my hand up from the left side and unlock the plug and got pretty scraped up.
Last edited by Peter Aawen; 05-23-2023 at 08:28 PM.
Reason: my... ;-)
2020 Spyder RT Limited; Deep Marsala/Chrome
Formosa AZ01 165/50/R16's on PPA Recluse wheels up front
General Altimax RT43 215/60/R15 on factory rear
Primary exhaust: RLS Cat delete w/ his baffle; secondary, custom built w/ Flowmaster HS2
Suspension: BajaRon swaybar (highly recommended!), M2 coil-overs, front & rear (also highly recomended!)
Extra LED lighting and misc. to suit my needs/wants
-
Very Active Member


RayBJ, this is probably of little help to you, but I removed the cowl after hitting a pothole that was so rough that it dislodged the instrument cluster. I used Joel’s instructions (which I can no longer find). This is what it looks like under there when you get it off.
IMG_2195.jpeg
Pete
Harrington, Australia
2021 RT Limited
Setup for Tall & Big.... 200cm/6'7", 140kg/300lbs, 37"inleg.
HeliBars Handlebars
Brake rubber removed to lower pedal for easier long leg/Size 15 EEEEW boot access.
Ikon (Aussie) shocks all round.
Russell Daylong seat 2” taller than stock (in Sunbrella for Aussie heat & water resistance)
Goodyear Duragrip 165/60 fronts (18psi) - provides extra 1/2” ground clearance.
Kenda Kanine rear.
2021 RT Limited , Brake pedal rubber removed for ease of accessing pedal with size 15 boots. Red
 Forum Forum
 RT Shop Talk
 Has anyone disassembled the 2020 RT fairing(?) to get behind dash?
 Posting Permissions
- You may not post new threads
- You may not post replies
- You may not post attachments
- You may not edit your posts
-
Forum Rules
|


 Reply With Quote


